4. OPERATION REM - GRAINVAC VR12
4.6. P
OSITIONING AND SET-UP
36 9000-00-0042 R3
4.6.1. Jack Stabilizer Set-up
1. Remove the jack from its stowed position near the hitch.
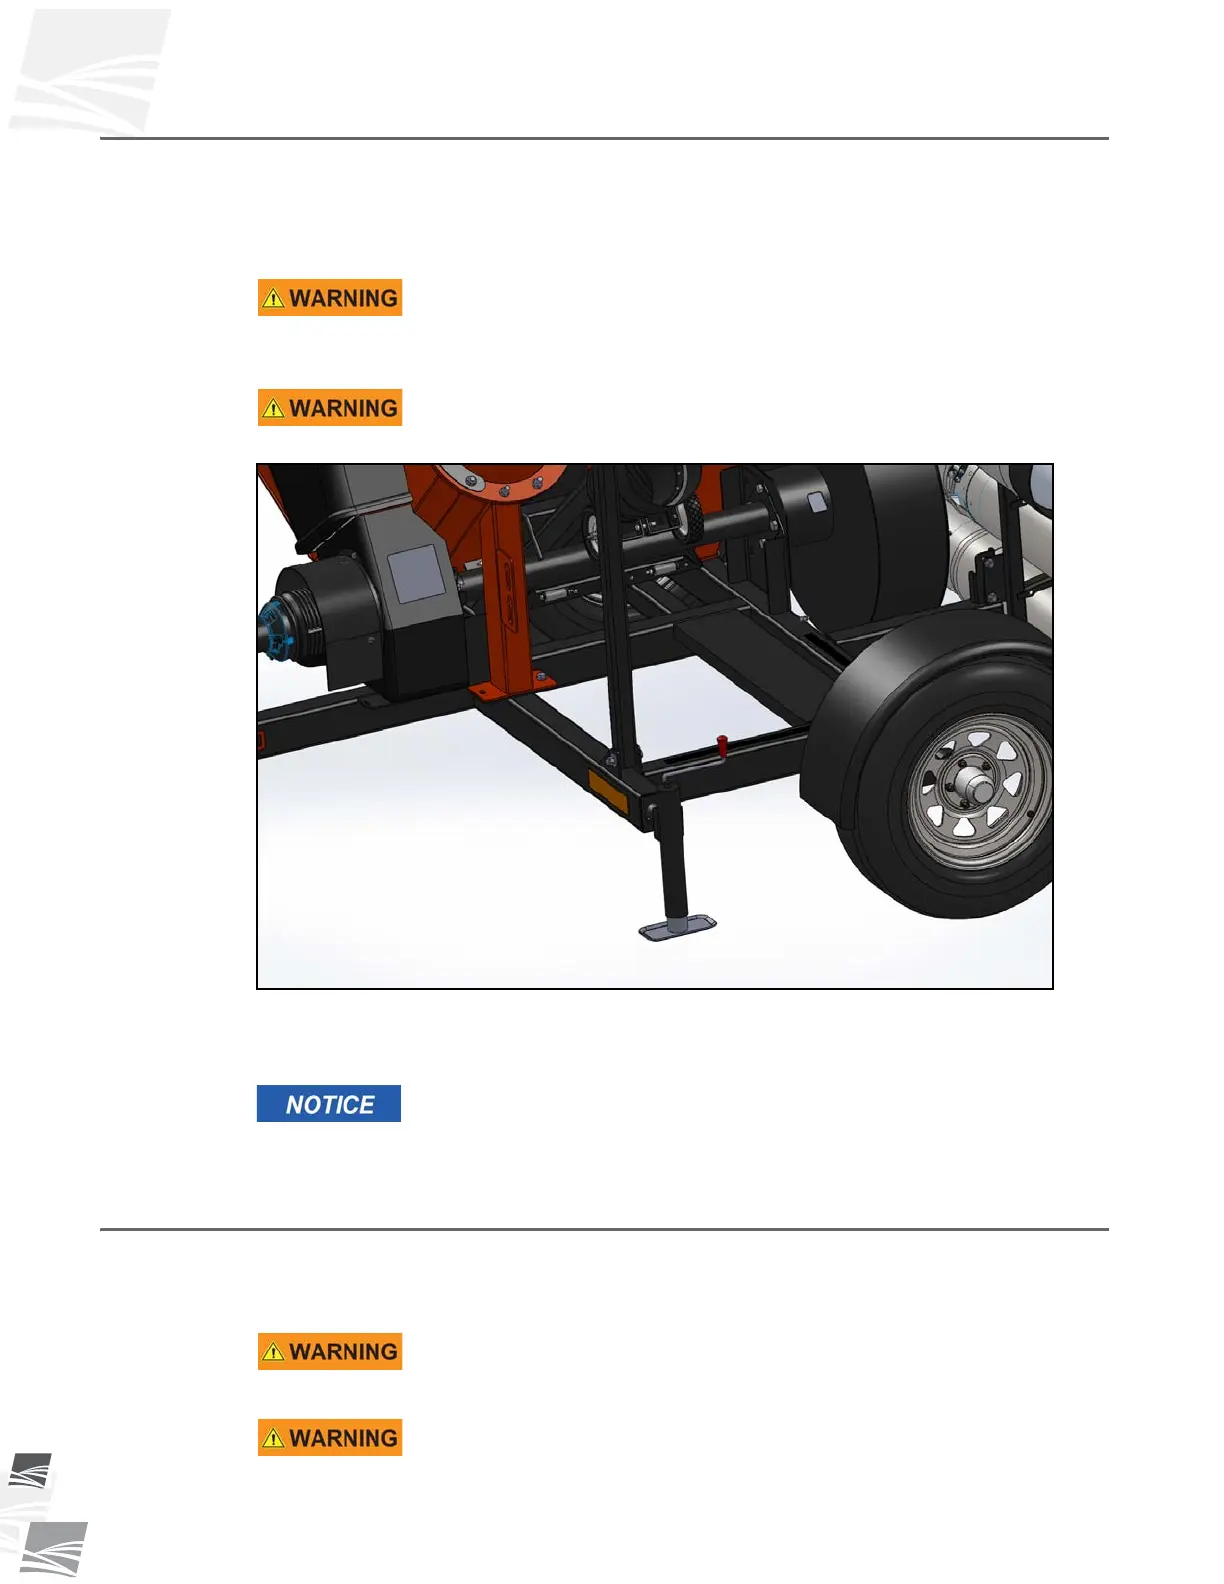
2. Attach the jack (in a vertical, working position) to the mounting bracket on the left
side frame rail, directly in front of the left fender (see Figure 4.4); use the jack
retaining pin to fasten to the jack mount bracket.
The jack must be moved to the location shown in Figure 4.4 for
added stability before the unloading auger is raised to working
position. Failure to follow these instructions may result in the
GrainVac instability and possible tip over.
Only use the jack supplied with the GrainVac. If the jack is damaged,
contact your local dealer to get a replacement from Rem.
Figure 4.4 Jack in Working Position
3. Rotate the jack handle to lower the jack base plate onto the ground, so that a small
amount of weight is transferred from the left tire to the jack.
DO NOT move the GrainVac while the jack is in vertical working
position and/or in contact with the ground. Retract augers to
transport position and raise the jack before moving the GrainVac.
4.6.2. Auger Hydraulic Lift
1. The GrainVac is equipped with a hydraulic lift system for the auger. Before
operation, check the system for leaks. Ensure the hydraulic hoses are attached
properly.
Wear proper hand and face protection when searching for hydraulic
leaks. Escaping fluid under pressure can penetrate the skin and
cause serious injury. In case of accident, see a doctor immediately.
Fluid leaks in the hydraulic lift cylinders and/or hydraulic hoses will
allow the auger to lower inadvertently. Repair all leaks and breaks
immediately.