REM - GRAINVAC VR12 4. OPERATION
4.6. POSITIONING AND SET-UP
9000-00-0042 R3 37
Know where overhead electrical lines are located and stay away
from them. Electrocution can occur without direct contact.
2. Engage the hydraulics gently. The auger will lift in a two-stage process. The middle
auger will lift first. The upper auger will swing out last.
Stay away from auger tubes when opening/closing (due to pinch
points). Keep others away. Failure to do so may result in serious
injury or death.
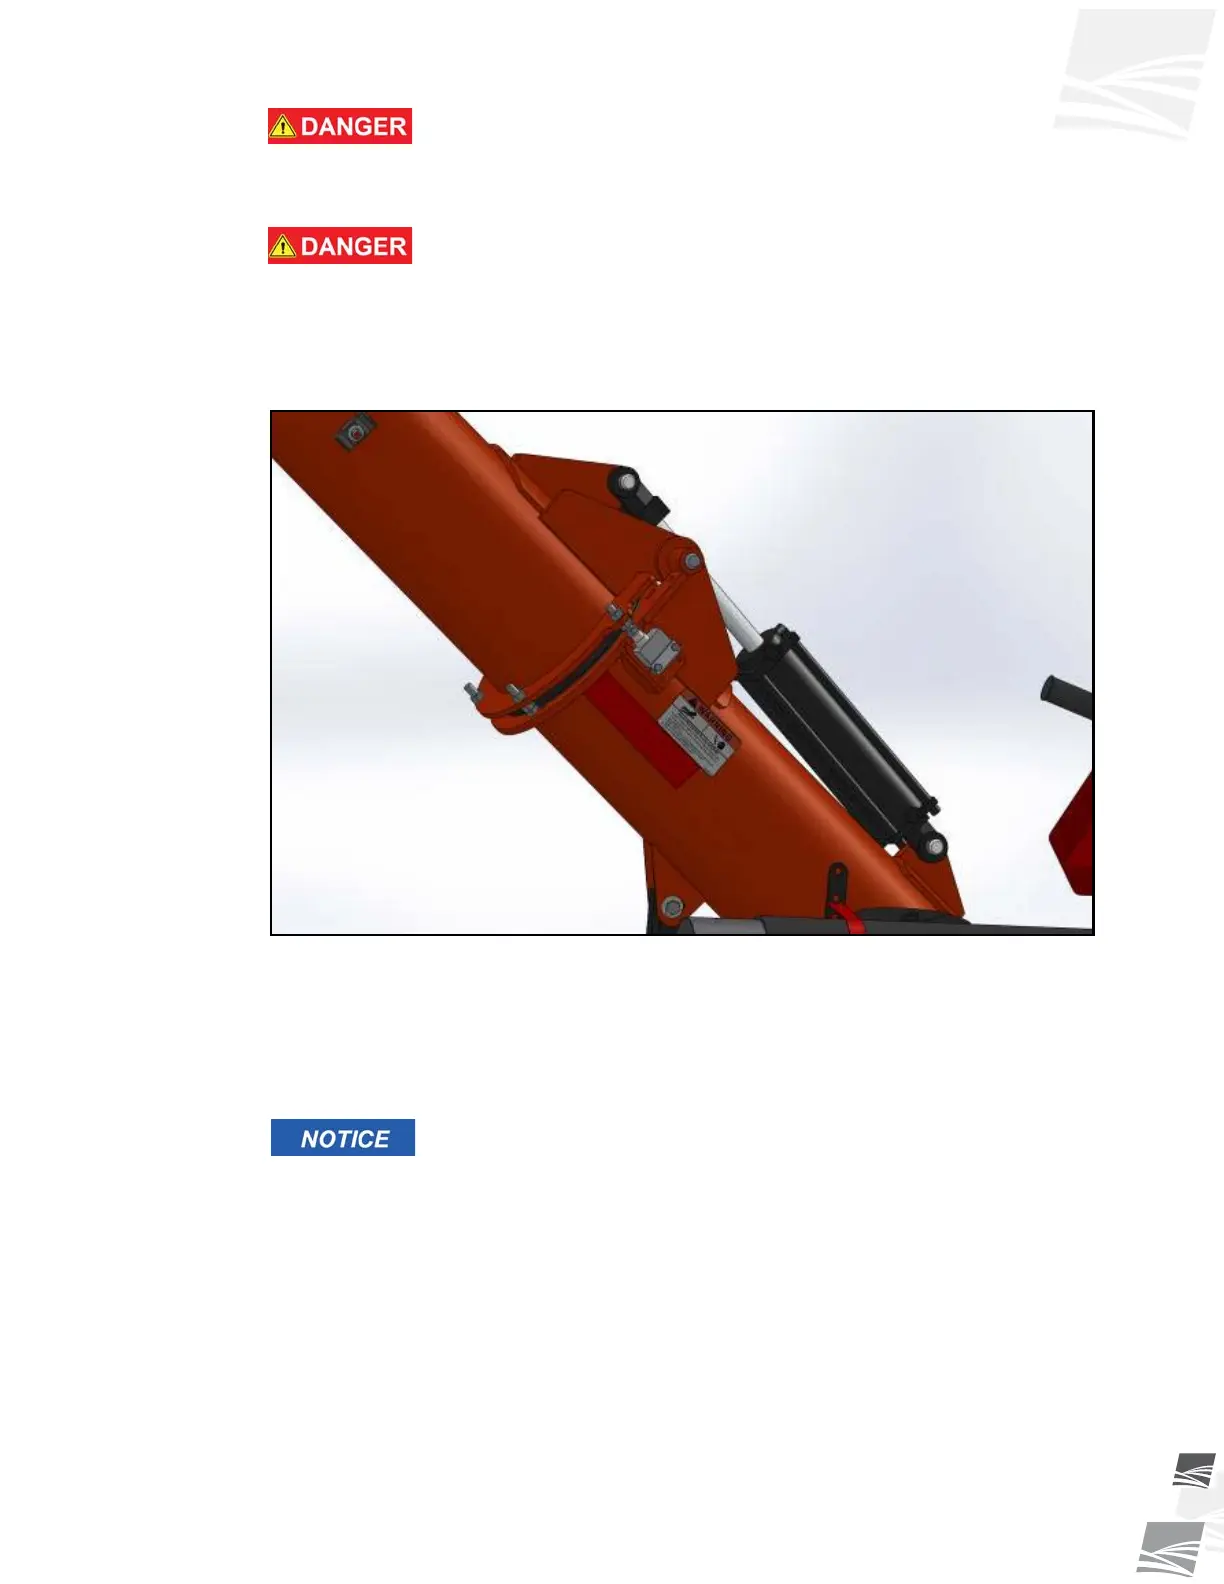
3. After the augers are fully raised, check to ensure that they are properly seated (see
Figure 4.5). The auger ends should be parallel to each other without any gaps. If
gap is present, lower the auger fully and inspect for obstruction.
Figure 4.5 Plunger Valve in Working Position (hydraulic hoses not shown)
Note: If both auger hydraulic cylinders extend or retract at the same time, stop activating the
hydraulics. When this occurs, it is because the plunger valve adjustment is not set
properly. To resolve this problem, first fully lower all the auger sections into the transport
position (see Figure 4.6). Then raise only the middle auger into its working position.
Then to adjust the plunger valve, adjust the bolt until the plunger valve depresses
approximately 1/16” (1.6 mm).
Do not fully depress the valve as this will cause damage from the
heavy weight applied by the auger tubes.