REM - GRAINVAC VR12 6. SERVICE
6.3. ROTORS REMOVAL/INSPECTION & BEARING CARTRIDGE REPLACEMENT
9000-00-0042 R3 75
6.3. Rotors Removal/Inspection & Bearing Cartridge Replacement
6.3.1. Rotors – Removal and Full Inspection
1. Disconnect the PTO from the tractor.
2. Chock the GrainVac wheels.
The machine generates heat through the action of the rotors. This
heat is carried out of the machine in the exhaust air. Do not touch or
service until after operation when rotor and exhaust surfaces have
been allowed to cool. Failure to follow these instructions may result
in burns.
3. Remove the rear guard and cover plate.
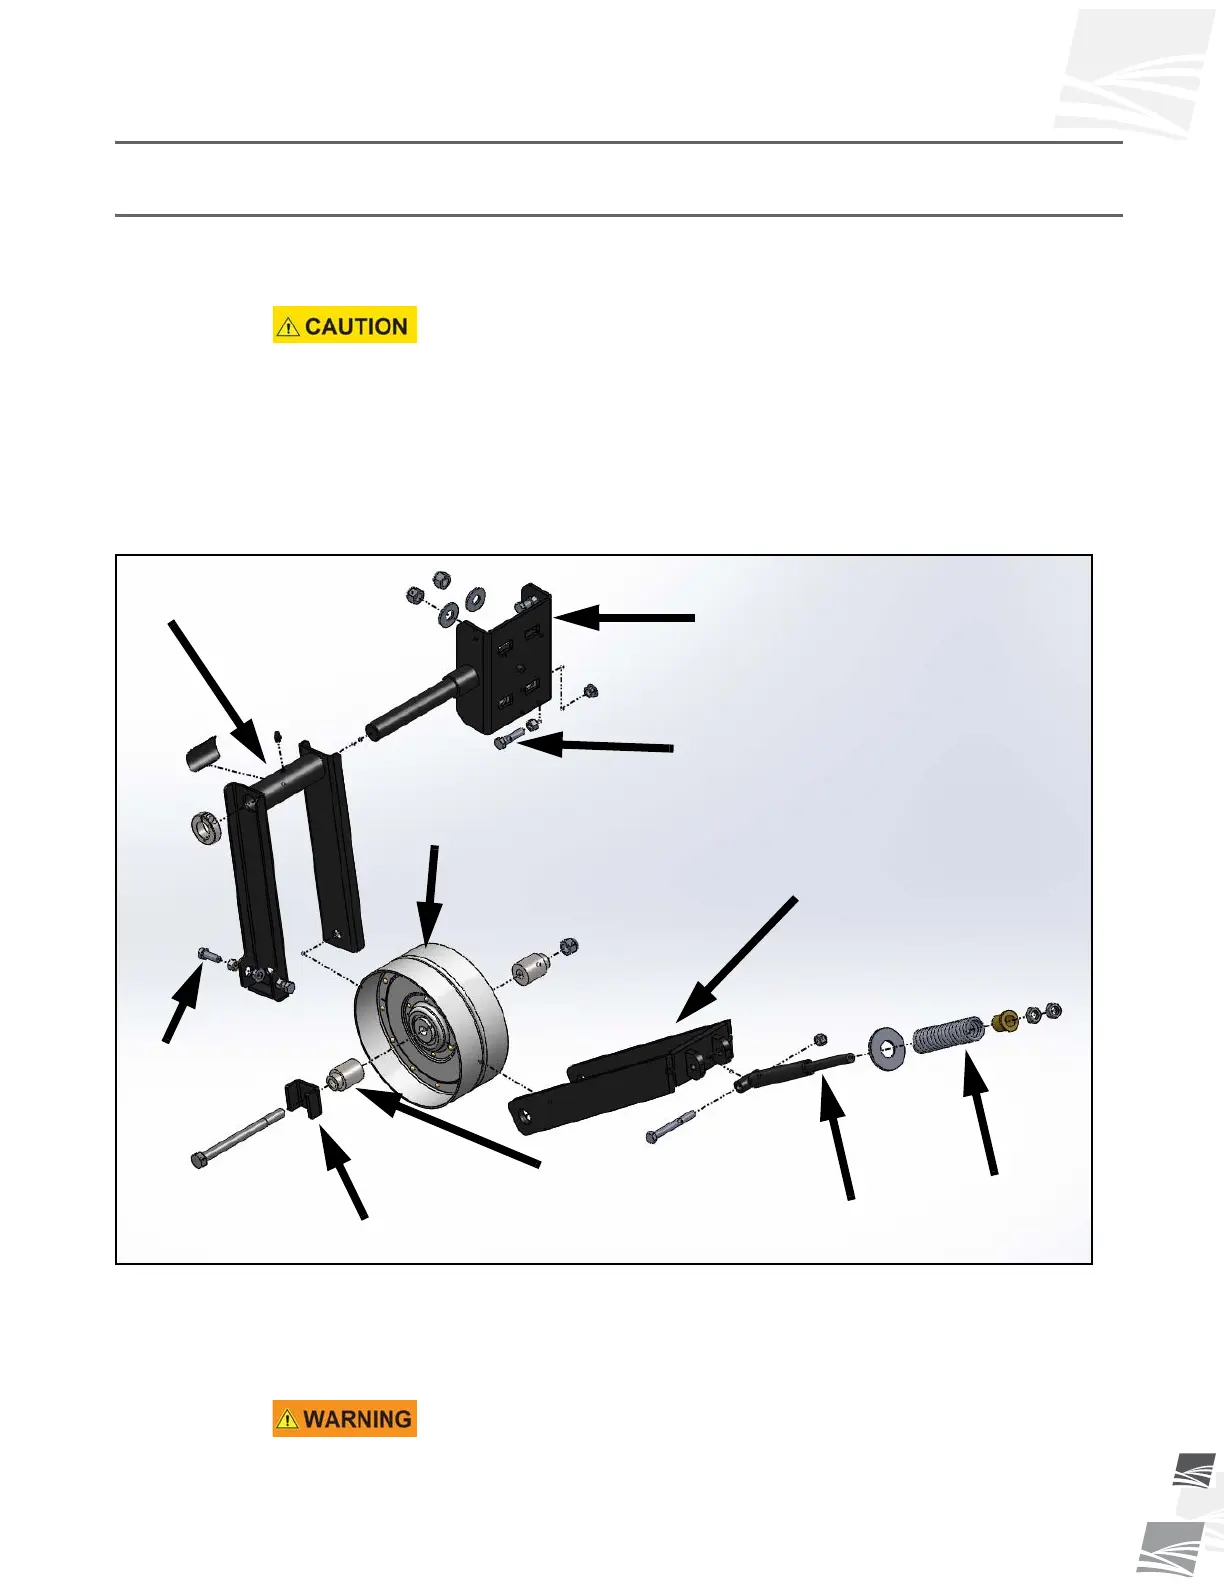
4. Loosen and remove the spring tightener nuts, spring assembly, and idler tightener
(see Figure 6.2).
Figure 6.2 Idler Assembly
5. Remove the rotor drive belt.
6. Using a suitable lifting device with a minimum of 500 lb (230 kg) lifting capacity
rating, fasten the lift strap/chain to the lifting lug (see Figure 6.3).
Use extreme caution when handling heavy parts. Use a lifting device
suitable for weight of part being lifted. Use a hook with a safety latch.
Lift only at the specified lug. Keep clear of heavy parts supported
only by a lifting device.
IDLER PULLEY
PULLEY SPACER
PULLEY
ALIGNMENT
HARDWARE
IDLER
ARM
IDLER
TENSION
SPRING
IDLER
TIGHTENER
IDLER FORK
PUSHER BLOCK
IDLER MOUNT
ALIGNMENT BOLT