6. SERVICE REM - GRAINVAC VR12
6.3. R
OTORS REMOVAL/INSPECTION & BEARING CARTRIDGE REPLACEMENT
76 9000-00-0042 R3
7. Remove the nuts and bolts securing the perimeter flange of the pedestal to the rotor
housing on the vac body.
8. Remove the nuts and bolts securing the pedestal base to the vac body.
9. Slide the pedestal/rotors assembly out of the rotor housing on the vac body.
Ensure the pedestal/rotors assembly is slid completely out of the
rotor housing on the vac body before upwardly lifting the pedestal/
rotors assembly. Failure to follow this instruction may result in
damage to the rotor and stator components if they collide with the top
of the rotor housing.
10. Place the pedestal/rotors assembly on a flat working surface.
Due its heavy weight, make sure to clamp the pedestal/rotors
assembly to the flat working surface to ensure it doesn’t tip over on
you while you are performing service on it.
11. Check the foam seal between the front surface of the stator outer diameter and the
perimeter flange of the rotor housing on the vac body. If it is damaged, replace the
foam during later reassembly.
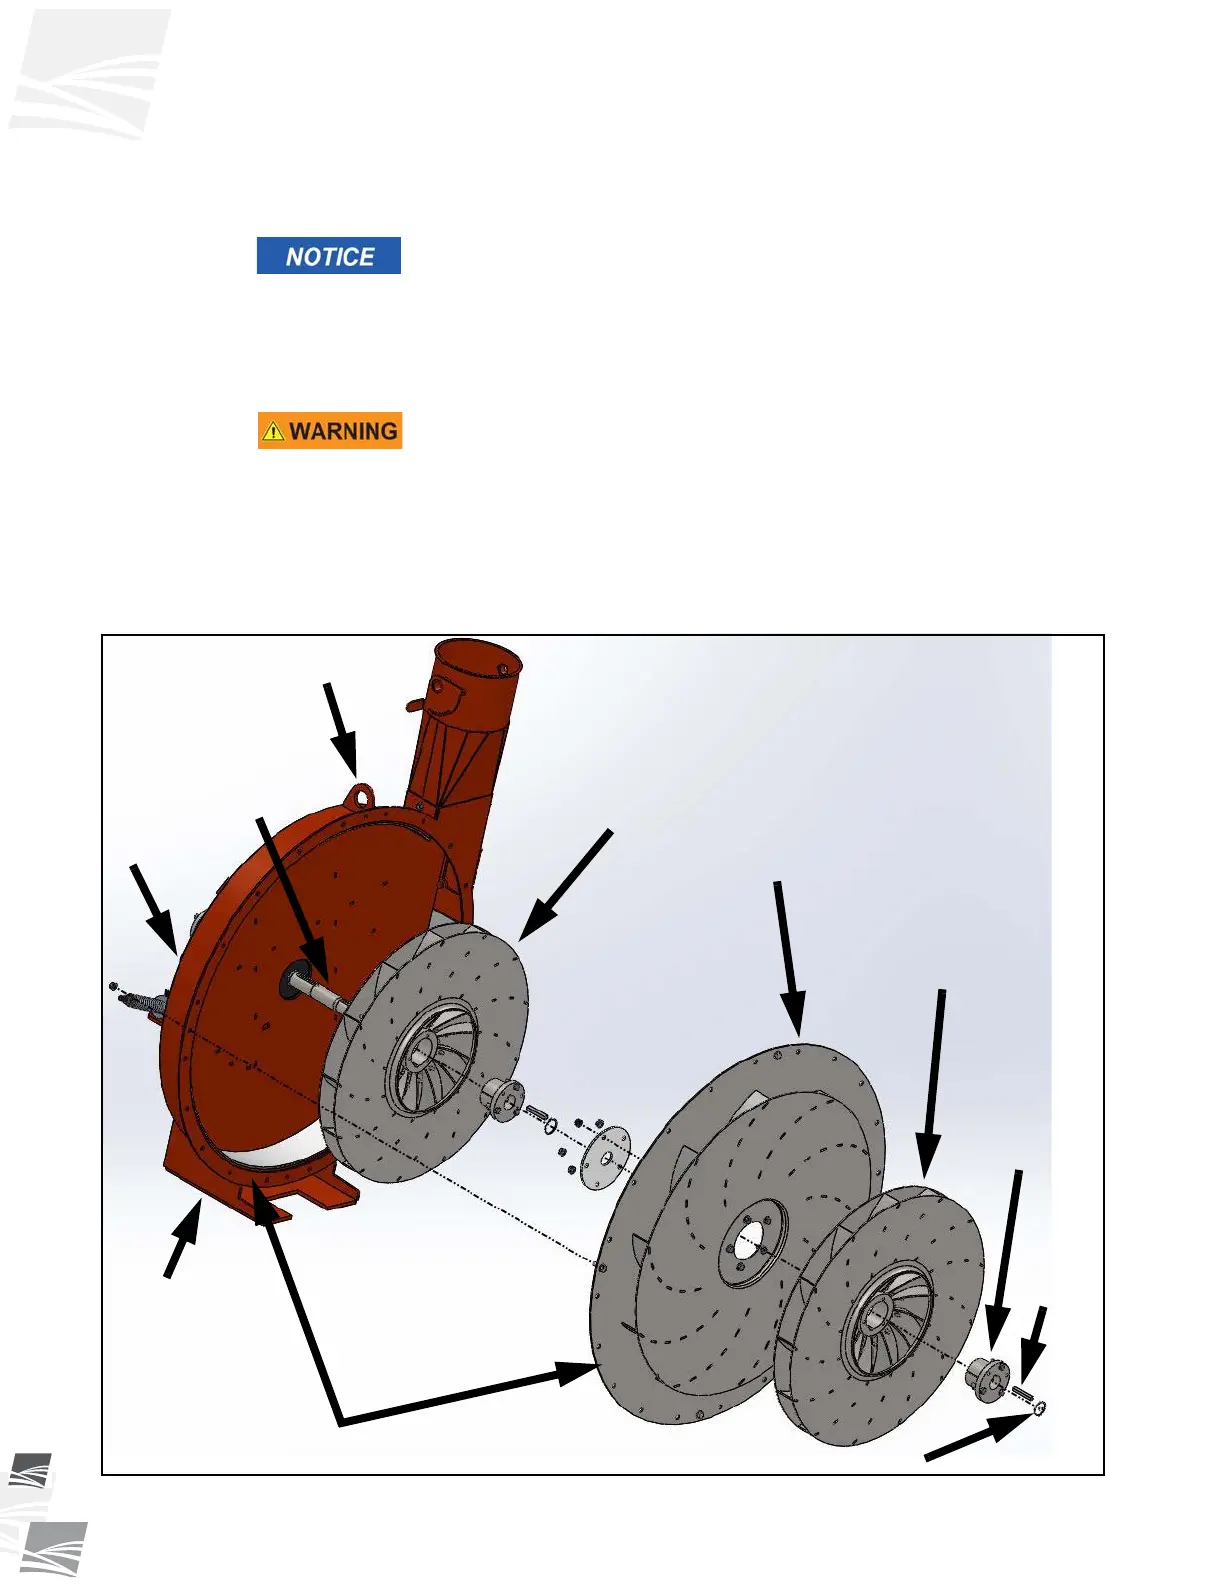
12. Remove the snap ring from the front rotor on the rotor drive shaft (see Figure 6.3).
Figure 6.3 Pedestal/Rotors Assembly
KEY
SPLIT
TAPER
BUSHING
LIFTING
LUG
ROTOR
DRIVE
SHAFT
PEDESTAL
BASE
REAR
ROTOR
STATOR
FRONT
ROTOR
FOAM SEALS (NOT SHOWN)
SNAP RING
PEDESTAL