6. SERVICE REM - GRAINVAC VR12
6.3. R
OTORS REMOVAL/INSPECTION & BEARING CARTRIDGE REPLACEMENT
78 9000-00-0042 R3
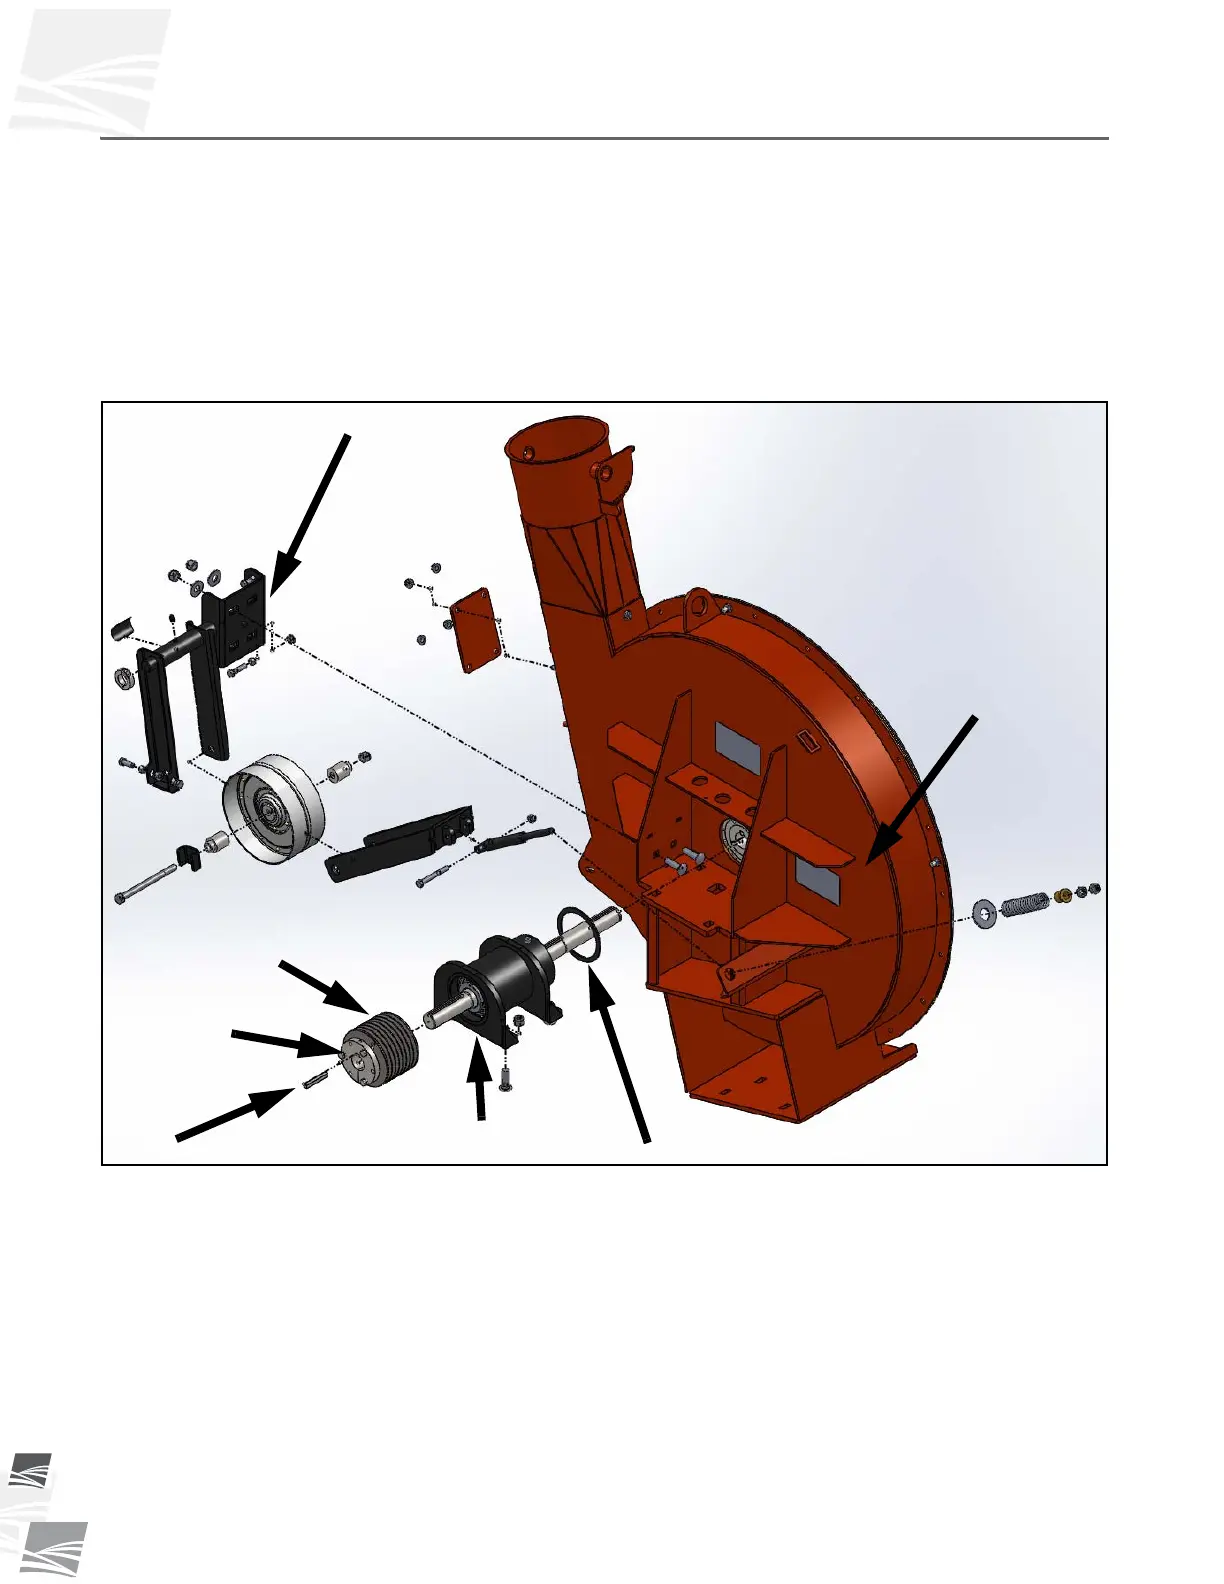
6.3.2. Bearing Cartridge Replacement
To replace the bearing cartridge, follow the same steps as in Section 6.3.1. Rotors –
Removal and Full Inspection, as well as the following steps (see Figure 6.4):
1. Remove the 5/16” bolts from the hub (split taper bushing) of the pulley (sheave)
(refer to Section 6.4. Split Taper Bushing – Removal & Installation on page 80).
Install the bolts into rotor hub threaded holes. Using a hand wrench, tighten each
bolt 1/2 a turn each in sequence until the hub and rotor become loosened from each
other. Clean the bushing.
2. Unbolt the bearing cartridge from the pedestal.
Figure 6.4 Pedestal, Idler Assembly, Bearing Cartridge Assembly
3. Check the foam seal (neoprene) between the bearing cartridge and the pedestal. If it
is damaged, replace the foam.
4. Reinstall the new bearing cartridge hardware. Before tightening, use a pry bar to
push the bearing cartridge up tight to the pedestal and tighten fasteners (see Figure
6.5).
IDLER MOUNT ASSY
NEOPRENE SEAL
BEARING
CARTRIDGE
SHEAVE
SPLIT
TAPER
BUSHING
KEY
IDLER
ASSY
PEDESTAL