REM - GRAINVAC VR12 6. SERVICE
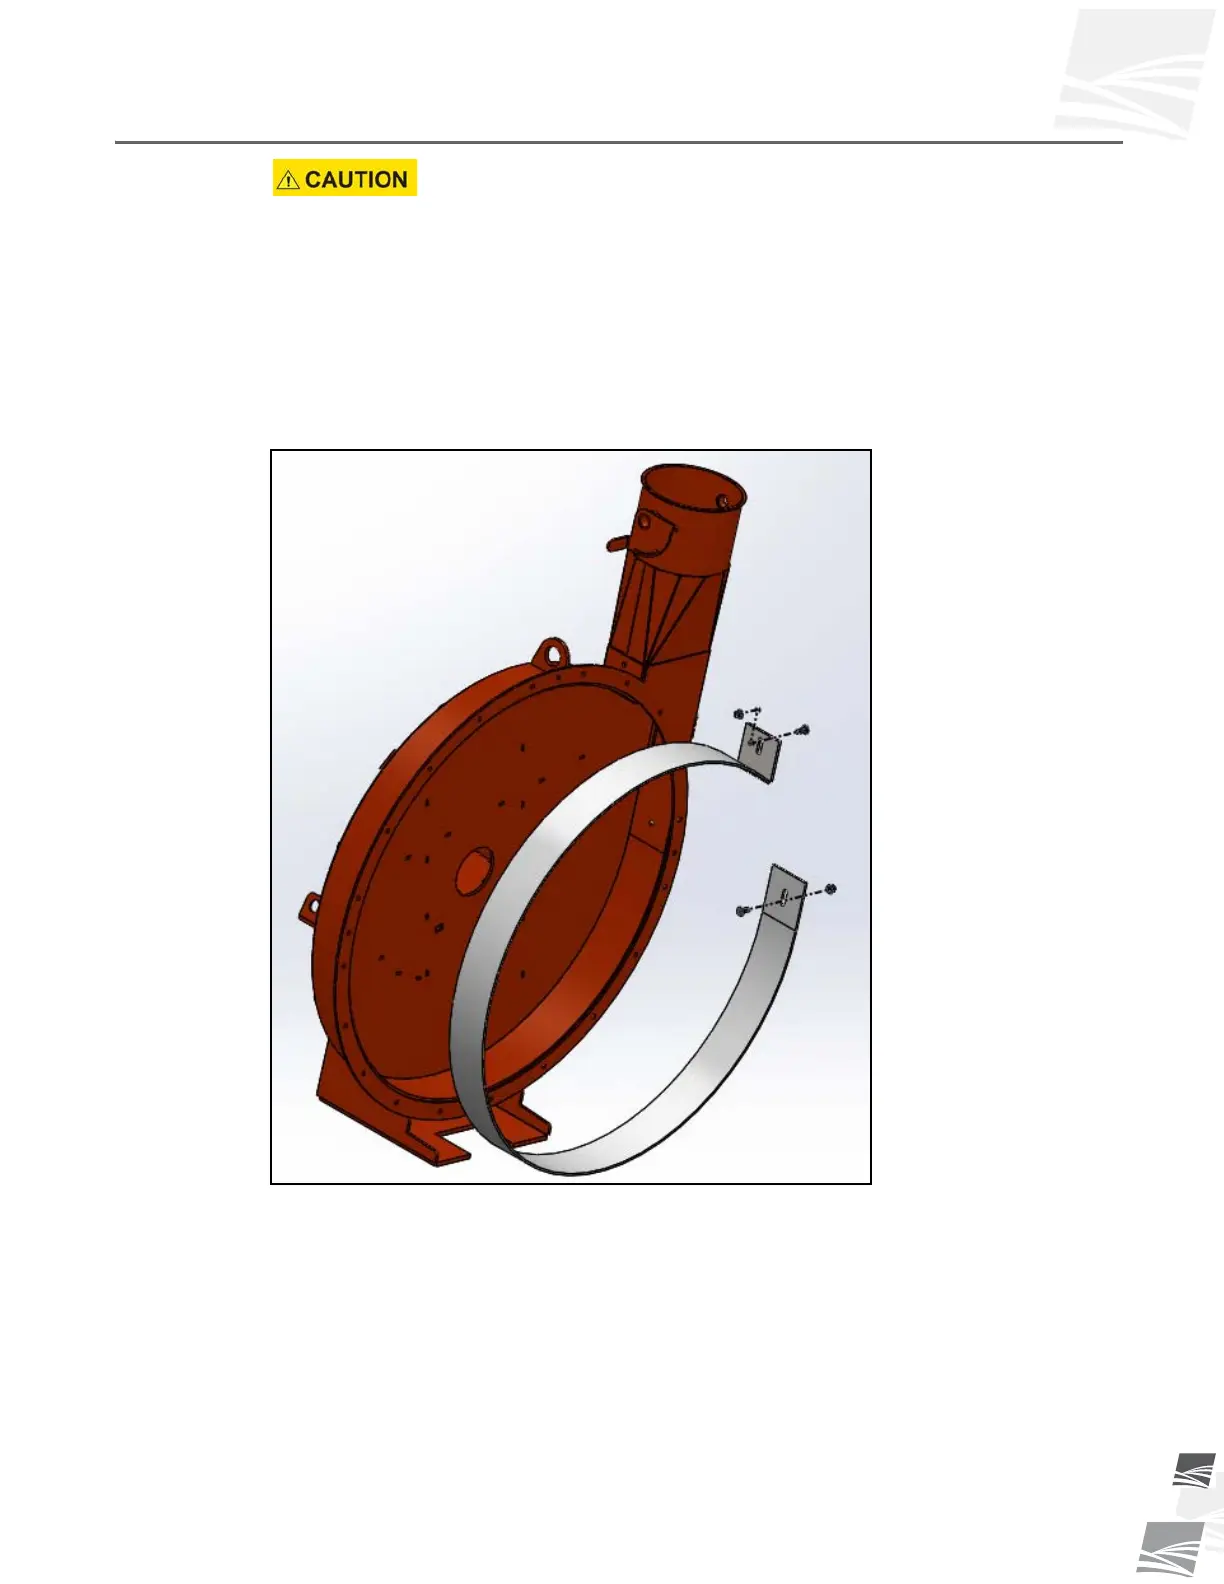
6.5. REAR & FRONT WEAR WRAPS REPLACEMENT
9000-00-0042 R3 81
6.5. Rear & Front Wear Wraps Replacement
The machine generates heat through the action of the rotors. This
heat is carried out of the machine in the exhaust air. Do not touch or
service until after operation when rotor and exhaust surfaces have
been allowed to cool. Failure to follow these instructions may result
in burns.
1. Remove and disassemble the pedestal/rotors assembly as detailed in Section 6.3.1.
on page 75.
2. Remove the carriage bolts retaining the worn rear wear wrap in the exhaust outlet
and take out the worn rear wear wrap by pulling the “hooked” end down from the
exhaust (see Figure 6.7).
Figure 6.7 Rear Wear Wrap
3. CLEAN ALL DEBRIS out of the pedestal inner housing. Inspect the pedestal inner
housing for any excessive wear.
4. Install the new rear wear wrap. Continue all the way around until the "hooked" end
slips over the exhaust cut-off.
5. You must now get the "hooked" end up as tight as possible to the housing. Use a
large pipe clamp down from the top. Once you have the wrap as tight as possible,
insert a new 3/8” x 1” carriage bolt and tighten with a whiznut (see Figure 6.8).