6. SERVICE REM - GRAINVAC VR12
6.6. D
RUM REMOVAL/MAINTENANCE
84 9000-00-0042 R3
6.6. Drum Removal/Maintenance
Under certain grain types and conditions it may be necessary to remove the drum from
the GrainVac. The most common instances are:
• The drum openings become clogged or gummed up and require cleaning.
• The drum bearings fail.
• The straight inlet between the drum and rotor fails, or material becomes stuck
between the two surfaces.
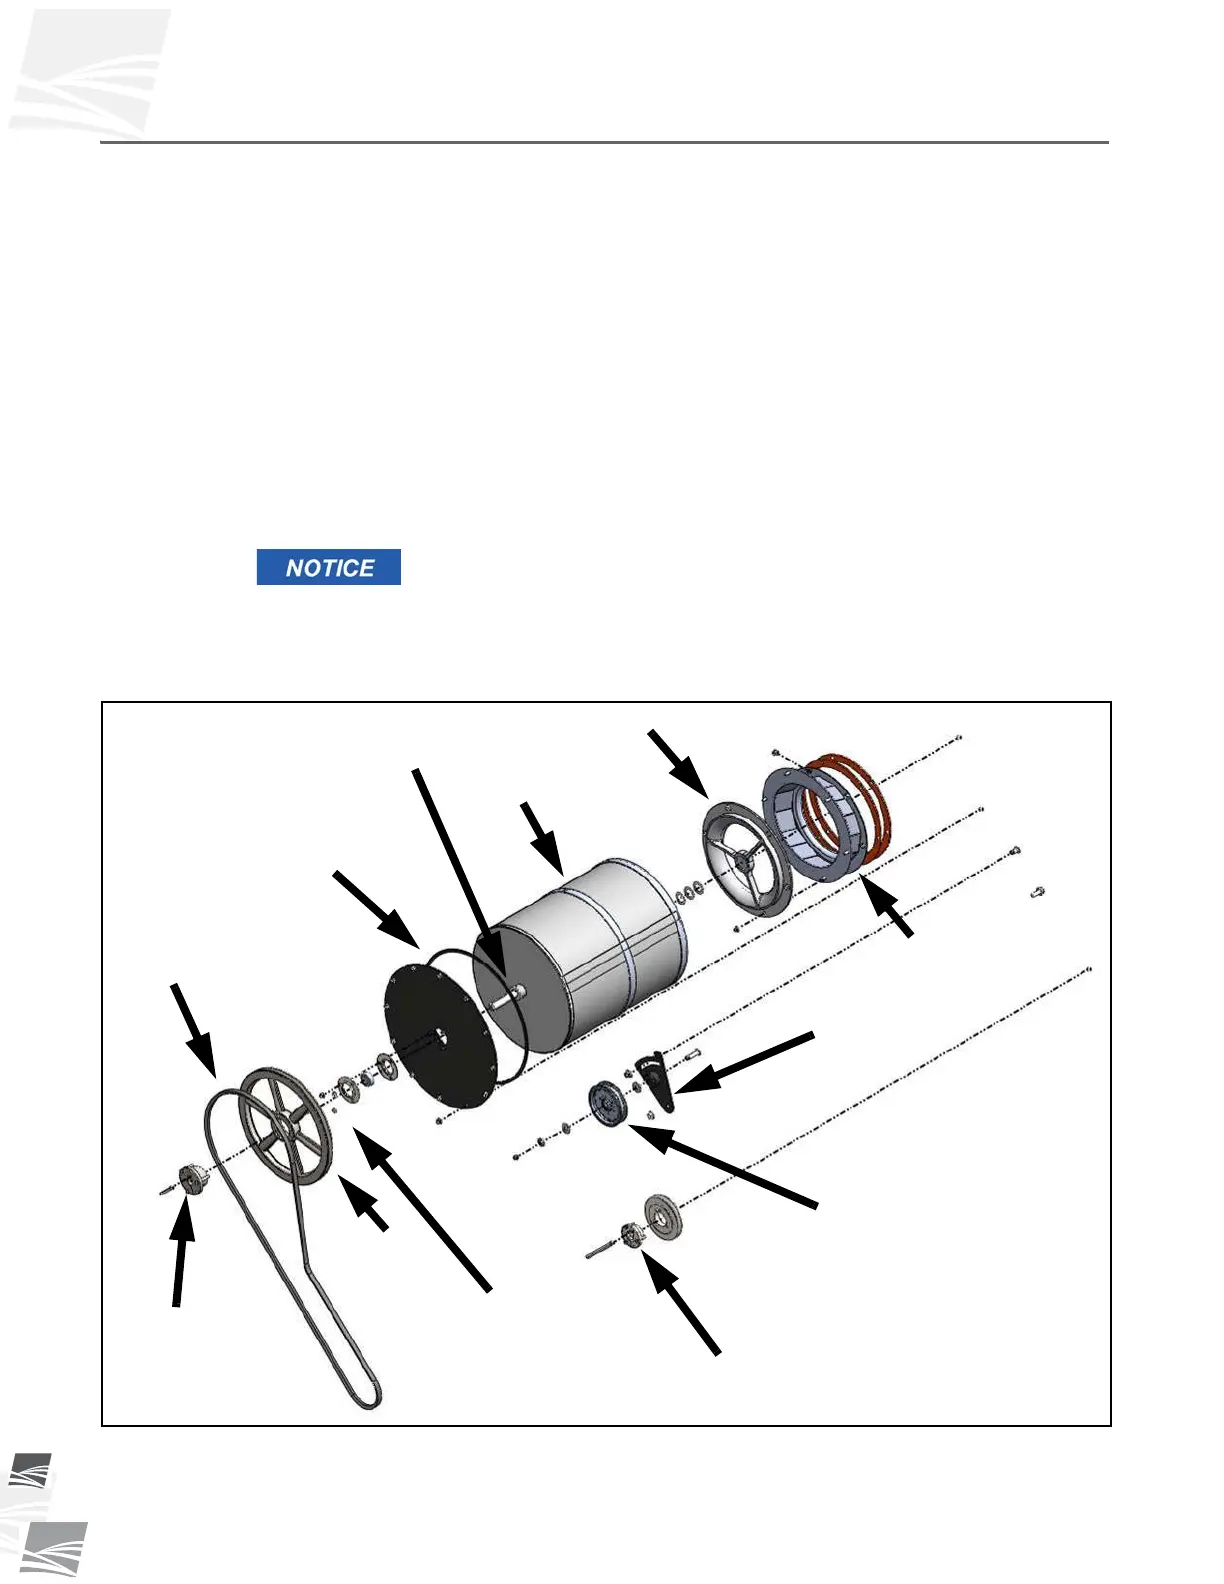
To remove the drum (see Figure 6.11):
1. Remove the front guard and lay to the side.
2. Loosen drum belt idler and remove the drum drive belt.
3. Loosen and remove the mounting nuts for the front body plate.
4. Remove the drum by pulling on the large sheave. The entire assembly will slide out.
The seal area on the rear of the drum can easily be damaged. Care
should be taken when removing and installing the drum screen.
5. Use a pressure washer to clean the drum if the holes are clogged or gummed up.
6. REMOVE ALL RESIDUAL MATERIAL FROM INSIDE THE DRUM.
Figure 6.11 Drum Assembly
7. Check the bearings and replace if they are rough or seized.
ALUMINUM INLET
DRUM
DRUM SHAFT
FOAM SEAL
DRUM DRIVE BELT
PULLEY
RETAINING NUTS
TRANSITION CONE
DRUM IDLER
TENSIONER
PULLEY
Torque to
10 ft·lb (14 N·m)
Torque to
19 ft·lb (26 N·m)