En-8
10. OPTIONAL KIT INSTALLATION
This air conditioner can be connected with the following optional kits.
• Wired remote controller
• Simple remote controller
• External connect kit
CAUTION
• Before installing, be sure to disconnect all power supply.
• Do not touch the heat exchanger.
• When installing or removing parts of the air conditioner, be sure that the wire is not
caught by any parts or pulled hard. It may result in damage or malfunction of the air
conditioner.
• Avoid place in direct sunlight.
• Select place that will not be affected by the heat from a stove, etc
• Before setting up the optional kit, please confi rm whether air-conditioner can receive
the signal.
• Do not connect the wired remote controller to the terminal for power supply.
• When connecting the wired remote controller with the indoor unit, use the connecting
cable (supplied with wired remote controller or simple remote controller).
• Recommended cable length of wired remote controller is 32 ft. (10 m). Make sure to
do insulate of connecting part when extended the cable.
10.1.
Before installing wired remote controller
• When you use wired remote controller, some functions may not be used.
10.2.
Remote controller cable modifi cation
(1) Use a tool to cut off the terminal on the end of the remote controller cable, and then
remove the insulation from the cut end of the cable.
(2) Connect the remote controller cable and connecting cable.
(supplied with wired remote controller)
Important: Be sure to insulate the connection between the wires.
Connecting cable
White
Red
White
Red
Black
Black
Insulated
connection
Remote
controller cable
Remote
controller cable
13/16 in.
(20 mm)
10.3. External input / output Wire modifi cation
(1) Remove insulation from wire attached to wire kit connector. Remove insulation from
locally purchased cable. Use crimp type insulated butt connector to join fi eld cable and
wire kit wire.
(2) Connect the wire and locally purchased wire.
(Supplied with external connect kit)
Important:
Be sure to solder wires to connect. Be sure to insulate the connection between
the wires.
Option parts
External input/output wire
Insulated connection
Cable (Locally purchased)
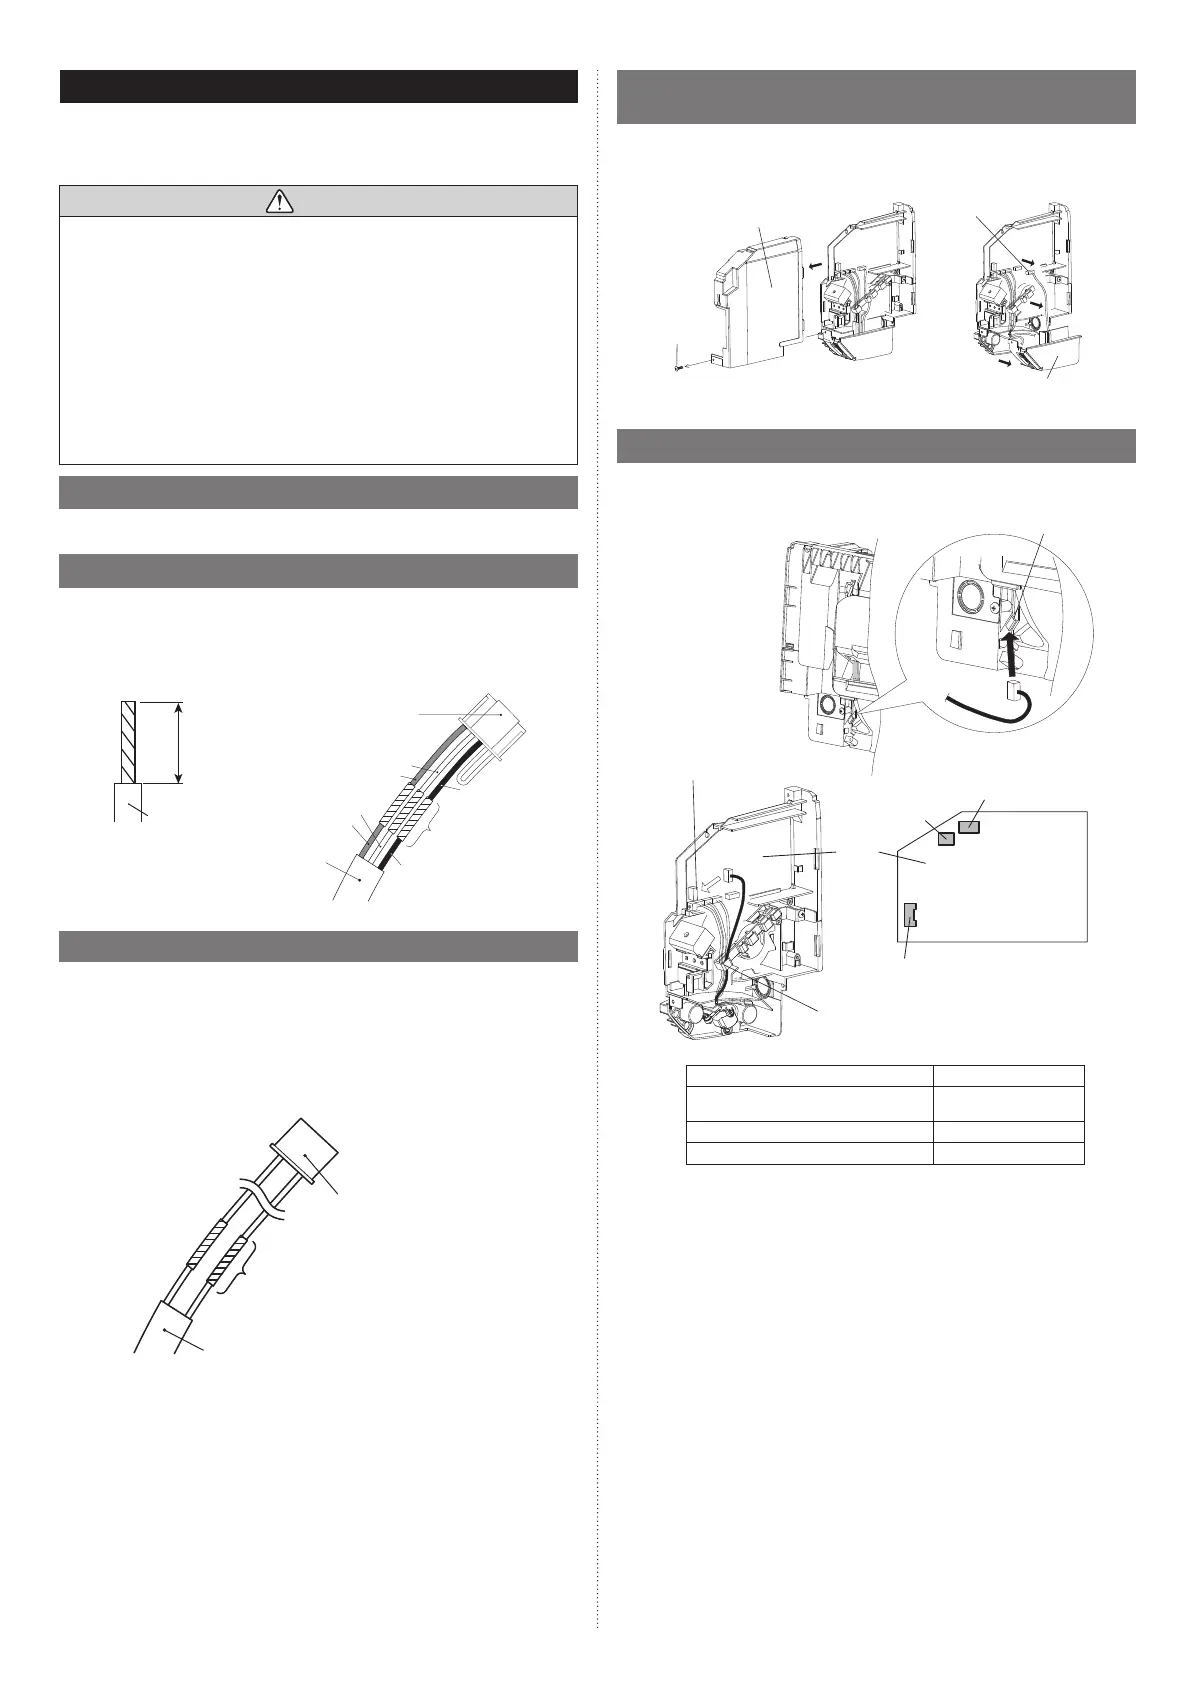
10.4. Front panel, control box cover and display case
removal
(1) Refer to “FRONT PANEL REMOVAL AND INSTALLATION” to remove the front panel.
(2) Remove the screw then remove the control box cover.
(3) Remove the display case and connector.
control box cover
screw
display case
connector
10.5. Connecting cable to control board connector
(1) Pass the cable from the hole in the back of indoor unit.
(2) Connect the cable to the control board connector.
(3) Hook the cable to the rib.
connect the cable
rib
CN6
CN16
CN14
PCB
hole
Option type Connector No
Wired remote controller
Simple remote controller
CN6
External input CN14
External output CN16
9318739237_IM.indb 89318739237_IM.indb 8 11/30/2016 9:59:21 AM11/30/2016 9:59:21 AM
 Loading...