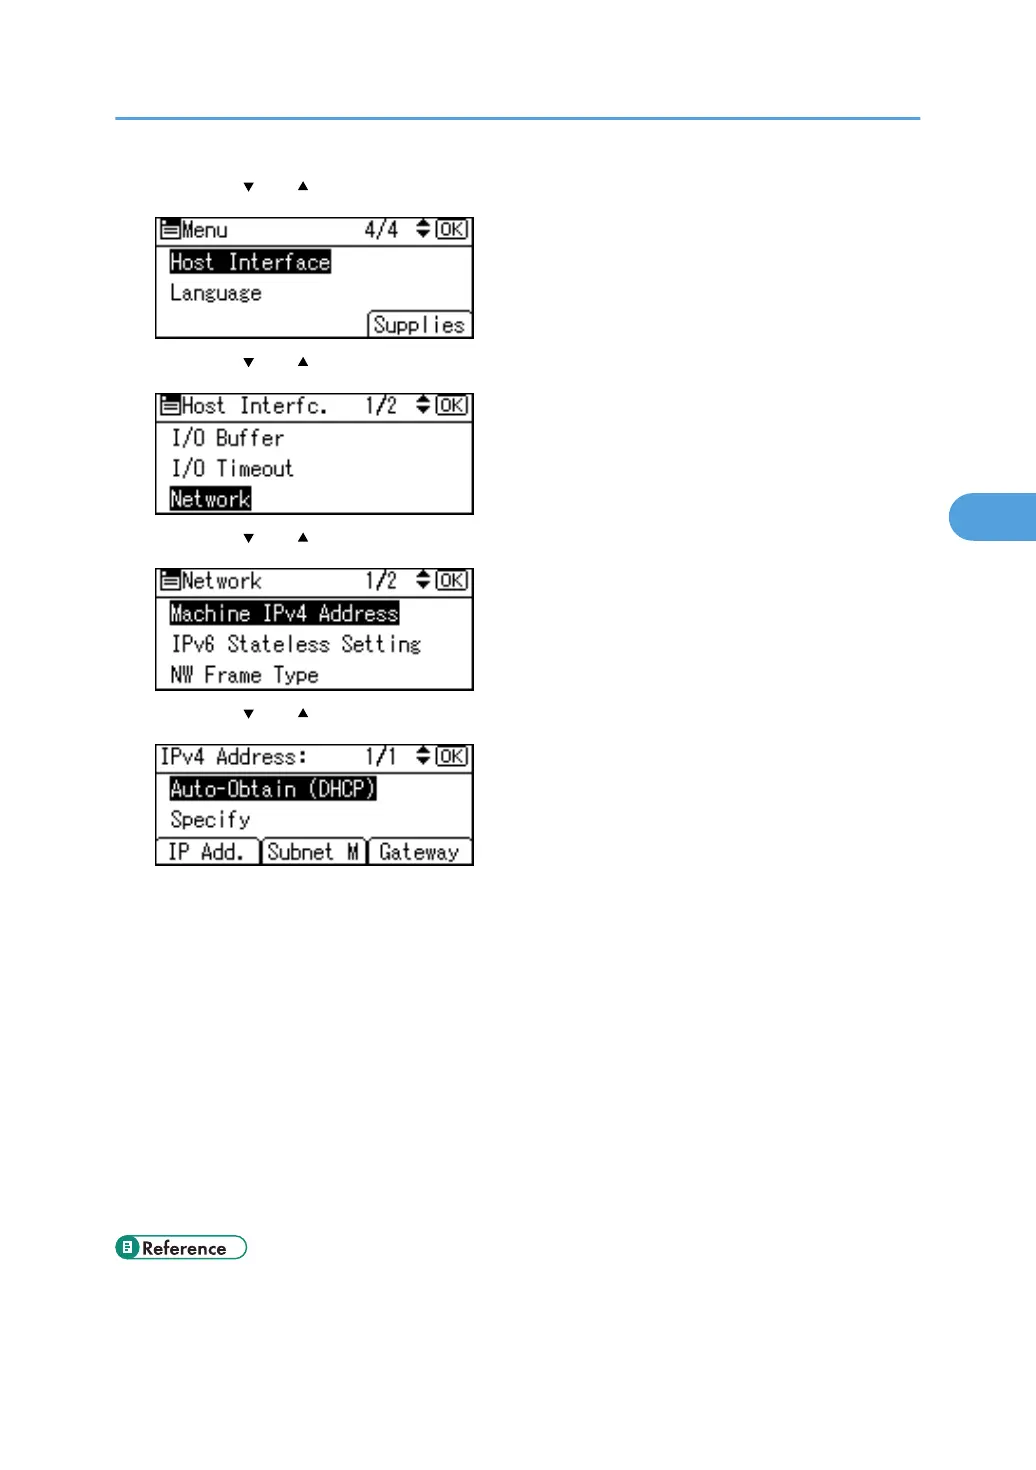
2. Press the [ ] or [ ] key to select [Host Interface], and then press the [OK] key.
3. Press the [ ] or [ ] key to select [Network], and then press the [OK] key.
4. Press the [ ] or [ ] key to select [Machine IPv4 Address], and then press the [OK] key.
5. Press the [ ] or [ ] key to select [Auto-Obtain (DHCP)], and then press the [OK] key.
The printer will automatically receive an IP address.
To check the detected addresses, press the followings:
• [IP Address]
IP address
• [Subnet Mask]
Subnet Mask
• [Gateway]
Default Gateway
6. Press the [Menu] key to return to the initial screen.
7. Print a configuration page to confirm the settings.
• For details about printing the configuration page, see “Test printing”, Quick Installation Guide.
Ethernet Configuration
71

 Loading...


