Copier Installation
SM 2-11 D245/D246/D247
Installation
22. Pull out the paper tray, and then adjust the positions of the end and side guides.
23. Plug in the main power cord and turn on the main switch.
24. Activate the SP mode and execute "Developer Initialization" (SP2-801-001).
25. Wait until the message "Execute Result = OK" shows (about 2 minutes) and then press
the “OK” key.
26. Activate the User Tools and select the “Language” menu.
27. Specify a language. This language is used for the operation panel.
28. Load the paper in the paper tray and make a full size copy, and make sure the
side-to-side and leading edge registrations are correct.
2.2.3 CHECK IMAGE QUALITY / SETTINGS
Checking the copy image with the test chart
Check the copy image with the test chart.
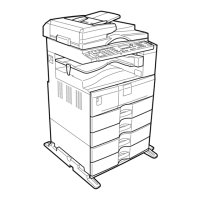
2.2.4 MOVING THE MACHINE
This section shows you how to manually move the machine from one floor to another floor. See
the section "Transporting the Machine" if you have to pack the machine and move it a longer
distance.
1. Turn the main power OFF and pull out the plug.
2. Close all the covers and trays.
3. Remove peripherals physically attached to the main machine: paper feed unit and
by-pass tray cover.
4. Keep the machine horizontal and move it slowly. Tipping and excess vibrations may
damage the machine.
2.2.5 TRANSPORTING THE MACHINE
1. Remove the PCDU. This prevents toner leak, which is caused by vibration during
transport.
2. Make sure there is no paper left in the paper trays. Then fix down the bottom plates
with a sheet of paper and tape.
3. Do one of the following steps:
Attach shipping tape to the covers and doors.
Shrink-wrap the machine tightly.
Rev. 01/08/2016