Linear installation guide 13563-B 02-19 | 11
Installation overview
Complete framing and base panel, p. 12-15.
Prepare gas and electrical connections, and cavity ventilation (refer next page).
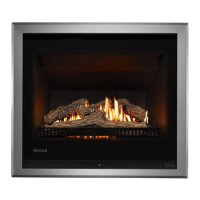
Fit the Linear
Move the Linear into the cavity. Tip forward slightly to get the two back feet in rst. To reduce the
weight you can remove the glass rst (p. 19). The Linear as adjustable feet on all corners. Use
these feet to level the re. This is critical so the wall lining can be installed ush to the lips of the re.
Once level, secure the Linear to the base of the enclosure using the four brackets, which also act as
seismic restraints (p. 18).
Complete the gas connection
To access the gas connection and gas control, remove the screws holding the Wi-Fi panel in place
(refer image on p. 27 for Wi-Fi assembly position). At this stage also check the ue conguration to
see if a dip switch change is required. Check for gas leaks.
Fit the ue, refer p. 36-41 for more information.
Commission with the glass off
The commissioning sheet is located in a plastic pouch inside the unit on the base panel. Follow the
commissioning instructions. Commissioning needs to be done with the glass off (refer p. 19 on how
to remove), before the burn media is added and before the wall lining is installed.
Install the burn media
Placement of the burn media is critical to the performance and safe operation of the appliance. Refer
p. 25 for more information, the separate burn media instructions and the colour burn media sheet
attached to the glass frame.
Install the glass front
Reinstall the glass front, check operation of the re, check the remote and Wi-Fi module is working
(p. 27).
Complete nal framing and install the wall lining
Complete the nal framing once you are satised the re is working correctly—there will be limited
access to the unit once nal framing is completed.
Install the wall lining as one piece (so it doesn’t crack), with a cutout for the glass, up to the lips of
the unit. DO NOT go over the lips. There is an air gap of at least 3 mm around the lips of the re,
which is CRITICAL to safe operation to ensure air ow in and around the unit.
Fix the wall lining in place. We recommend gluing as screws will transfer heat, and during installation
there is the potential to damage some controls of the re if screws are used, refer p. 28-33 for more
information.
N.B: For new builds the nal stage could be completed prior to commissioning.
New build
HELPFUL
TIPS
To level the unit and not affect where the feet go, the seismic brackets need to be elevated once
the unit is off the pallet.
We STRONGLY recommend the gas is on to check the inlet pressure as access to the control
after the wall lining is on is more difcult.

 Loading...