- 95 - GD-70D
Phosphine does not come in cylinders of 0.1 ppm concentration so you need to determine how much to
dilute the cylinder that you have. For example, a cylinder of 0.5 ppm PH3 diluted 1 part gas to 4 parts
nitrogen (5 parts total) would give you 0.1 ppm PH3:
0.5 3
5
× 1.7 = 0.17 < 0.20
But if you had a higher concentration of PH3 in your calibration cylinder or if your sensor’s factor is higher
than 1.7, you would need to increase the dilution.
1.0 3
5
× 1.7 = 0.34 < 0.20
Changing the dilution to 1 part gas to 8 parts nitrogen (9 parts total):
1.0 3
9
× 1.7 = 0.19 < 0.20
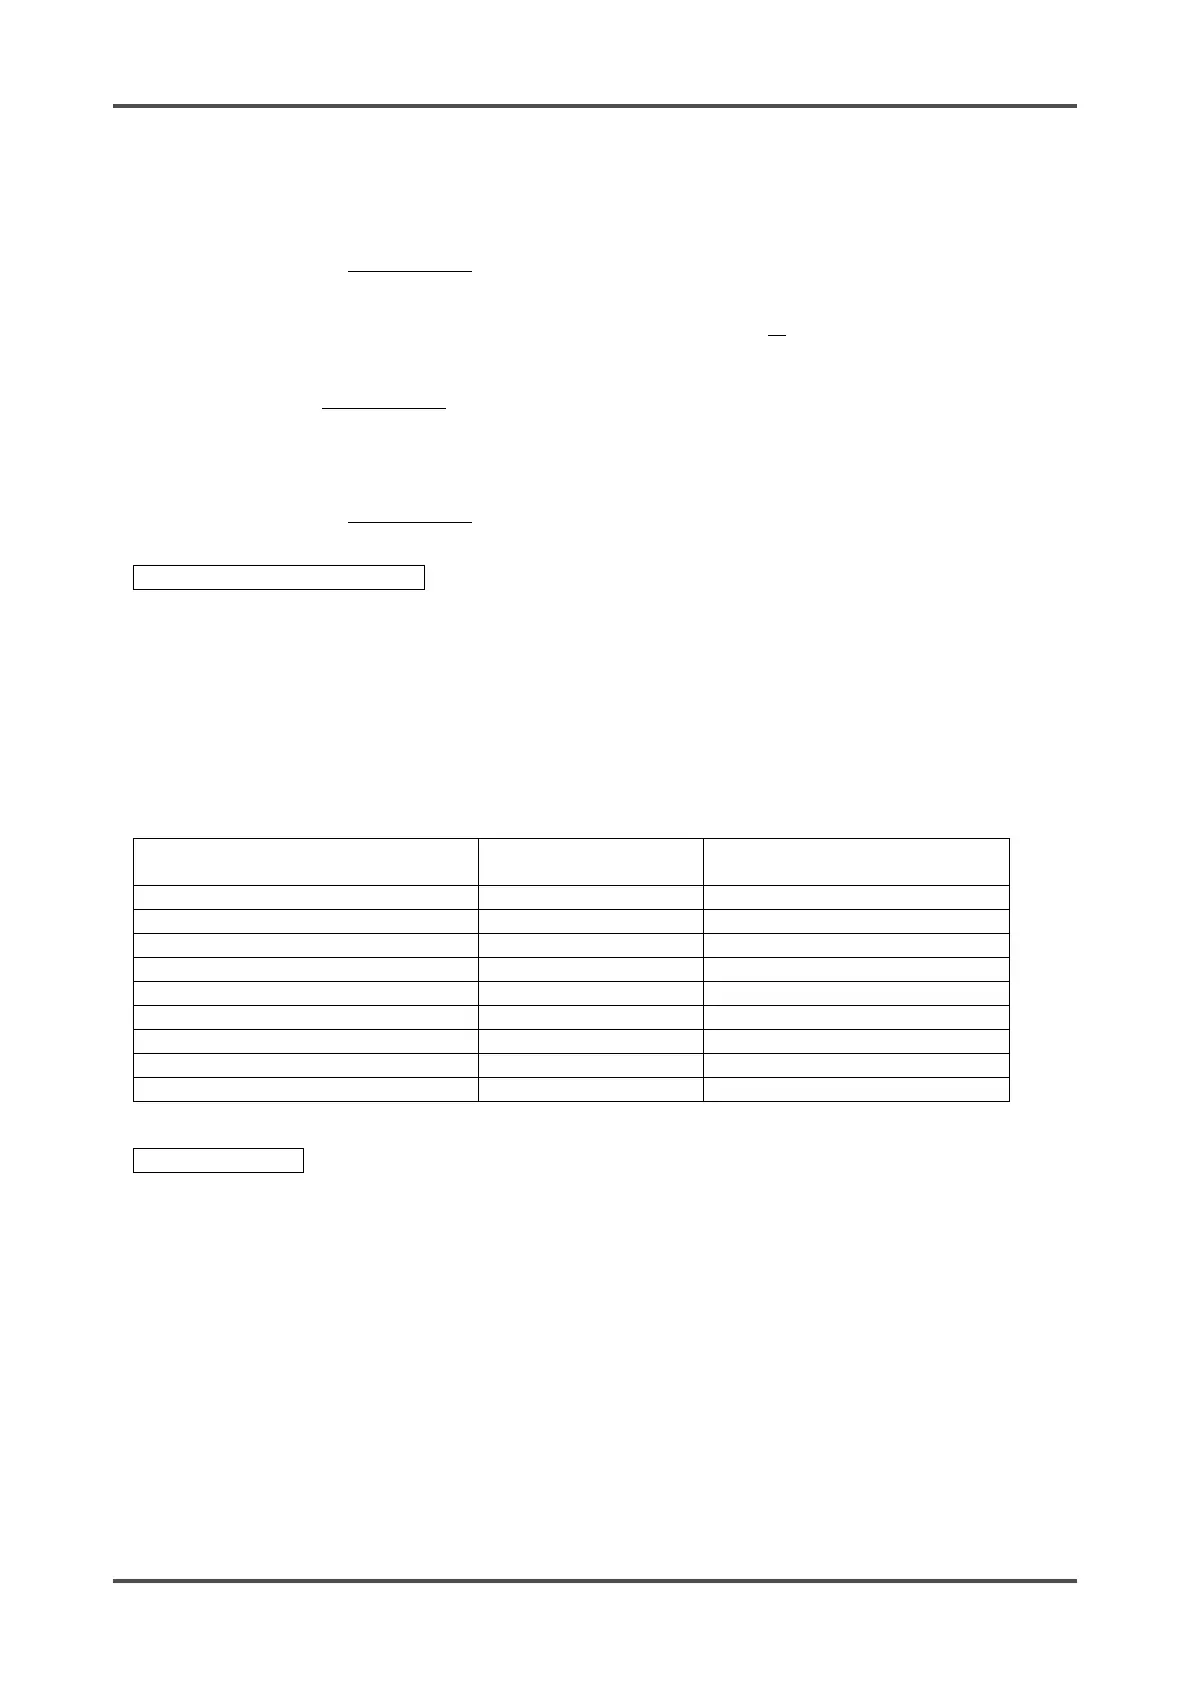
Determining How to Fill Gas Bag
After determining the required dilution, you will need to determine how to fill your gas bag (ie. how long to
let each cylinder flow). The GD-70D will need approximately 1 liter of gas for a 2 minute calibration. The
fixed flow regulator used to fill the gas bag flows at 0.5 LPM.
The table below provides suggestions for gas flow times based on level of dilution needed. The times listed
assume you have a 2 liter gas bag and will provide between 1 and 1.5 liters of gas which is enough to
calibrate one detector head. If you want to mix a gas once and calibrate multiple detector heads with it, you
will need a bag larger than 2 liters and you will need to increase the times listed below.
Table 1: Gas Flow Times for Gas Bag Dilution
Total Parts in Gas Bag
(from discussion in previous section)
2 (1 part gas, 1 part N2)
3 (1 part gas, 2 parts N2)
4 (1 part gas, 3 parts N2)
5 (1 part gas, 4 parts N2)
6 (1 part gas, 5 parts N2)
7 (1 part gas, 6 parts N2)
8 (1 part gas, 7 parts N2)
9 (1 part gas, 8 parts N2)
10 (1 part gas, 9 parts N2)
Filling the Gas Bag
1. If not already installed, install the hose and hose clamp on the gas bag.
2. Open the hose clamp on the gas bag.
3. Be sure the gas bag is completely empty.
4. Connect the tubing on the gas bag to the fixed flow regulator’s hose barb fitting. Be sure the regulator’s
knob is in the closed position.
5. Screw the fixed flow regulator onto the calibration cylinder.
6. Turn the regulator’s knob counterclockwise. Allow the gas to flow for the appropriate amount of time
based on your dilution needs. See Table 1 above.
7. Turn the regulator’s knob clockwise to close it.
8. Clamp down on the hose clamp to prevent the release of gas from the gas bag.
9. Remove the gas bag from the regulator.
10. Unscrew the regulator from the calibration cylinder and screw it onto a 100% N2 cylinder.
11. Connect the gas bag tubing to the regulator’s hose barb fitting.
12. Open the hose clamp on the gas bag.
13. Turn the regulator’s knob counterclockwise. Allow the gas to flow for the appropriate amount of time
based on your dilution needs. See Table 1 above.
14. Turn the regulator’s knob clockwise to close it.
 Loading...