GD-70D - 112 -
10-9 Replacing Parts
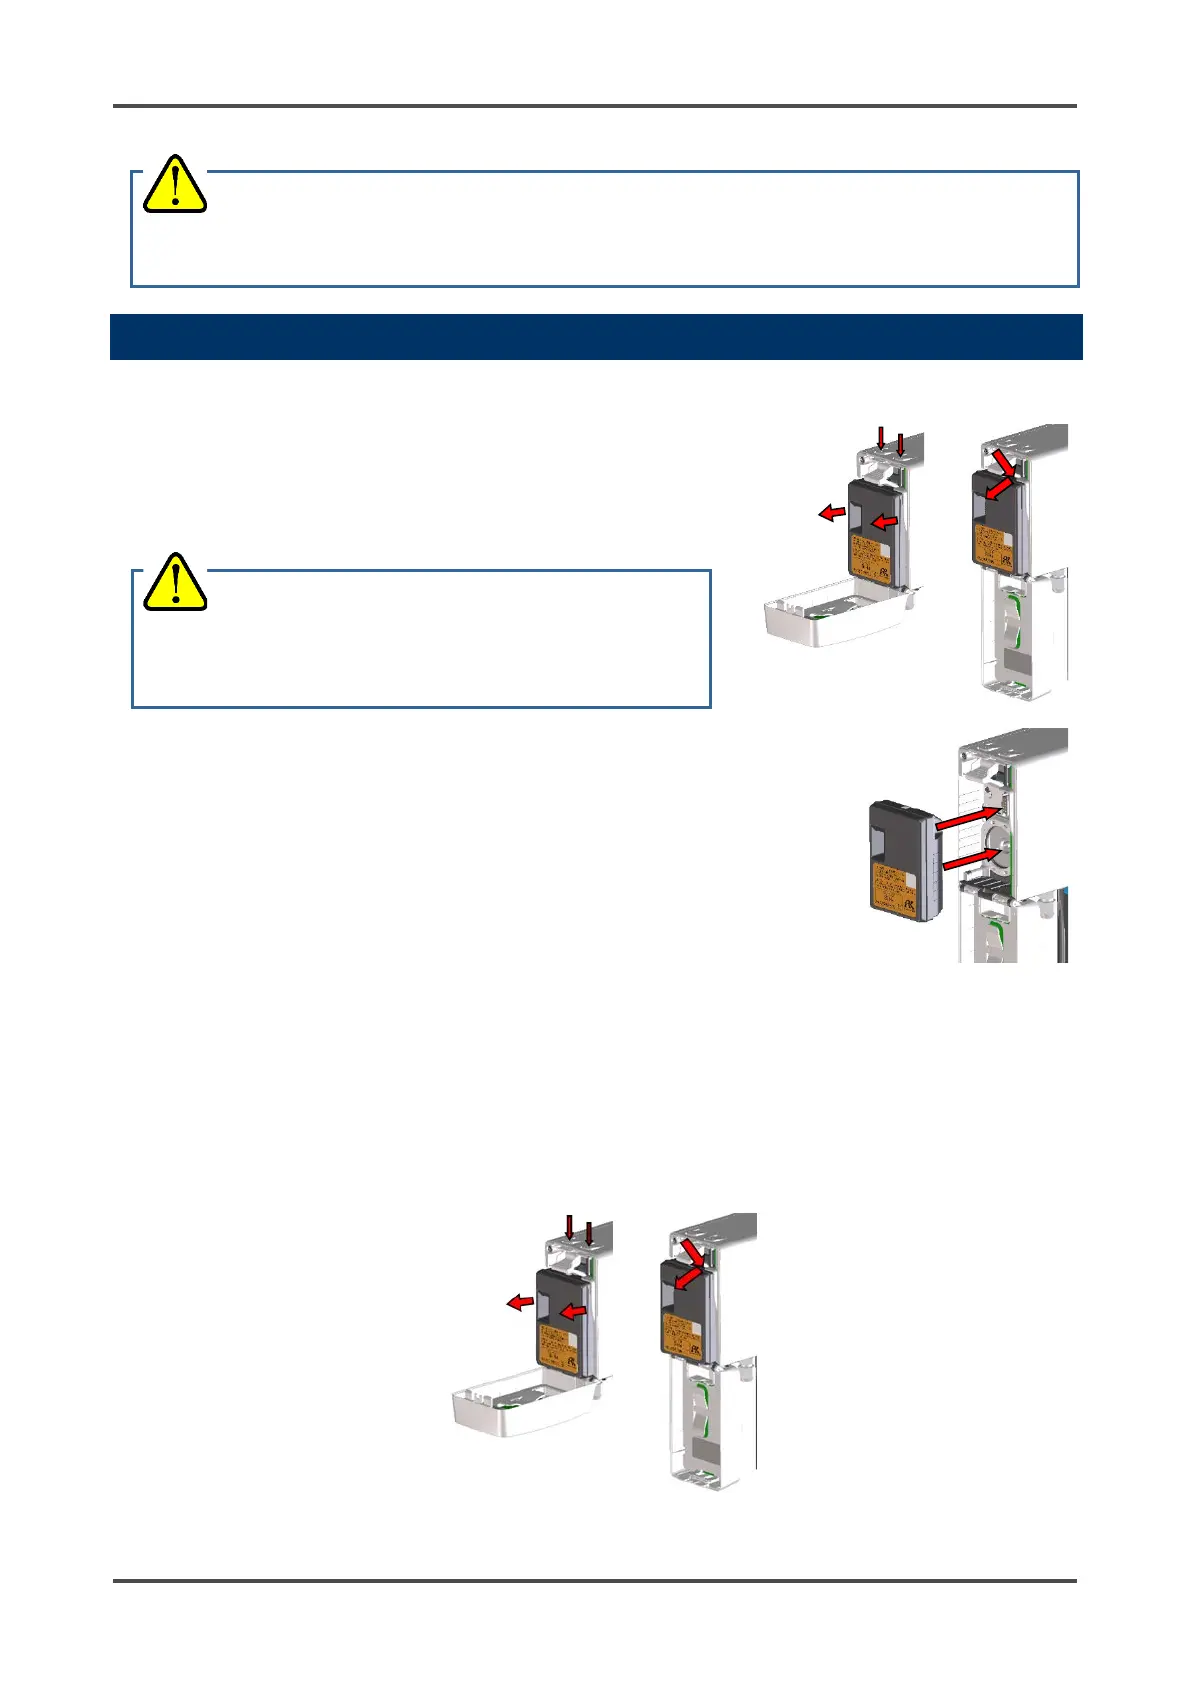
<Replacing the Sensor Unit>
1. Push the two buttons at the top of the main unit down to
open the front cover.
* The front cover opens 90 degrees at first. You can push it
down to 180 degrees.
2. Grab the sides of the old sensor unit and pull it out.
If the sensor unit is hard to detach, insert a finger into the
gap at the top right of the sensor unit and pull it out.
3. Insert the new sensor unit into the main unit and make sure
that the sensor unit is secured.
4. After replacing the sensor unit, close the front cover. Be sure
the front cover clicks into place.
5. Turn the power to the detector back on and allow the sensor
unit to warm up, if necessary.
6. Perform a calibration.
<Replacing the Sensor Battery (ESU Type Sensors ONLY)>
If you get an E-1 error message for an ESU type sensor, try replacing the battery before replacing the
entire sensor.
1. Turn off the GD-70D.
2. Push the two buttons at the top of the main unit down to open the front cover.
*The front cover opens 90 degrees at first. You can push it down to 180 degrees.
3. Grab the sides of the sensor unit and pull it out.
If the sensor unit is hard to detach, insert a finger into the gap at the top right of the sensor unit and
pull it out.
WARNING
After the adjustment is completed, do not forget to press the MODE key to return to Detection Mode.
CAUTION
• Turn the power off before detaching or attaching the
 Loading...