Robotiq inc. © 2016 20
1.
2.
3.
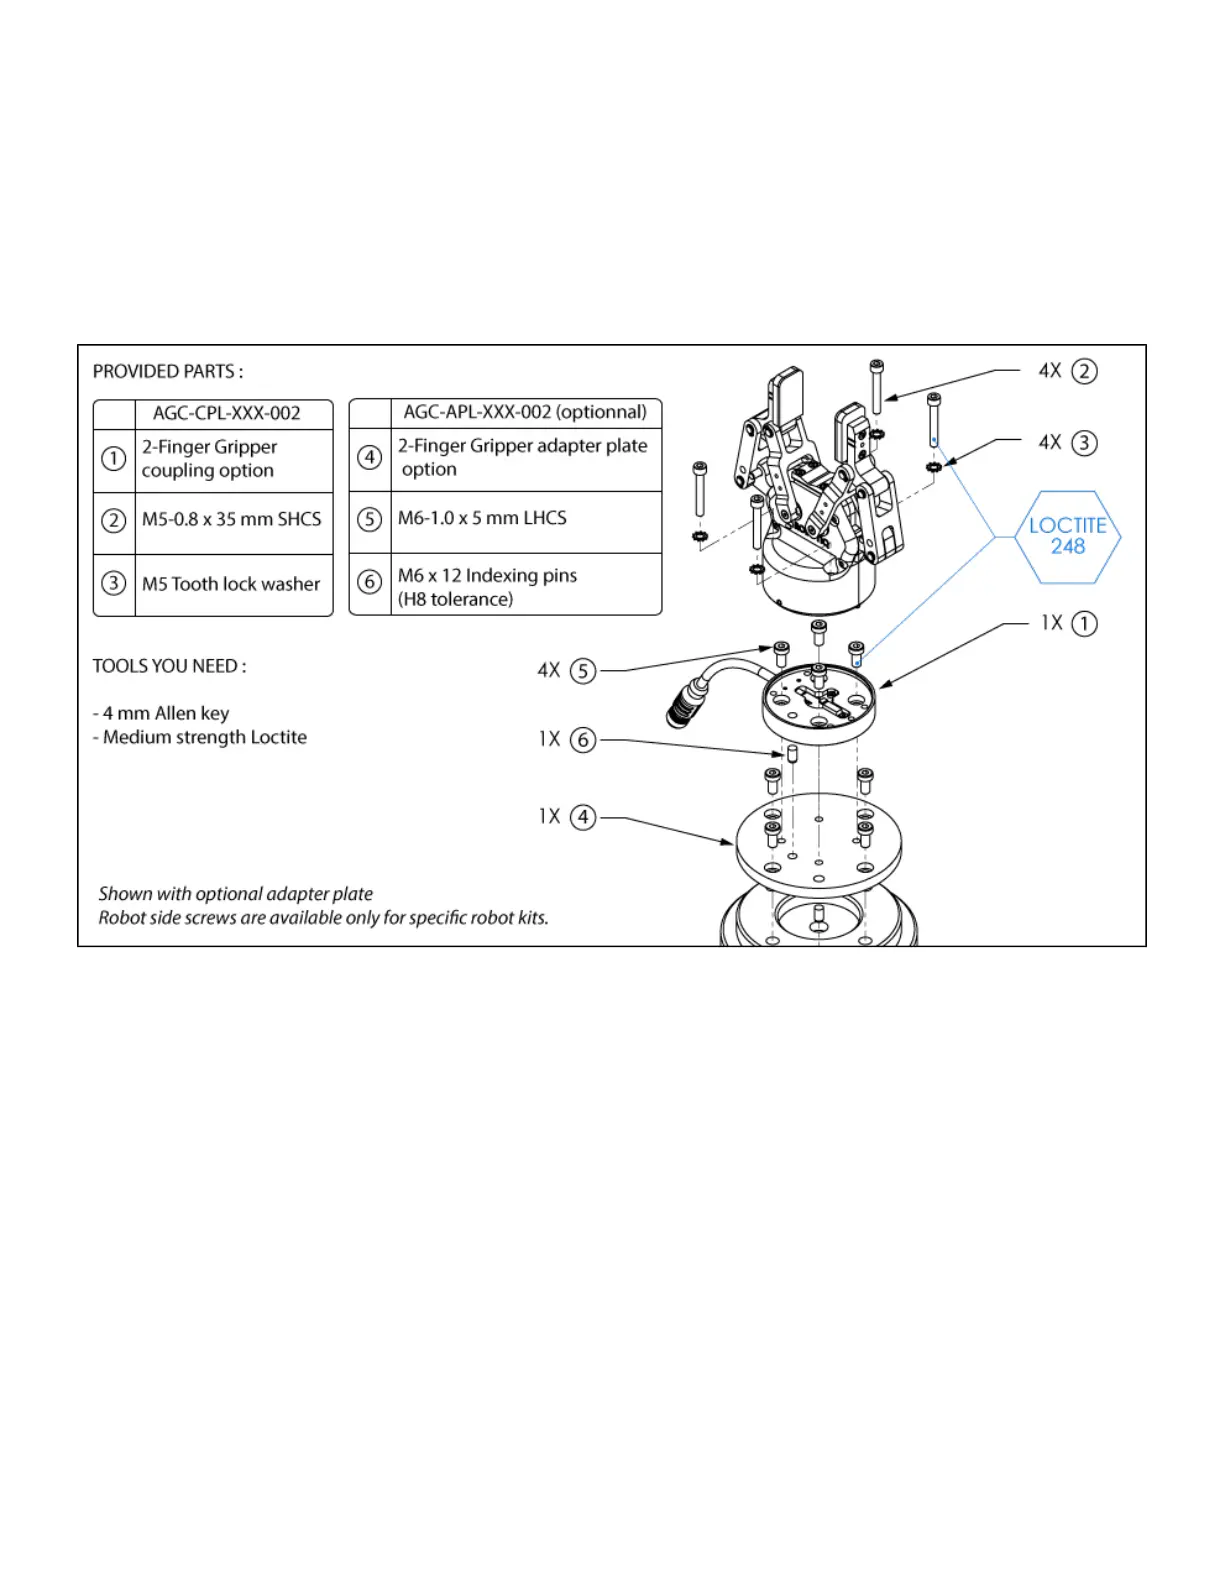
Installing the Gripper onto the robot :
You must use a coupling to attach the Gripper to the robot. Be sure to use the coupling related to your robot model. If there is no coupling for your robot, you
can modify a blank coupling or Robotiq can create a custom version for you. Some couplings may require an additional adapter plate. To create your own
coupling or adapter plate you can refer to the . To see the details of the available couplings and adapter plates see the Coupling section Spare Parts, Kits
.and Accessories section
Here are the steps to follow to mount the Gripper to your robot (exploded view in Figure 3.4.3 below). Note that all screws must be locked in place using
medium strength thread-locker.
Screw the adapter plate or the coupling to the robot.
Screw the coupling to the adapter plate (if adapter plate is required).
Screw the Gripper onto it's coupling.
Figure 3.4.3 : Installing the Gripper to a robot using an adapter plate and coupling.
 Loading...