PATCH (VALUE) Button [+] / [-]
In the Play mode (status at start-up), press these but-
tons to go through the different patches (tones) in
sequence.
In the Edit mode, press the buttons to change the set-
tings values or options selected with the dials.
➼
Pressing the [+] button once increases the setting value
by one. When the button is held down, the value contin-
ues to change. If you then hold down the [-] button at
the same time, the speed of this change increases. Press
the buttons in the reverse fashion to cause the values to
decrease.
The [+] and [-] buttons are also used in other tasks,
including writing to patches (p. 30), setting the Effect
Time Off (p. 44), calling up the Tuner (p. 15), and so
on.
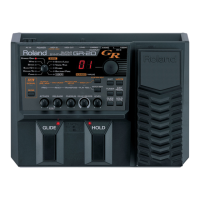
EDIT TARGET Dial
This dial is used for determining which of the eight
“targets” (groups of settings) — 1ST TONE, TONE
MIX, EFFECT, and the like — is to have settings acted
upon. This dial has no effect other than in the Edit
mode.
PARAMETER SELECT Dial
This dial is used for determining which of the groups
[A] to [D] will have its settings acted upon. It is also
used in other procedures such as adjusting pickup
sensitivity (p. 14) and saving tones (p. 30).
This dial generally has no effect outside of Edit mode,
but in the PLay mode, only "PATCH INC/DEC BY
S1/S2" can be selected when the dials turned com-
pletely clockwise. When it is in this position, you can
go up and down through sequences of patch numbers
just by using the “S1/S2” buttons on the guitar con-
troller (GK-2A) (p. 18).
STRING SELECT Knob
When making changes in 1ST/2ND tone assignment
(LAYER), transposition (TRANSPOSE), and other set-
tings of individual strings, use this knob to designate
the which string is to be set.
Three-digit Indicator
In the Play mode (the mode at start-up), this three-
place indicator displays the patch numbers.
In the Edit mode, it displays the values and settings
status of the currently selected item. Various other
messages are also displayed here.
Five-light Indicator
This illuminated indicator consists of five LEDs. For
the Tuner function (p. 15) and sensitivity adjustment
(p. 14), the entire group of indicator lights functions
as a meter. In other cases, it displays the following
status conditions:
LOCAL OFF
Starting up with local control off (p. 77) is indicat-
ed when the green light turns on.
EFFECT BYPASS
When, by pressing the [+] button while holding
down [EDIT/PLAY], internal effects are temporar-
ily switched off; this is indicated when the green
light comes on.
ARP/HAR
The green light turns on when Arpeggiator is
turned on, and the light shines red when
Harmonist is turned on.
GTR-ENV FOLLOW
When settings to “PLAY FEEL” are made with
either “EF1” or “EF2” (p. 37), the green light comes
on, indicating that the decay of the string vibration
is being accompanied by a corresponding change
in the synth sound.
EDIT
The green light comes on when you go into the
Edit mode. When a change to patch settings is
made here, it is indicated by the light beginning to
flash on and off. Furthermore, if you jump to the
Play mode without performing the write proce-
dure, the red light will flash, and if at this point
you proceed to switch patches, a message is dis-
played stating that you have just lost the changes
you had made.
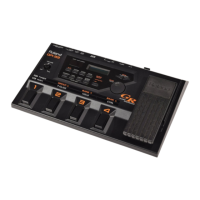
Foot Pedals
These are four foot-operated switches. In the Play
mode, together with the GK-2A’s “S1,” they are used
mainly to switch patches. After pressing the GK-2A’s
“S2” to go into Pedal Effect mode, you can step on the
switch to get performance effects such as wah, pitch
glide, and hold. (Even in the Play mode, these effects
are enabled when dial 5 is pointing at PATCH
INC/DEC BY S1/S2.
Additionally, this can be used when calling up special
functions to carry out operations such as creating
Arpeggiator patterns (p. 60), sending BANK SELECT
data to an external MIDI device (p. 73), initializing (p.
81), or transferring data.
9

 Loading...
