125
Detailed Settings for Each Function ([EDIT] Button)
4.
Press the [F1 (DEST)] button to select the type of
copy.
5.
Use the Cursor [ ] [ ] buttons or the VALUE
dial to select the song that you want to copy.
If you do not want to copy the song, press the [EXIT/
SHIFT] button.
If you choose “ALL,” all songs will be copied.
6.
Press the [ENTER] button to copy the song.
Be sure never to turn off the power while the copy
is in progress.
You can’t copy audio files into internal memory.
If a file with the same name has already been
saved, the confirmation message “Overwrite OK?”
appears. To overwrite the Song, press the [ENTER]
button; to save the file under a different name,
press the [EXIT/SHIFT] button.
7.
Press the [EDIT] button, extinguishing its
indicator.
You are returned to the Tone screen.
“Formatting” is an operation that returns the internal memory
to the factory-set condition, or prepares USB memory for use
with RD-700GX.
USB memory cannot be used with the RD-700GX unless it is
formatted suitably for the RD-700GX.
If you’re using newly purchased USB memory, you must first
format it on the RD-700GX.
When you format the USB memory, all data
previously saved on that memory will be erased.
Before you carry out a format, make sure that the
USB memory does not contain important data you
need to keep.
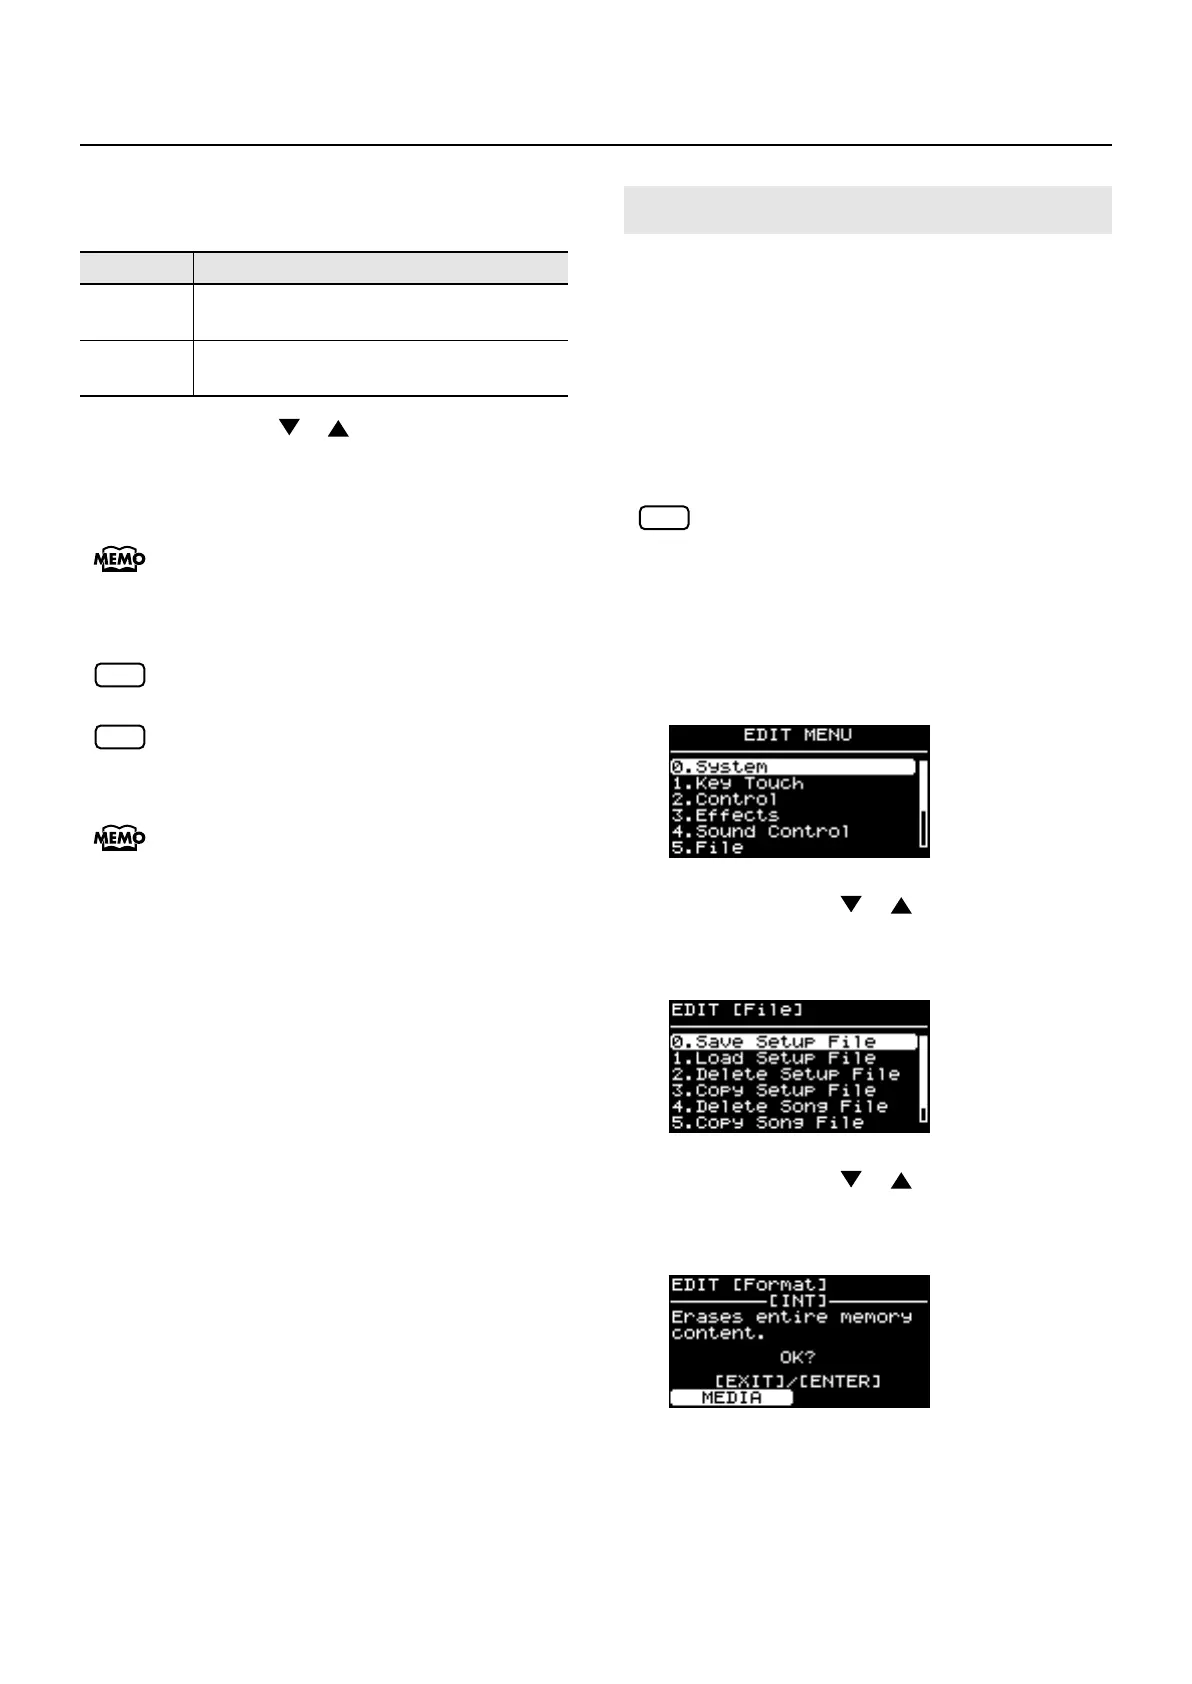
1.
Press the [EDIT] button, getting the indicator to
light.
The Edit Menu screen appears.
2.
Press the Cursor [ ] [ ] buttons to select
“5.File,” then press the [ENTER] button.
The Edit screen appears.
3.
Press the Cursor [ ] [ ] buttons to select
“6. Format,” then press the [ENTER] button.
The following screen appears.
4.
Press the [F1 (MEDIA)] button to select the
media that you want to format.
Parameter
Description
INT
→
USB
Copy from the RD-700GX's internal memory
to USB memory.
USB
→
INT
Copy from USB memory to the RD-700GX’s
internal memory.
NOTE
NOTE
Formatting Memory (Format)
NOTE
RD-700GX_e.book 125 ページ 2008年2月13日 水曜日 午後5時49分
 Loading...