19
Video Operations
Switching Automatically (Auto Scan)
You can make the video on channels 1 through 4 switch automatically.
MEMO
5 Any channels carrying no video input are skipped.
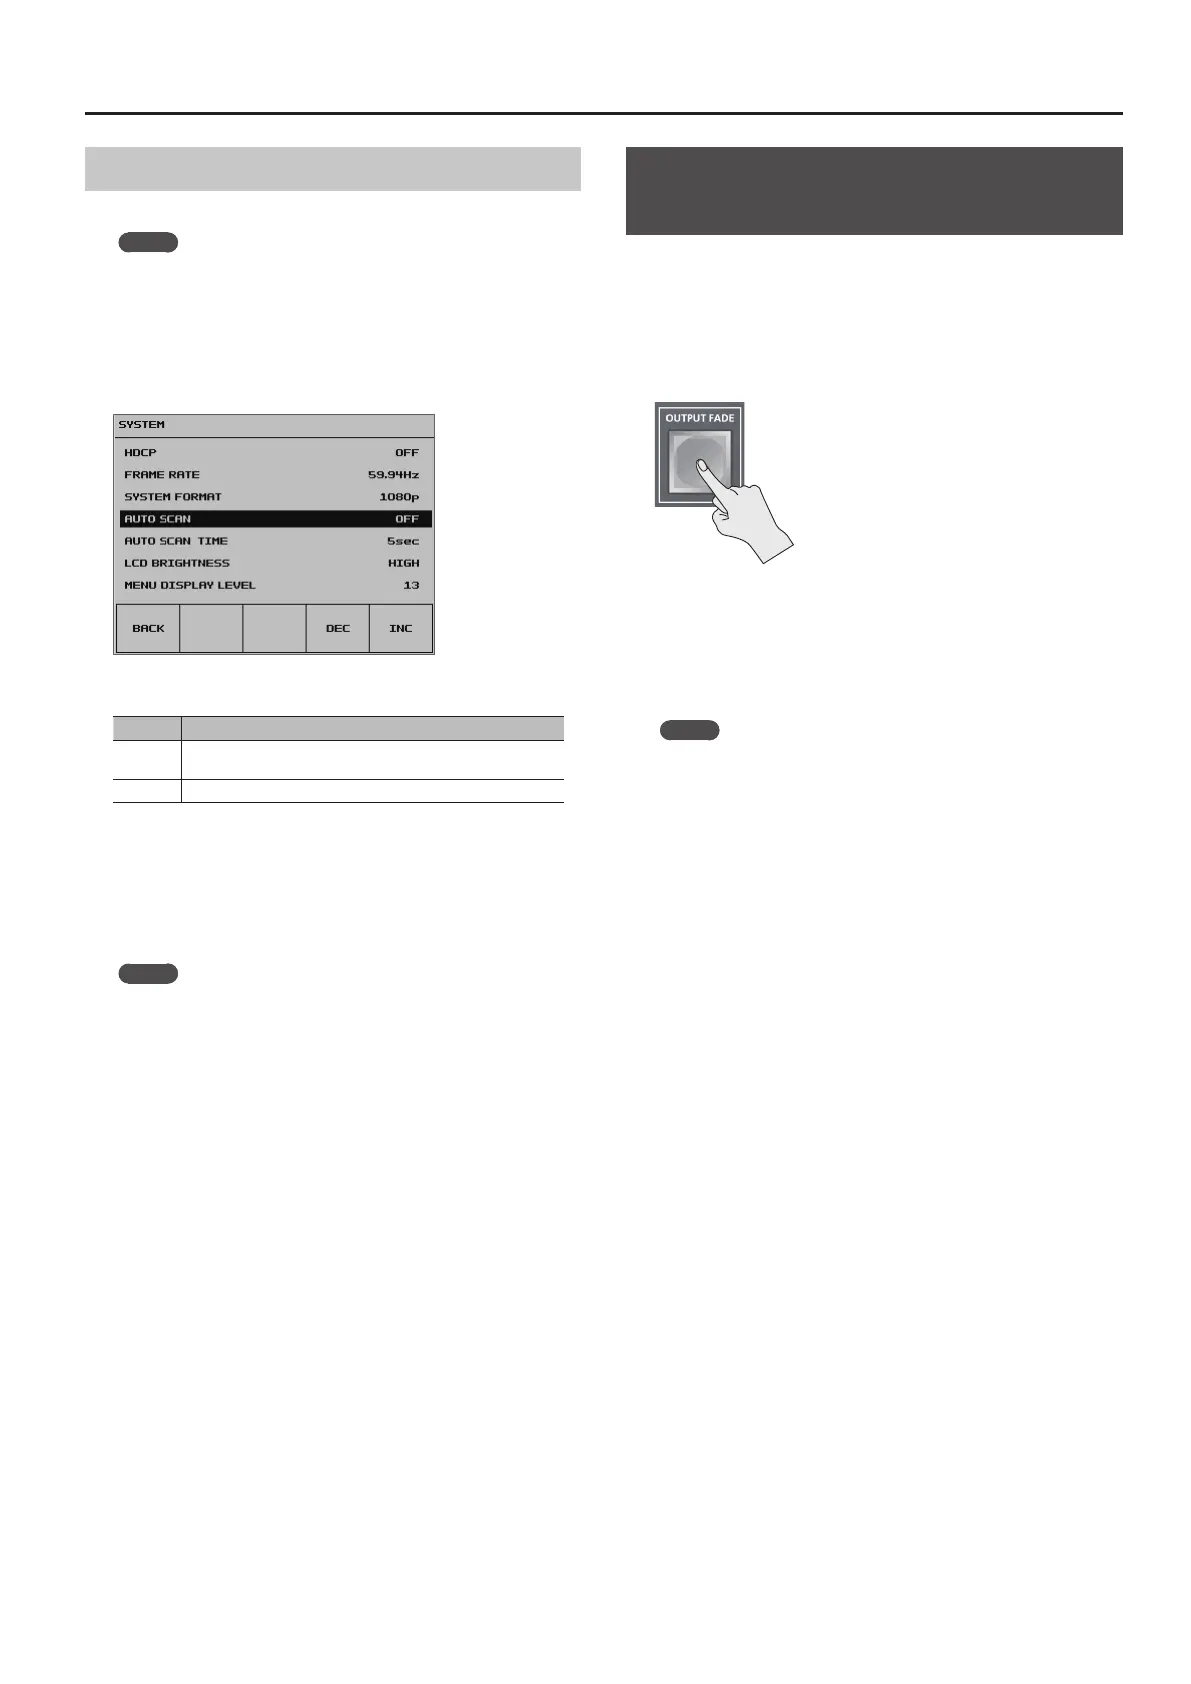
1. Press the [SYSTEM SETUP] button to display the setup screen.
2. Select <SYSTEM> to display the SYSTEM menu.
3. Select <AUTO SCAN>.
4. Use the [VALUE] knob to set this to “ON.”
Value Explanation
ON
Video automatic switching is turned on. The video on channels
1 through 4 is switched automatically.
OFF The video automatic switching feature is turned o.
5 You can set the interval for video display within the range of 1
to 120 seconds. Use the [SYSTEM SETUP] button g<SYSTEM> g
<AUTO SCAN TIME> to make the setting.
5. Press the [SYSTEM SETUP] button several times to quit the
setup screen.
MEMO
5 You can assign the Auto Scan function to a USER button and use
the button to switch it on and o.
For information on how to use the USER buttons, refer to
“Assigning Functions to USER Buttons” (p. 37).
Applying a Fade to the Main Output
Video (Output Fade)
You can apply fade to the VR-4HD’s main output video.
This lets you make the main output video fade to a black (or white)
picture at times when you want to suppress video output, such as
during intervals in a band performance.
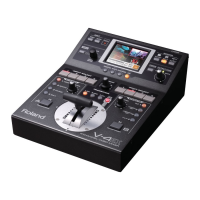
1. Press the [OUTPUT FADE] button to perform a fade-out.
When the fade-out is complete, the [OUTPUT FADE] button lights up.
2. To perform a fade-in, press the [OUTPUT FADE] button again.
When the fade-in is complete, the [OUTPUT FADE] button goes dark.
MEMO
5 To set the fade time to fade-ins and fade-outs, use the [SYSTEM
SETUP] button g <TRANSITION> g <TRANSITION TIME> to apply
the setting.
5 By factory default, the fade color is set to black. When you want
to set the fade color to white, use the [SYSTEM SETUP] button g
<VIDEO OUT> g set <OUTPUT FADE> to “WHITE.”
5 You can adjust the level of the fade color. Use the [SYSTEM SETUP]
button g <VIDEO OUTPUT> g <OUTPUT FADE WHITE LEVEL> or
<OUTPUT FADE BLACK LEVEL> to adjust.