33
Audio Operations
Using the AUX Bus
The VR-4HD has two built-in audio buses (a MAIN bus and an AUX bus). You can select the audio bus to output for each individual connector.
MAIN bus This receives all input audio as a group and sends it to output (main output audio).
AUX bus This lets you selectively choose and mix the input audio to send, and sends it to output. You can output dierent audio than the main output audio.
For example, you can use this at a live performance venue to output a mix of all input audio (MAIN bus), and when recording or streaming a broadcast, you
can use this to output just certain specic input-audio streams (AUX bus).
MEMO
5 Reverb (p. 29) is not applied to audio on the AUX bus.
5 You can align the timing of AUX bus audio and video. For details, refer to “Aligning the Output Timing of Video and Audio (Lip-sync)” (p. 35).
Assigning an Audio Bus to Audio Output
Connectors
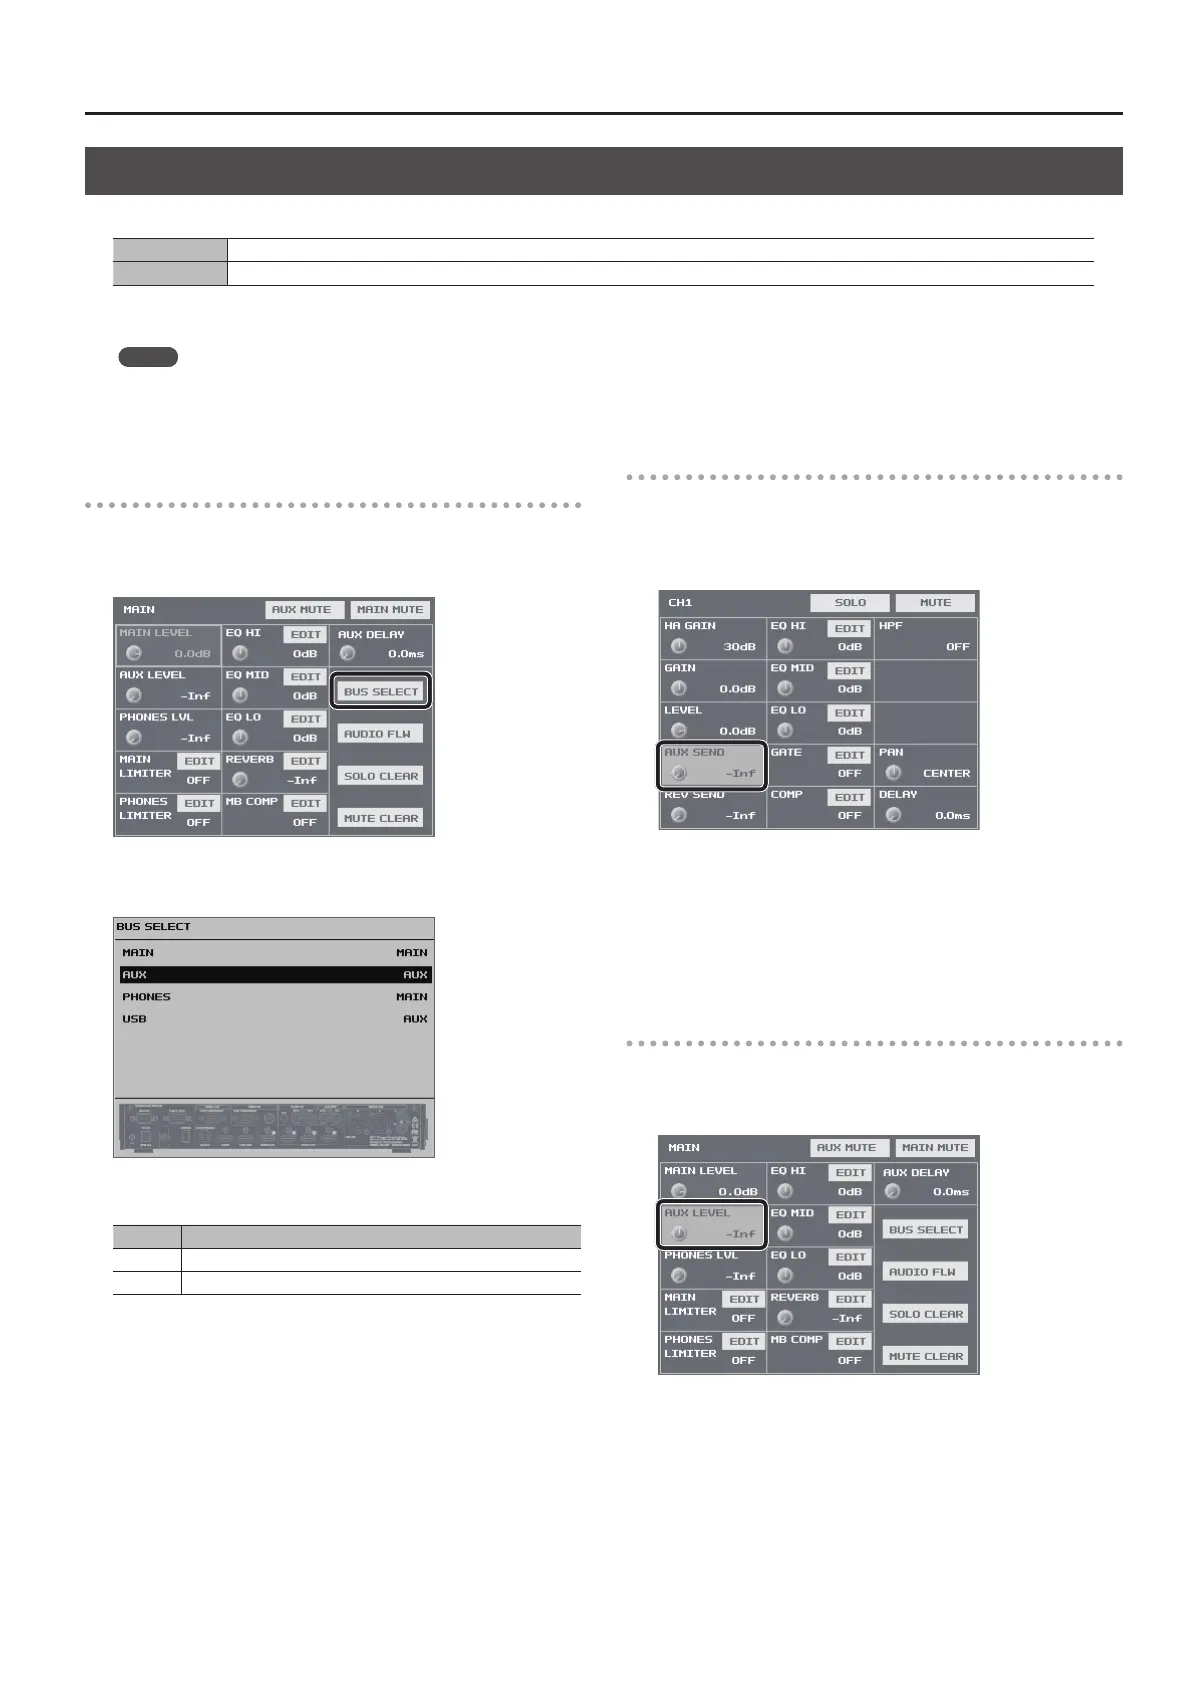
1. Press the MAIN [SETUP] button to display the setup screen.
2. Select <BUS SELECT> to display the BUS SELECT screen.
3. Select the output connector whose audio-bus assignment
you want to change.
4. Use the [VALUE] knob to specify “MAIN” or “AUX.”
Value Explanation
MAIN MAIN bus audio is output.
AUX AUX bus audio is output.
5. Press the MAIN [SETUP] button several times to quit the BUS
SELECT screen.
Sending Audio to the AUX Bus
1. Press the [SETUP] button for the input audio you want to
use on the AUX bus, making the setup screen appear.
2. Select <AUX SEND>.
3. Use the [VALUE] knob to adjust the send level for the audio
to the AUX bus.
4. Press the [SETUP] button to quit the setup screen.
Adjusting the Volume Level of Output Audio on
the AUX Bus
1. Press the MAIN [SETUP] button to display the setup screen.
2. Select <AUX LEVEL>.
3. Use the [VALUE] knob to adjust the volume level of AUX bus
output audio.
4. Press the MAIN [SETUP] button to quit the setup screen.
 Loading...