30
Audio Operations
Hearing Only Specic Input Audio (Solo/Mute)
You can temporarily monitor specic input audio via headphones (Solo feature).
You can also temporarily silence specic input audio or output audio (mute feature).
* The Solo feature aects output to headphones. It has no eect on non-headphones audio output.
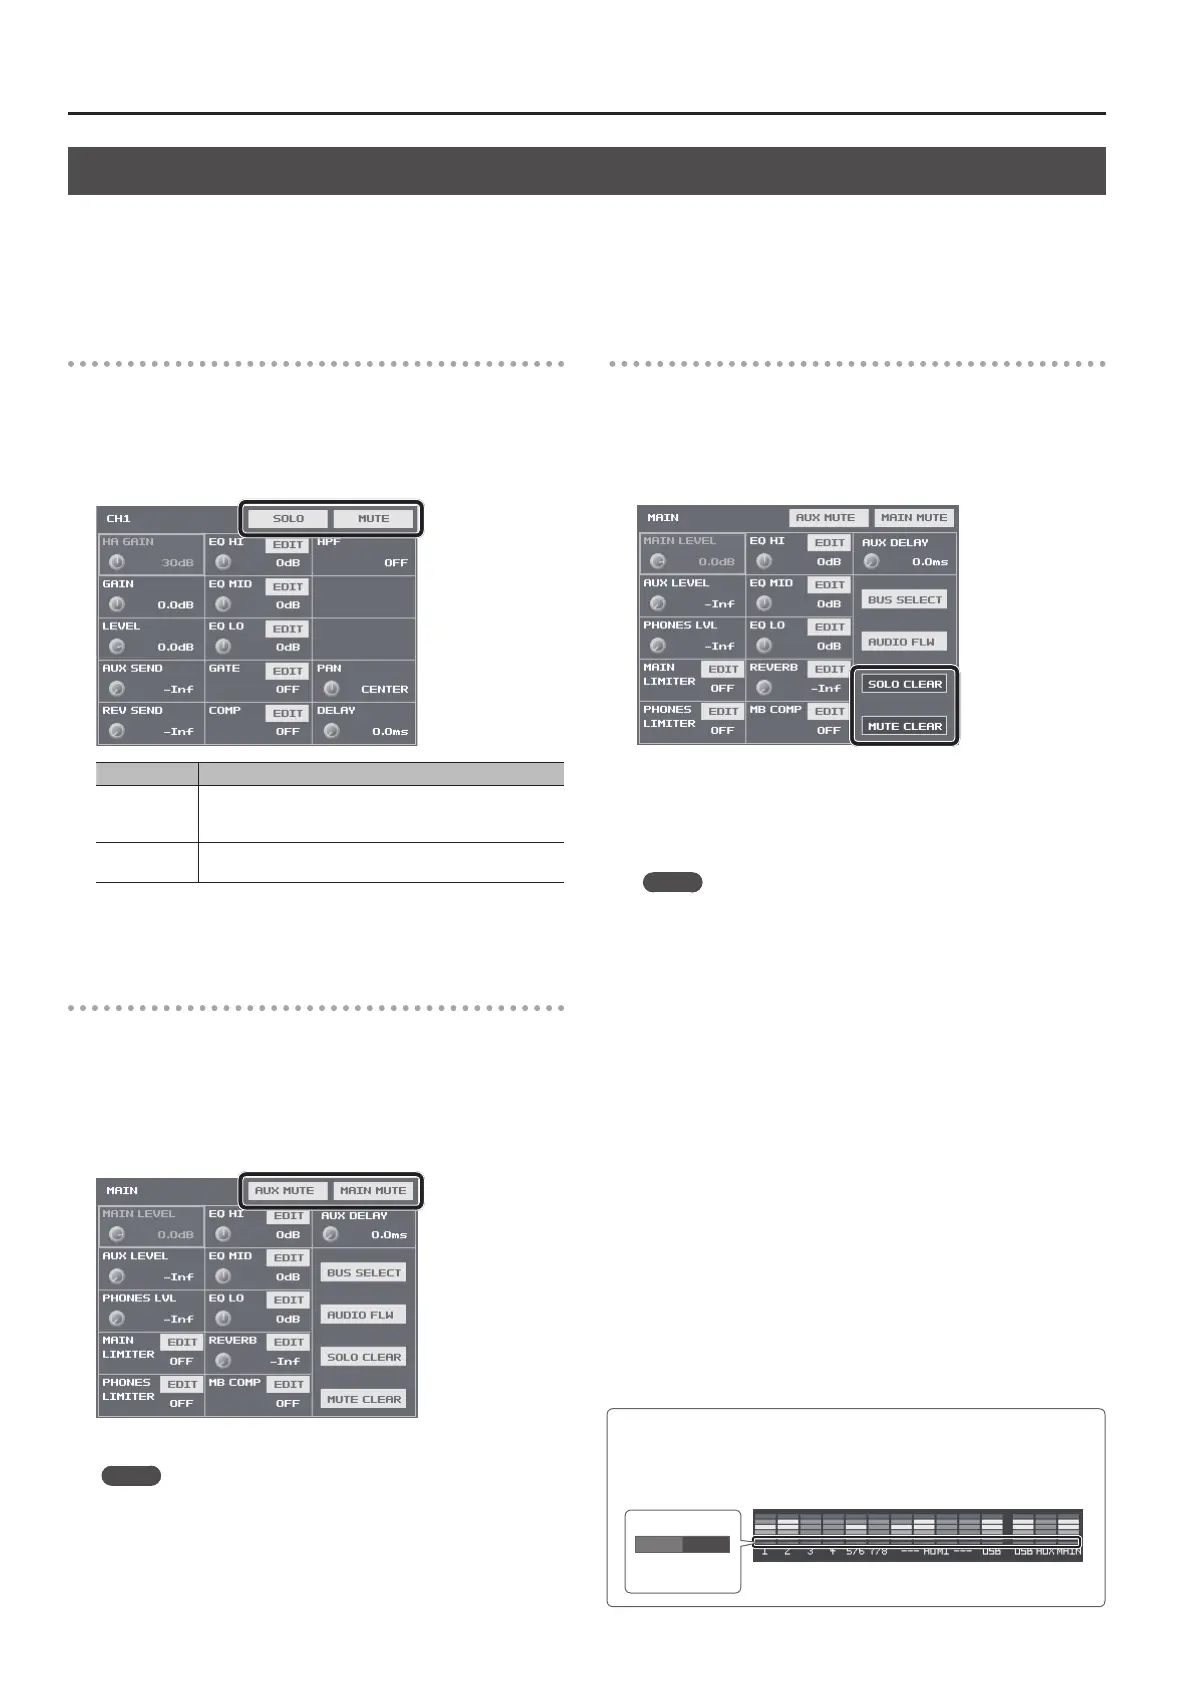
Solo/Mute for Input Audio
1. Press the [SETUP] button for the input audio where you
want to make the setting for Solo or Mute, making the setup
screen appear.
2. Select <SOLO> or <MUTE> to switch the setting on or o.
Setting item Explanation
SOLO
When this is on, the <SOLO> indicator changes to blue. You
can hear just the input audio for which this is turned on
through the headphones.
MUTE
When this is on, the <MUTE> indicator changes to red. The
input audio for which this is turned on is muted out.
3. Press the [SETUP] button to quit the setup screen.
Muting Output Audio
This mutes audio on the MAIN bus or AUX bus (p. 33).
1. Press the MAIN [SETUP] button to display the setup screen.
2. Select <MAIN MUTE> or <AUX MUTE> to switch the setting
on (red) or o.
3. Press the MAIN [SETUP] button to quit the setup screen.
MEMO
5 When muting audio output via USB, use the USB [SETUP] button
g at the USB TO PC page, switch <MUTE> on and o.
Turning O Solo/Mute Globally
This turns o the setting for Solo or Mute globally.
1. Press the MAIN [SETUP] button to display the setup screen.
2. Select <SOLO CLEAR> or <MUTE CLEAR>.
When all Solo or Mute settings have been turned o, the <SOLO
CLEAR> or <MUTE CLEAR> indication is grayed out.
3. Press the MAIN [SETUP] button to quit the setup screen.
MEMO
5 You can assign the Solo and Mute features to USER buttons and
switch them on and o in the following ways.
5 Assign audio signals to a group and switch the Solo or Mute
feature on and o for the group.
5 Display all Solo buttons and switch the Solo feature on and
o. You can also perform the same kind of operation using
the Mute feature.
For information on how to use the USER buttons, refer to
“Assigning Functions to USER Buttons” (p. 37).
Checking Solo/Mute Status
The status of Solo and Mute is displayed beneath the level meter.
When Solo or Mute is turned on, the area lights up as shown below.
Lighted
in blue
Solo
Lighted
in red
Mute