4 x Set-up and installation
ROTEX GCU compact -
17
Surface temperatures, minimum distance
– When operating independently of the ambient air with nomi-
nal output, the design does not allow temperatures > 70 °C on
any component outside the unit pa
nels. Therefore, no mini-
mum distance is required to components made with flamma-
ble materials.
– A minimum distance of 50 mm between the flue gas duct and
flammable components
should be maintained in a partial
room air-independent and ambient air-dependent mode (sep-
arate flue gas/air intake line).
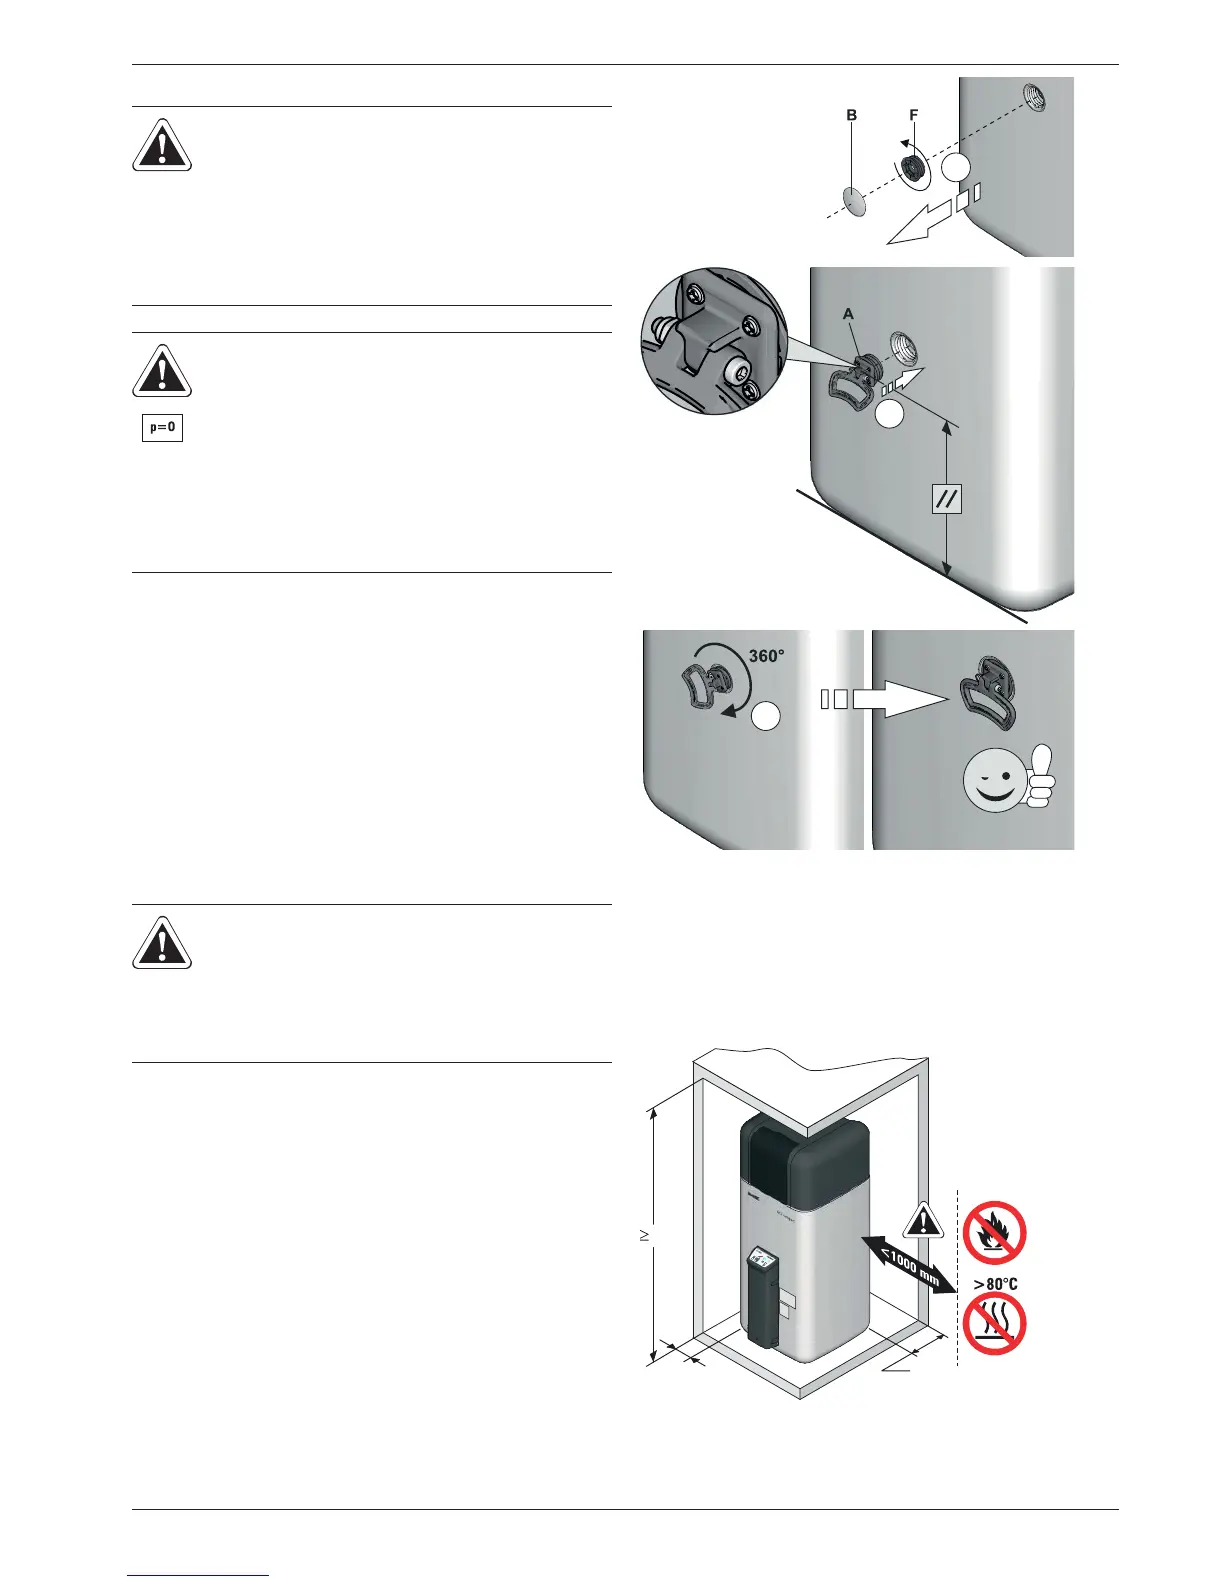
– Do not use or store easily inflammable and ea
sily combustible
substances directly next to the ROTEX GCU compact (mini-
mum distance 1 m, see fig. 4-10).
4.4.2 Setting up the unit
Precondition
– The installation site complies with the respective country-spe-
cific regulations, as well as the minimum requirements
described in section 4.4.1.
Set-up
Ɣ Remove the packaging and dispose of it in an environmen-
tally sound manner.
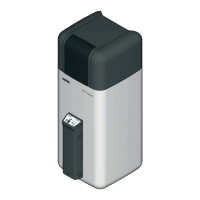
Ɣ Unscrew the threaded inserts (fig. 4-9, item G), onto whi
ch
the carrier loops are to be attached, from the hot water
storage tank.
Ɣ Thread the carrier loops (item A) through the threaded pieces
(item G) and mount onto th
e available connections on the
front and back of the hot water storage tank.
Ɣ Carefully transport the ROTEX GCU compact to the erection
site, use the handles.
Ɣ Install ROTEX GCU compact at the place of installation.
– Recommended distances:
to the wall (s1/s2/s3/s4): see tab. 4-1
To the ceiling (s
D
): 150 mm.
–Install close to the discharge point.
Ɣ Install the connection lines to allow for the removal of the
sound insulation hood (fig. 4-11).
WARNING!
The plastic wall of the storage tank of the ROTEX GCU
compact can melt
under the effects of external heat
(80°C) and, in the extreme case, can catch fire.
Ɣ Only install the ROTEX GCU compact with a
minimum distance of 1 m to other hea
t sources
(>80°C) (e.g. electrical heater, oil heater, chimney)
and the material to be combusted.
CAUTION!
Wird die ROTEX GCU compact is not erected
ade
quately lower the flat solar panels (the top edge
of the storage tank is higher than the bottom edge of
the solar panels), the unpressurised solar system in
the outdoor area will be unable to drain completely.
Ɣ Erect the GCU compact low enough, with a solar
connection, with reg
ard to the flat solar panels
(observe minimum gradient in the solar connecting
lines)
WARNING!
The ROTEX GCU compact is top heavy when not
fil
led, it can tilt over during tra
nsport. This can pose a
risk to persons or damage the machine.
Ɣ Correctly secure the ROTEX GCU compact,
transport carefully, use the handles.
Fig. 4-9 Assemble the handles (for legend, see fig. 4-8)
Fig. 4-10 Minimum distances for the erection of the GCU compact
(for dimensions, see tab. 4-1)
V
VV
K
5