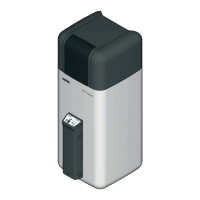
5 x Start-up
ROTEX GCU compact -
31
5Start-up
Incorrect start-up makes the manufacturer's guarantee for the
unit void. If you have questions, please contact our Technical
Customer Service.
5.1 Initial start-up
After the ROTEX GCU compact has been erected and fully con-
nected, it can be put into service by skilled staff.
5.1.1 Requirements
– The ROTEX GCU compact is fully connected.
– The burner trim is closed and is sealed tight.
– The heating and hot water system are filled and charged with
the right pressure.
–T
he storage tank is filled to the overflow point.
– The control valves of the heating system ar
e open.
5.1.2 Checks before start-up
Ɣ Check all connections for leakage.
Ɣ Check all the items
in the enclosed checklist (see section 5.2
- Before start-up). Log the test results on the checklist.
Only when all items on the checklist can be answered with
Yes should the ROTEX GCU compact be put into service.
5.1.3 Start-up
1. Open the gas stopcock.
2. Switch on the mains switch. Wait for the start phase.
– In case of starting problems, see chapter 10.
3. Configure the heater system from the RoCon BF control.
– For setting and explanations, see the enclosed operating
instructions "
RoCon BF Control" -> chapter "Initial start-
up".
– Enter modified setting values in the corresponding table in
the operating in
structions of the RoCon BF control.
4. First automatic calibration:
Ɣ From the RoCon BF control
, select the programme
[Emission Measurement] -> [Full Load]
(see chapter 15.2), but do not confirm.
– Make sure heat can dissipate into the heating network
during the cali
bration.
– In the event of burner starting problems, see
chapter 7.3.4.
Î Automatic calibration of the GCU compact and adaption
of the gas valve complete.
Î Calibration and adaption are complete 2 minutes after the
burner symbol appears in the display. GCU compact
runs under full load.
Ɣ End
programme [Emission Measurement].
Î Burner blower switches off.
Ɣ After the burner blower has come to a stop, switch o
ff the
mains plug on the boiler control panel.
Î GCU compact switches off.
Ɣ Wait 20 seconds before switching the mains switch on
again. Wa
it for the start phase.
5. Second automatic calibration and performance of flue gas
measurement:
Ɣ From the RoCon BF control
, select the programme
[Emission Measurement] -> [Full Load]
(see chapter 15.2), but do not confirm.
– Make sure the heat can dissipate into the heating network
during emis
sion measurement.
– In the event of burner starting problems,
see chapter 7.3.4.
Î Automatic calibration of the GCU compact and adaption
of the gas valve complete.
Î Calibration and adaption are complete two minutes after
the burner symbol appears. GCU compact runs under
full load.
Ɣ Use the glue gas analyzer to check the burner settings
and compare them with tab. 5-1 to tab. 5-3.
a)
If the O
2
/CO
2
concentrations lie within the permissible
values:
Î No further measures are required.
b) If the O
2
/CO
2
concentrations lie outside the permissible
values:
Î Carry out a 100 % calibration and adjust the [Drop Io-
base] in such a way that the setting range is reached
(See chapter 7.3.4) and repeat the measurement.
Ɣ Do
cument the measured values in the "Installation certifi-
cation" and
in the operating manual.
WARNING!
A ROTEX GCU compact that is installed or started in-
correctly may not operate properly and is dangerous
for the health and safety of individuals.
Ɣ Only heating engineers, authorised and trained by
gas and energy supply companies are allowed to
start up the ROTEX GCU compact.
CAUTION!
A ROTEX GCU compact not put into operation
p
roperly
can lead to damage to property and the envi-
ronment.
Ɣ Observe the regulations in VDI 2035 in order to
avoid corrosion and deposits.
Ɣ Measures for desalination, softening or hardness
stabilizati
on are necessary, if the filling and top-up
water has a high total hardness (>3 mmol/l - sum
of the calcium and magnesium concentrations,
calculated as calcium carbonate).
– We recommend Fernox scale and corrosion
protection agent KSK ( 15 60 50).
Ɣ During
the plant operation, the water pressure at
the manometer (green
area) must be checked at
regular intervals. If necessary, readjust by topping
up.