List of contents
2
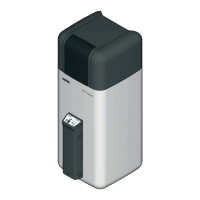
ROTEX GCU compact -
1 Guarantee . . . . . . . . . . . . . 4
1.1 Warranty conditions . . . . . . . . . . . . . . . . . . . . . . 4
2 Safety . . . . . . . . . . . . . . . . . . . . . . . . . . . . . . 5
2.1 Observing instructions . . . . . . . . . . . . . . . . . . . . 5
2.2 Warning signs and explanation of symbols . . . . 5
2.3 Avoid danger . . . . . . . . . . . . . . . . . . . . . . . . . . . 5
2.4 Proper use . . . . . . . . . . . . . . . . . . . . . . . . . . . . . 5
2.5 Instructions for operating safety . . . . . . . . . . . . . 6
2.5.1 Before working on the heating system . . . . . . . . . .6
2.5.2 Electrical installation . . . . . . . . . . . . . . . . . . . . . . . .6
2.5.3 Installation room . . . . . . . . . . . . . . . . . . . . . . . . . . .6
2.5.4 Requirements for the heating water . . .
. . . . . . . . .6
2.5.5 Heating system and sanitary connection . . . . . . . .6
2.5.6 Fuel . . . . . . . . . . . . . . . . . . . . . . . . . . . . . . . . . . . . .6
2.5.7 Operation . . . . . . . . . . . . . . . . . . . . . . . . . . . . . . . .6
2.5.8 Instructing the user/owner. . . . . . . . . . . . . . . . . . . .6
3 Product description. . . . . . . . . . . . . . . . . . . 7
3.1 Design and components . . . . . . . . . . . . . . . . . . 7
3.1.1 GCU compact 315 / 324 . . . . . . . . . . . . . . . . . . . . .7
3.1.2 GCU compact 515 / 524 / 533. . . . . . . . . . . . . . . . .8
3.2 Brief description . . . . . . . . . . . . . . . . . . . . . . . . . 9
4 Set-up and installation . . . . . . . . . . . . . . . 11
4.1 Dimensions and connection dimensions . . . . . 11
4.1.1 Connection dimensions for the heating and
hot water connections . . . . . . . . . . . . . . . . . . . . . .12
4.2 Installation versions . . . . . . . . . . . . . . . . . . . . . 14
4.2.1 Operation independent of ambient air. . . . . . . . . .15
4.2.2 Operation partially independent of ambient air . . .16
4.2.3 Ambient air dependent operation . . . . . . . . . . . . .16
4.3 Transport and delivery . . . . . . . . . . . . . . . . . . . 16
4.4 Installing the Gas Combi Unit compact . . . . . . 16
4.4.1 Selecting the installation site . . . . . . . . . . . . . . . .16
4.4.2 Setting up the unit . . . . . . . . . . . . . . . . . . . . . . . . .17
4.4.3 Remove the sound insulation hood. . . . . . . . . . . .18
4.5 Air/flue system (LAS) . . . . . . . . . . . . . . . . . . . . 18
4.5.1 General instructions for flue system . . . . . . . . . . .18
4.5.2 Connecting a flue gas line. . . . . . . . . . . . . . . . . . .19
4.5.3 Flue gas system kits . . . . . . . . . . . . . . . . . . . . . . .20
4.6 Water connection . . . . . . . . . . . . . . . . . . . . . . . 21
4.6.1 Connecting the safety group (SBG) . . . . . . . . . . .21
4.6.2 Connecting hydraulic lines . . . . . . . . . . . . . . . . . .22
4.6.3 Connect the condensate drain . . . . . . . . . . . . . . .23
4.7 Connection Control and Electrics. . . . . . . . . . . 23
4.7.1 Instructions concerning electrical connection . . . .23
4.7.2 Establishing the electrical connection .
. . . . . . . . .23
4.7.3 Integrated heating circulation pump and
3-way-valve. . . . . . . . . . . . . . . . . . . . . . . . . . . . . .25
4.8 Temperature sensor. . . . . . . . . . . . . . . . . . . . . 25
4.8.1 Connecting the exterior temperature sensor
RoCon OT1. . . . . . . . . . . . . . . . . . . . . . . . . . . . . .25
4.9 Connect the gas line, check the burner
setting for gas type. . . . . . . . . . . . . . . . . . . . . . 26
4.9.1 Important instructions for gas connection . . . . . . .26
4.9.2 Connecting the gas line. . . . . . . . . . . . . . . . . . . . .26
4.9.3 Installing/removing the burner trim . . . . . . . . . . . .2
6
4.9.4 Checking the gas pre-installation . . . . . . . . . . . . .27
4.10 Optional connections . . . . . . . . . . . . . . . . . . . . 28
4.10.1 Mixer module RoCon M1 . . . . . . . . . . . . . . . . . . .28
4.10.2 Room control RoCon U1. . . . . . . . . . . . . . . . . . . .28
4.10.3 Internet Gateway RoCon G1. . . . . . . . . . . . . . . . 28
4.11 Filling the system . . . . . . . . . . . . . . . . . . . . . . 28
4.11.1 Check the water quality and adjust the pressure
gauge . . . . . . . . . . . . . . . . . . . . . . . . . . . . . . . . . 28
4.11.2 Filling the hot water heat exchanger . . . . . . . . . . 28
4.11.3 Filling the storage tank . . . . . . . . . . . . . . . . . . . . 28
4.11.4 Filling the heating system and the storage tank
charging circuit .
. . . . . . . . . . . . . . . . . . . . . . . . . 30
5 Start-up. . . . . . . . . . . . . . . . . . . . . . . . . . . . .31
5.1 Initial start-up. . . . . . . . . . . . . . . . . . . . . . . . . . 31
5.1.1 Requirements . . . . . . . . . . . . . . . . . . . . . . . . . . . 31
5.1.2 Checks before start-up . . . . . . . . . . . . . . . . . . . . 31
5.1.3 Start-up . . . . . . . . . . . . . . . . . . . . . . . . . . . . . . . . 31
5.1.4 After start-up . . . . . . . . . . . . . . . . . . . . . . . . . . . . 32
5.2 Checklists for start-up . . . . . . . . . . . . . . . . . . . 33
6 Control unit . . . . . . . . . . . . . . . . . . . . . . . . .34
6.1 Operating elements on the boiler control
panel . . . . . . . . . . . . . . . . . . . . . . . . . . . . . . . . 34
6.2 Replacing the operating section RoCon B1 . . 35
6.3 Changing the sensors . . . . . . . . . . . . . . . . . . . 35
6.3.1 Changing the flow temperature sensor / return
temperature sensor and pressure sensor . . . . . . 36
6.3.2 Changing the internal mixer sensor for heating
support (only GCU compact 5xx) . . . . . . . . . . . . 36
6.3.3 Changing the storage tank temperature sensor . 37
7 Gas burner . . . . . . . . . . . . . . . . . . . . . . . . . .38
7.1 Structure and brief description . . . . . . . . . . . . 38
7.2 Safety function . . . . . . . . . . . . . . . . . . . . . . . . 39
7.3 Burner setting . . . . . . . . . . . . . . . . . . . . . . . . . 39
7.3.1 Setting values . . . . . . . . . . . . . . . . . . . . . . . . . . . 40
7.3.2 Establishing access to the burner . . . . . . . . . . . . 40
7.3.3 Checking and setting the burner . . . . . . . . . . . . . 40
7.3.4 Starting problems - calibrate the firing unit,
starting output burner blower and setting the
gas volume . . . . . . . . . . . . . . . . . . . . . . . . . . . . . 41
7.3.5 Setting ignition and Ionisation electrodes . . . . . . 43
7.4 Dismantling the burner . . . . . . . . . . . . . . . . . . 43
8 Hydraulic connection . . . . . . . . . . . . . . . . .45
8.1 Hydraulic system connection . . . . . . . . . . . . . 45
9 Service and maintenance . . . . . . . . . . . . . .47
9.1 General overview of service and maintenance 47
9.2 Service and maintenance tasks . . . . . . . . . . . 47
9.2.1 Checking the connections and pipes. . . . . . . . . . 47
9.2.2 Checking and cleaning the condensate drain. . . 47
9.2.3 Checking and cleaning the burner. . . . . . . . . . . . 48
10 Faults and malfunctions . . . . . . . . . . . . . . .49
10.1 Troubleshooting . . . . . . . . . . . . . . . . . . . . . . . 49
10.2 Overview of possible malfunctions . . . . . . . . . 49
10.3 Fault codes . . . . . . . . . . . . . . . . . . . . . . . . . . . 51
10.4 Rectifying burner faults and STB faults. . . . . . 53
10.5 Emergency operation . . . . . . . . . . . . . . . . . . . 54
10.5.1 Parallel operation . . . . . . . . . . . . . . . . . . . . . . . . 54
11 Taking out of service. . . . . . . . . . . . . . . . . .55
11.1 Temporary shutdown . . . . . . . . . . . . . . . . . . . 55
11.2 Final shutdown and disposal. . . . . . . . . . . . . . 55