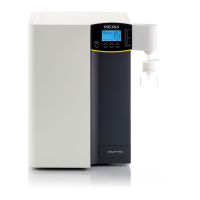
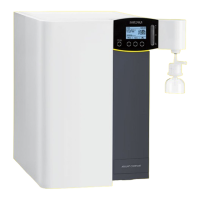
Unpacking
Remove arium 611VF from its
packaging. You will find the
accessories inside the arium
housing and in the top cover
of the packing. The equipment
supplied includes the following
parts:
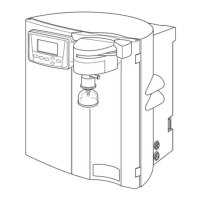
Display|Dispenser Unit Installation
The Display|Dispenser unit has
been designed to mount in 3 ways:
At the top of the right door for
bench systems, at the bottom of the
right door for wall mount systems
or in a remote location from the
system (additional kit required).
To install:
• If necessary, remove the rubber
cover mounted at the bottom of
the right door (for wall mounting).
• Route the supply cables through
the large opening of the right door
(top or bottom) and the two water
tubes from the outside through the
small opening.
• Use the 4 screws and washers
provided to mount the Display|
Dispenser Unit to the door by
routing the screws from inside the
door through the holes in the door
to the outside and screw to the
assembly.
• Route the water tubing through the
4 holes inside the door and connect
to the color coded connectors.
Follow the course of dotted lines
in the figure:
Positions (1) and (3): data and
power cables
Positions (2) and (4): water tubes
• Put rubber cover into the remaining
hole (top or bottom) in the door.
8
Unpacking and Installation
Part Description Number
arium 611VF 1
Dispenser unit with display 1
Screws and washers for the Display|Dispenser unit 4
Blue cover with manufacturer's label (VF) 1
Blue cover with model name of arium (for dispenser unit) 1
Ultrafilter cartridge 1
Reject water tubing 1
Tubing adapter for inlet water (1”, English and 4”, NPT) 2
Tube for inlet water with quick disconnect insert 1
Adapter with O-ring for cartridge pack 1
End cap for the sanitization syringe adapter 1
Sanitization syringe 1
Wall mounting bracket 1
Power cord 1
Installation and operation manual 1
Timed Dispense Tube, PE 4 inch OD X 8 feet 1
Tubing adapter, 4 inch OD tube to 4 NPT 1
Note
The cartridge packs are supplied
separately. They are not included
in the arium system packaging.
 Loading...