X
X
-
-
M
M
i
i
n
n
d
d
®
®
D
D
C
C
2
2
9
9
CAUTION
Check that the cable conduits are present in the timer installation wall; check the
compliance of the power supply with the installation specifications
(refer to §.4 “INSTALLATION SPECIFICATIONS”).
CAUTION
Check that the rating data match the power supply voltage.
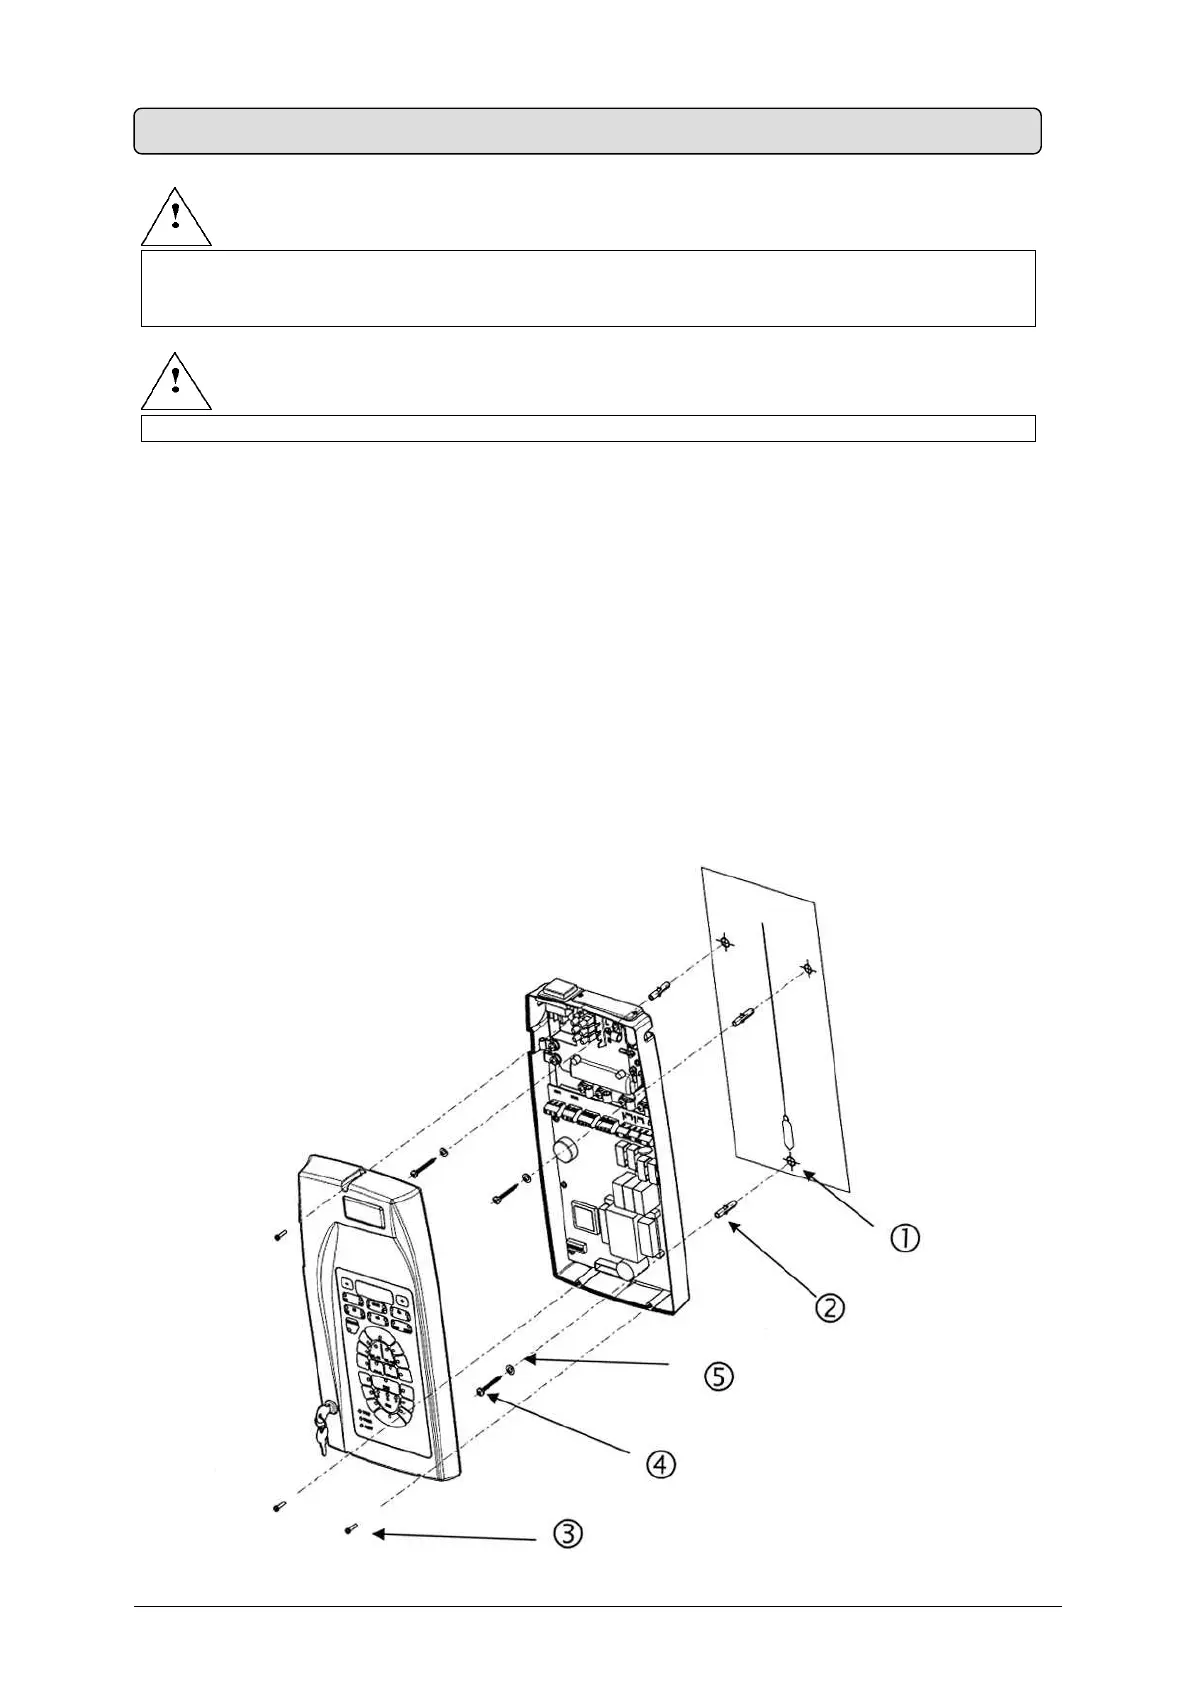
ASSEMBLY INSTRUCTIONS (Fig. 20)
1. Take the timer out of the packaging (refer to Fig. 5)
2.
Take out the drilling template
3. Mark the anchor holes on the wall using the drilling template
4. Drill using a Ø3mm bit, then drill again with a Ø6 mm bit to prevent any flaking of the
white coat
5.
Insert the three screw anchors provided into the holes
6.
Open the timer by unscrewing the three screws
5.8 ASSEMBLING THE “X-Mind
DC” TIME
Fig. 2