SawStop 10” Professional Cabinet Saw 77
Adjusting Your Saw
The insert should slide easily into and out of the table opening, but should not be loose in the opening. If the
insert is too loose, use the included 3 mm hex key to turn the side and/or rear positioning screw(s) counter-
clockwise as needed to reduce the clearance between the insert and the table opening (see Fig. 112). If the
insert is too tight, turn the side and/or rear positioning screw(s) clockwise as needed to increase the clearance
between the insert and the table opening.
Making Adjustments to Your Saw
Adjusting the Table Insert
The SawStop
®
zero-clearance insert has been designed to fi t securely within the table opening and just below
the table top. The blade slot in the insert is pre-cut at the factory after all alignments to the saw have been
completed.
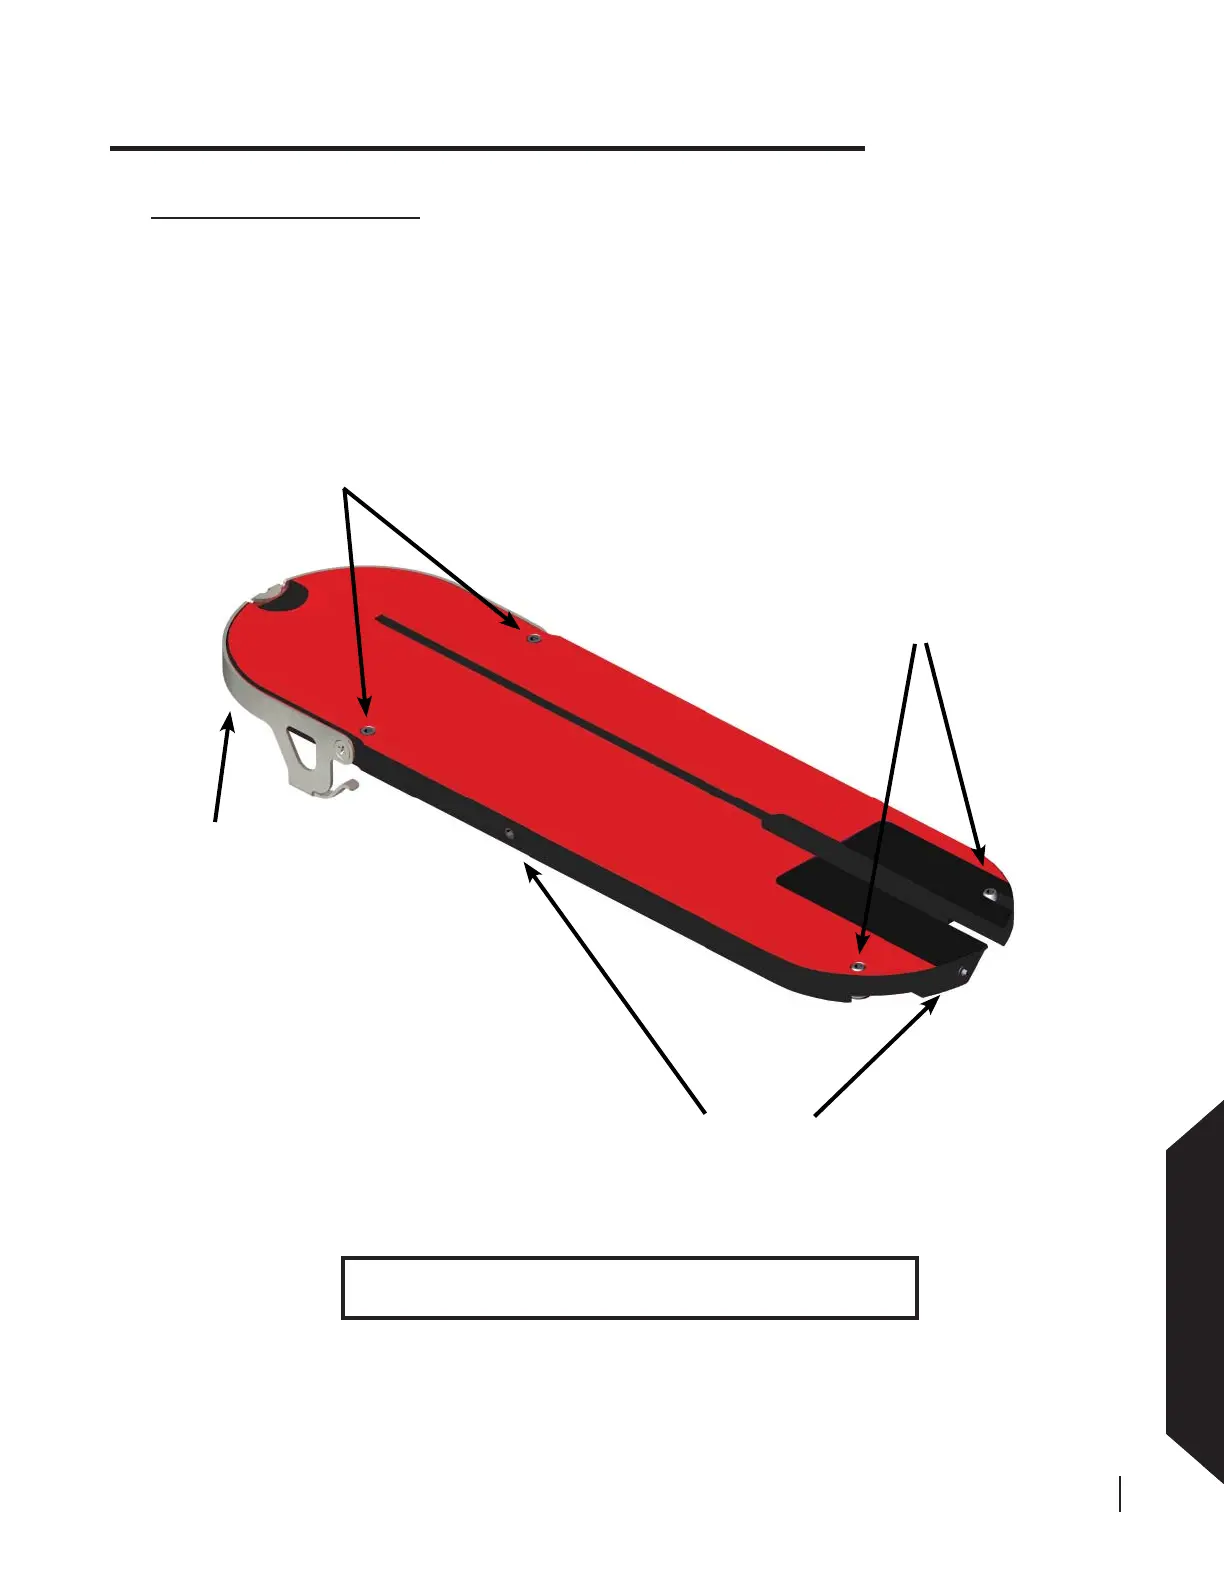
As shown in Fig. 112, the insert includes front and rear leveling screws to set the height of the insert. In
addition, positioning screws at the rear and right side of the insert prevent it from rattling in the table opening.
Finally, a lock-down lever at the front prevents the insert from rising unexpectedly.
positioning
screws
lock-down
lever
rear leveling
screws
front leveling
screws
WARNING! Always turn off the main power switch and unplug
the power cord before making any adjustments to your saw.
Fig. 112