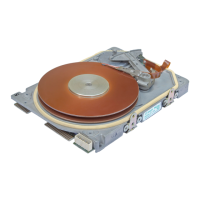
TRACK 0 SENSOR REMOVAL 9.3.5
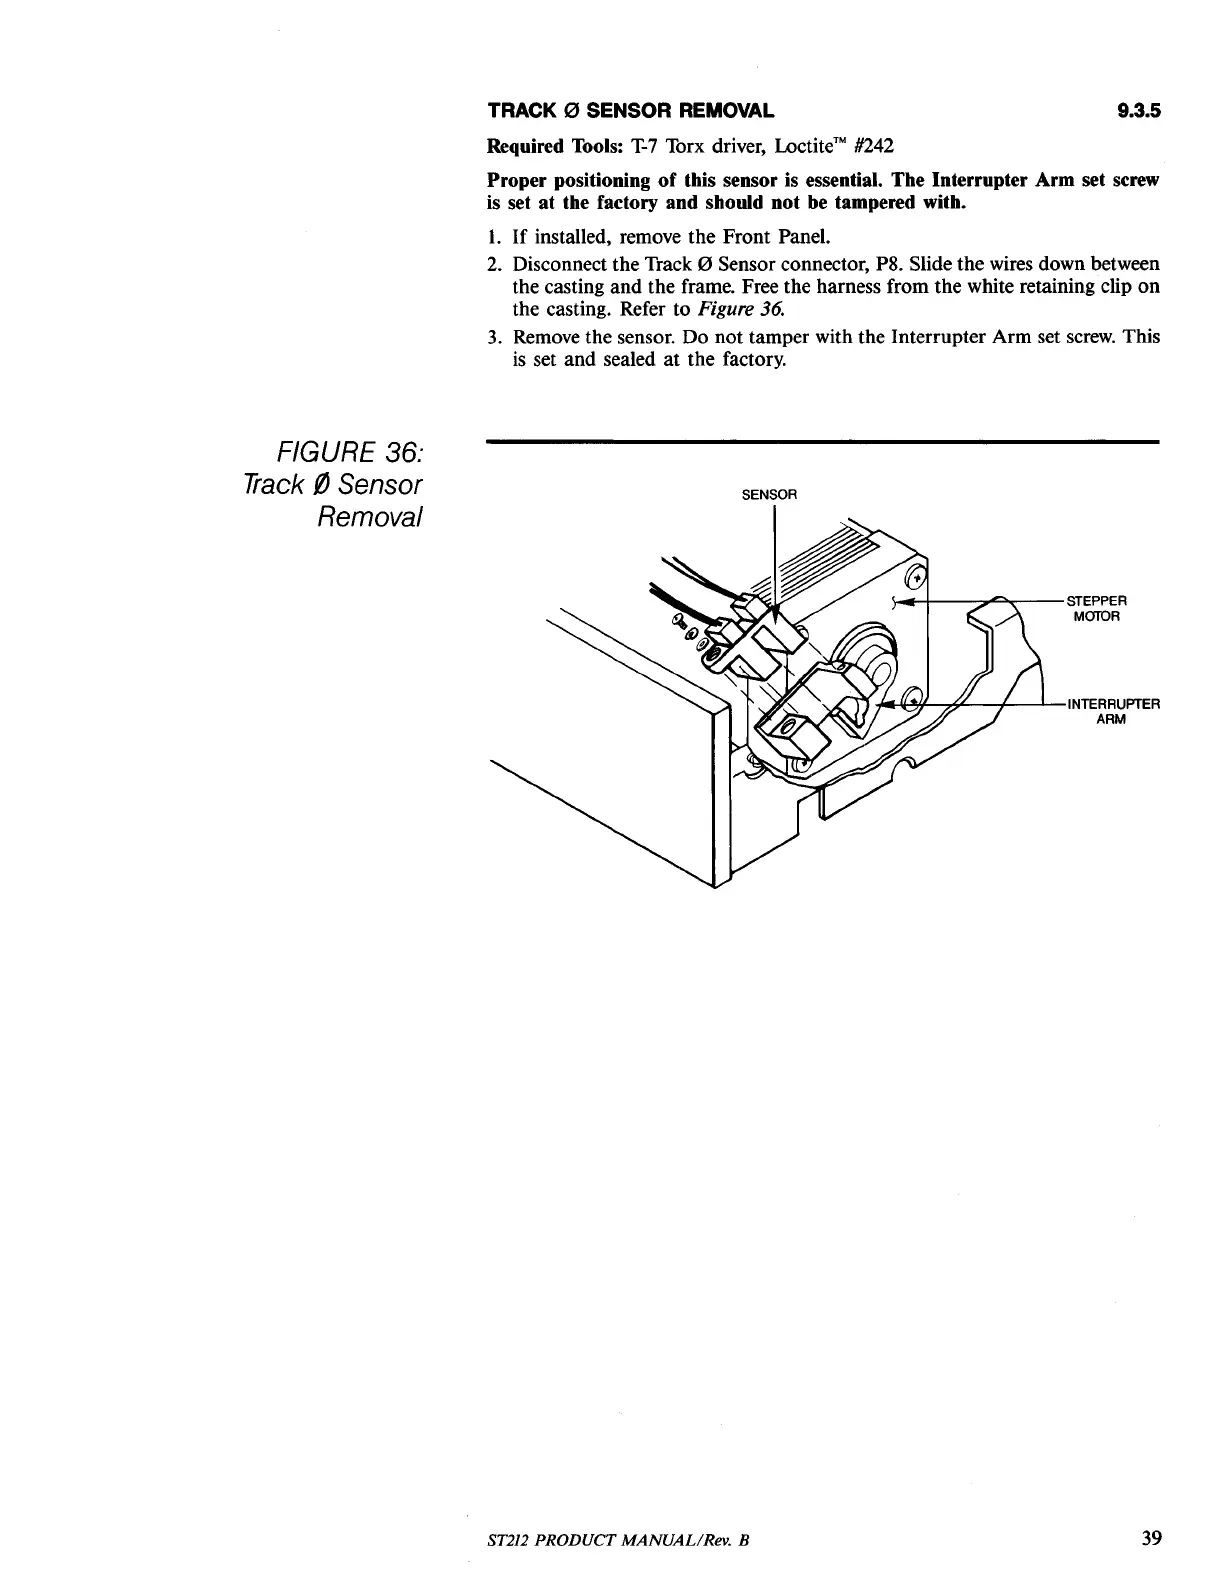
FIGURE 36:
Track
i1
Sens
or
Removal
Required Tools:
T-7
Torx driver,
Loctite™
#242
Proper positioning
of
this sensor is essential. The Interrupter Arm set screw
is set at the factory and should not be tampered with.
1.
If
installed, remove the Front Panel.
2.
Disconnect the Track 0 Sensor connector, P8. Slide the wires down between
the casting and the frame. Free the harness from the white retaining clip
on
the casting. Refer to Figure
36.
3.
Remove the sensor. Do not tamper with the Interrupter Arm set
screw.
This
is
set and sealed
at
the factory.
SENSOR
~-+----::o""""r--STEPPER
MaTOR
"'~f-.-.#--+-----JL--INTERRUPTER
ARM
ST212 PRODUCT MANUAL/Rev. B
39