Rostock MAX v2 User's Guide
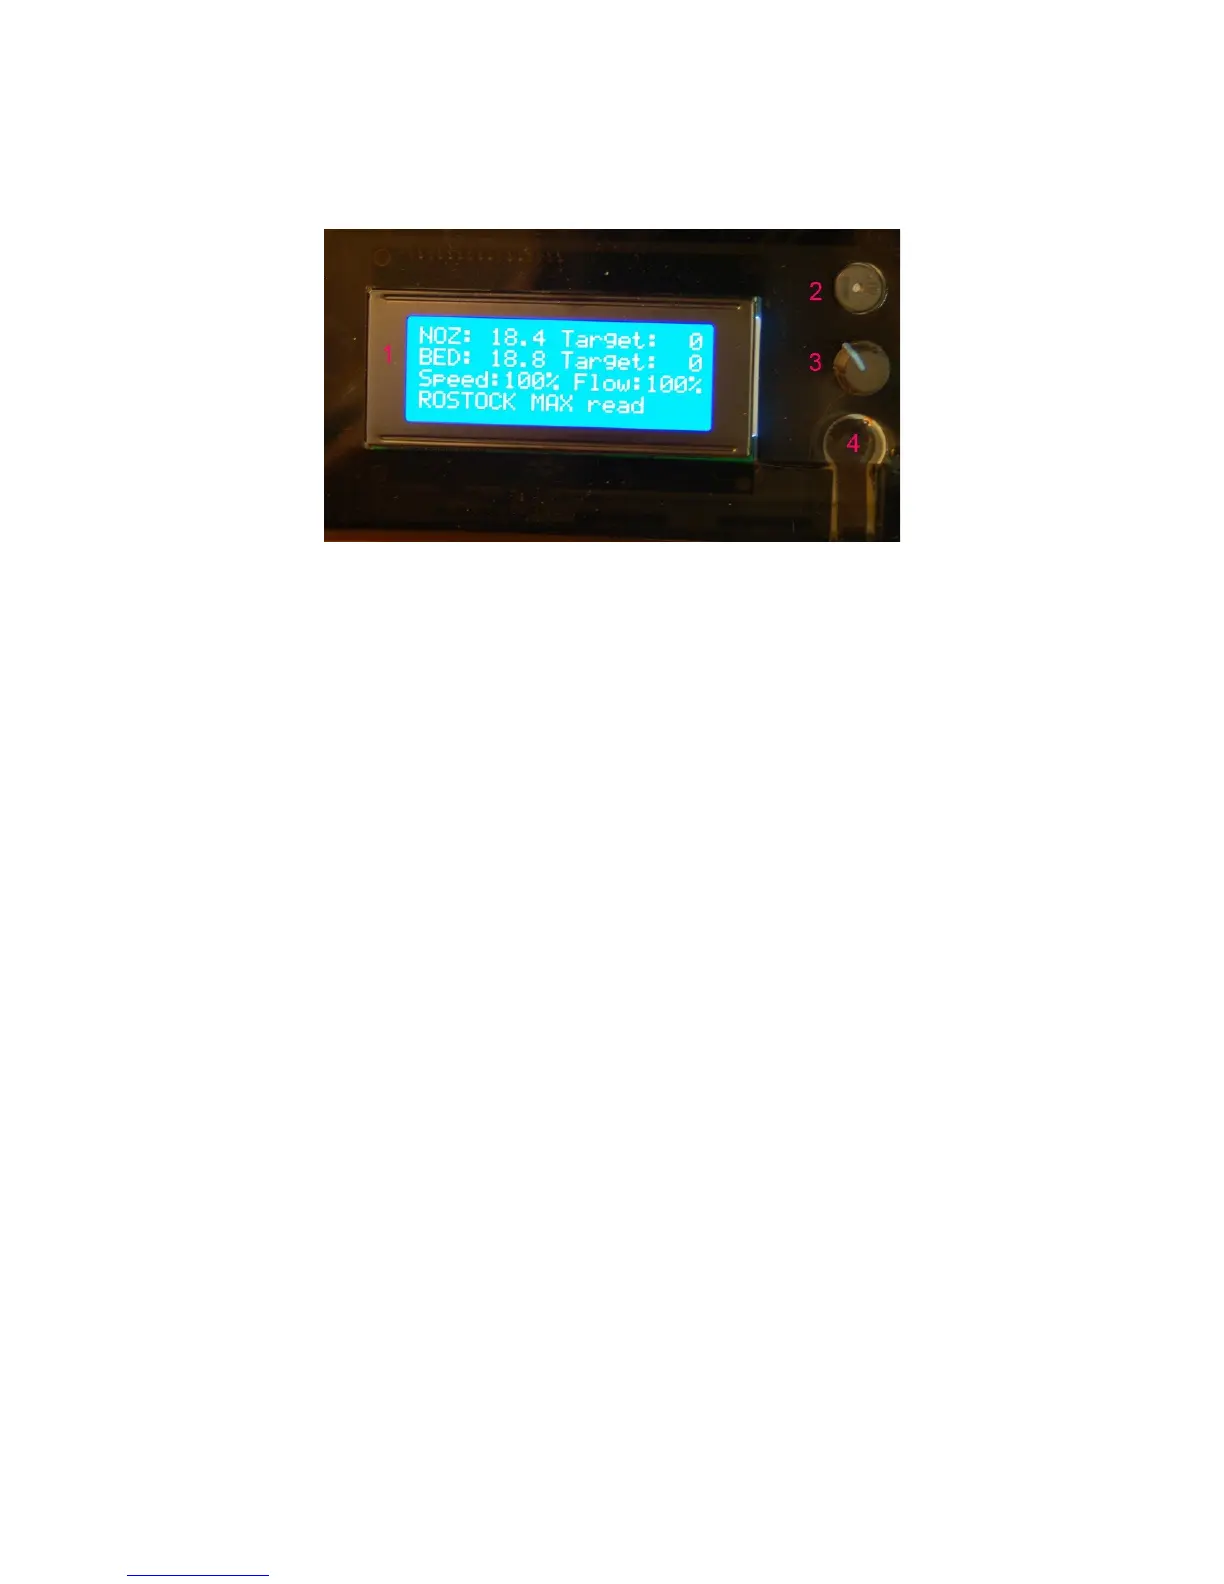
The front panel:
1. The LCD Display. (but you knew that, right?)
2. Beeper. That's it does. Beeps. (and beeps, and beeps and beeps...)
3. Input Controller. Turning the knob clockwise & counter clockwise is how you navigate
through the LCD menus. Pressing the button straight in acts similarly to a mouse click –
it selects the current menu item.
4. Emergency Reset Button. When you hit that button, a number of things are going to
happen. First, the RAMBo is going to turn off both the heat bed and the nozzle heaters.
Next, it's going to send all three Cheapskates to their “home” positions at the top of the
Rostock MAX v2 and then the RAMBo controller will reboot itself. If the printer is
really going nuts on you, this is the second fastest way to make it behave. (The first is to
turn the power off!)
Note that in order to operate the reset button, you need to press hard. You'll hear it
click, but that's kind of deceptive. The button doesn't close until more force is applied to
the little reset button arm. It is somewhat of a safety feature to prevent accidental resets
during a print job.
1 – Driver and Software Installation - 14
Fig. 1.6-2: The Front Panel.