Installing the sensor cable
FlexZone Product Guide Page 49
1. Cut the armored cable 53 cm past the specified location of the cable termination.
2. Prepare the sensor cable for termination.
Figure 56: Using the supplied bushings to protect FlexZone sensor cable
Figure 57: Cutting armored sensor cable for terminations
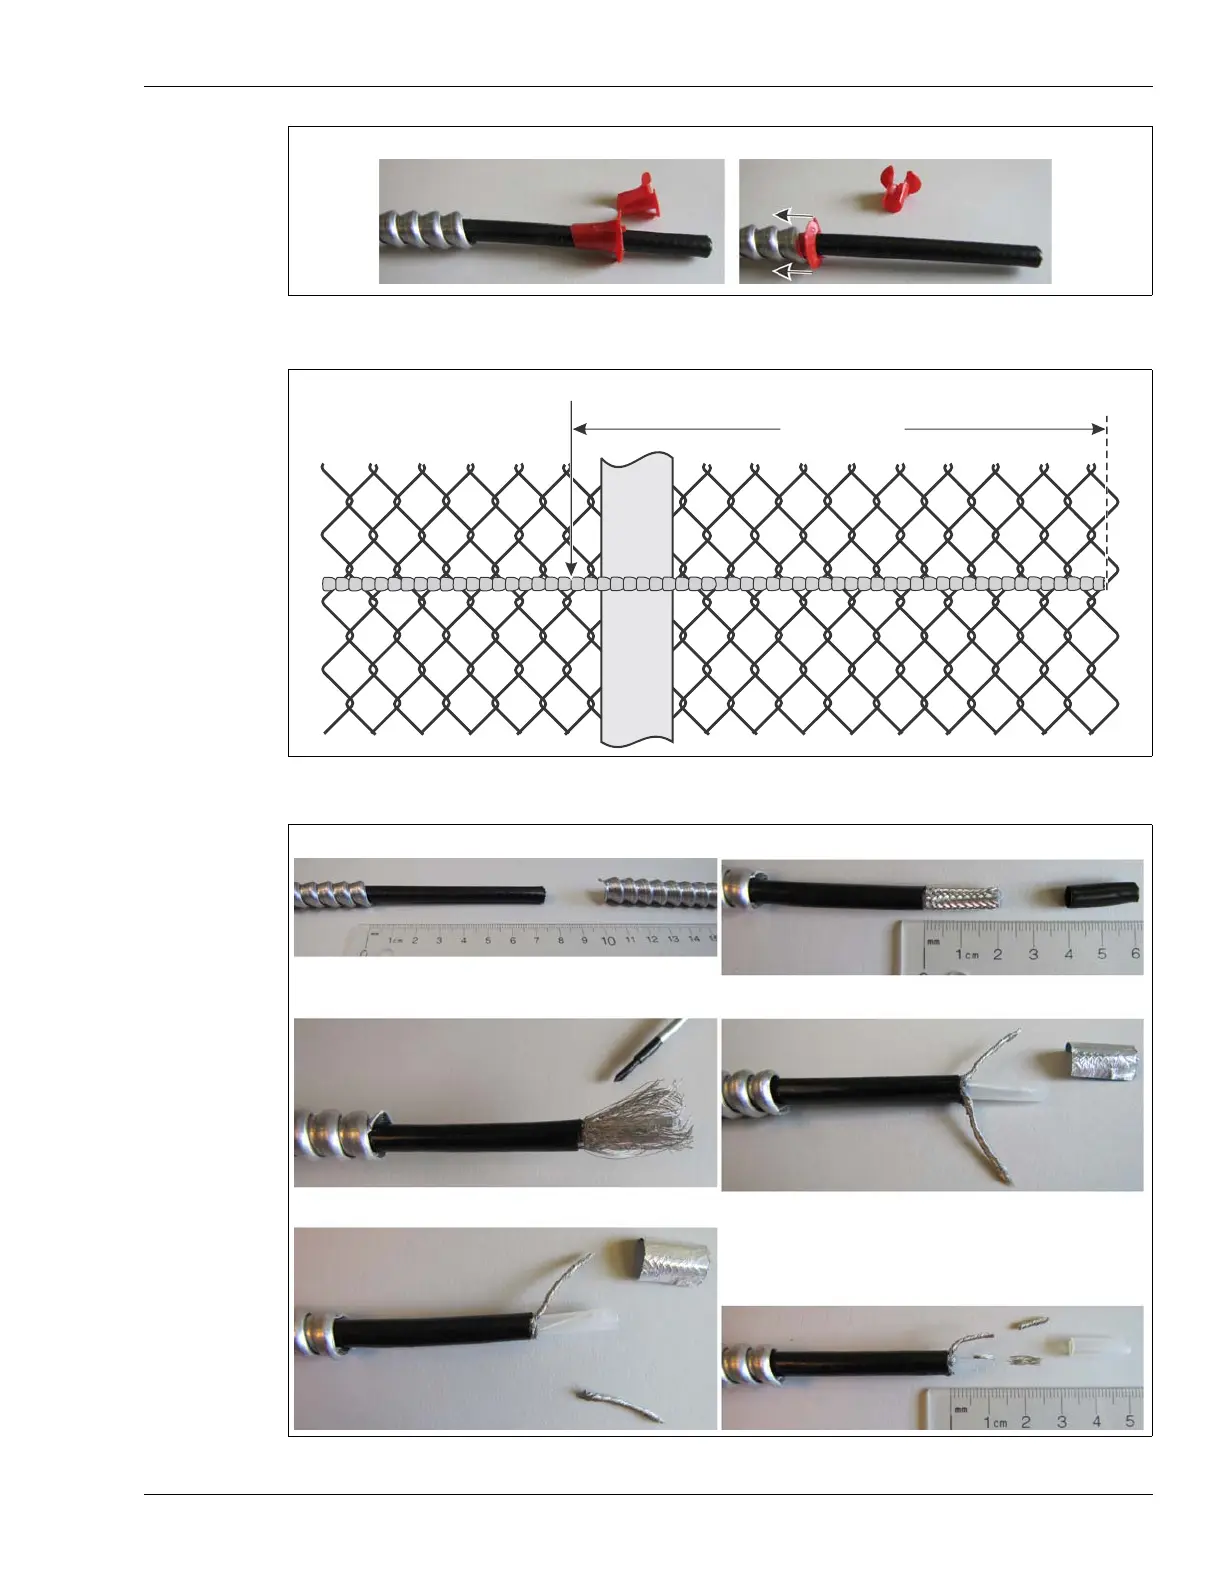
Figure 58: Armored cable preparation for terminations
Fit the protective bushing over the cable and slide it under the armor to protect the sensor cable.
termination location
cut location
53 cm
(21 in.)
a. Carefully, remove 7.5 cm (3 in.) of the metal jacket. b. Remove 2 cm (0.8 in.) of the black jacket.
c. Separate the strands of the braided shield.
d. Tightly twist the strands of the braided shield into two
separate conductors. Remove the exposed foil shield.
f. Trim the clear tube back to a length of 5 mm (0.2 in.).
Trim the center conductor and twisted shield to a
length of 6 mm (¼ in.) past the end of the clear tube.
e. Trim off the lower shield/conductor
(leave no loose strands).