Installing the FlexZone processor
FlexZone Product Guide Page 51
9. Insert the protective grommet under the armor (see Figure 56: ).
10. Remove the terminal block and connect the sensor cable.
11. Plug the sensor cable into the appropriate connector (A Side or B Side) and tighten the nut on
the cable gland to secure the armored cable. There should be about 2.5 cm (1 in.) of armor
inside the enclosure.
12. Use a thin bead of silicone on the inside of the cable gland to seal the fitting.
Installing the FlexZone processor
Do not remove the processor circuit card when installing the enclosure. The processor is shipped
with two gear clamps that are used for securing the enclosure to a post. The hardware required to
mount the enclosure on another type of surface is customer supplied. Figure 62:
shows a fence-
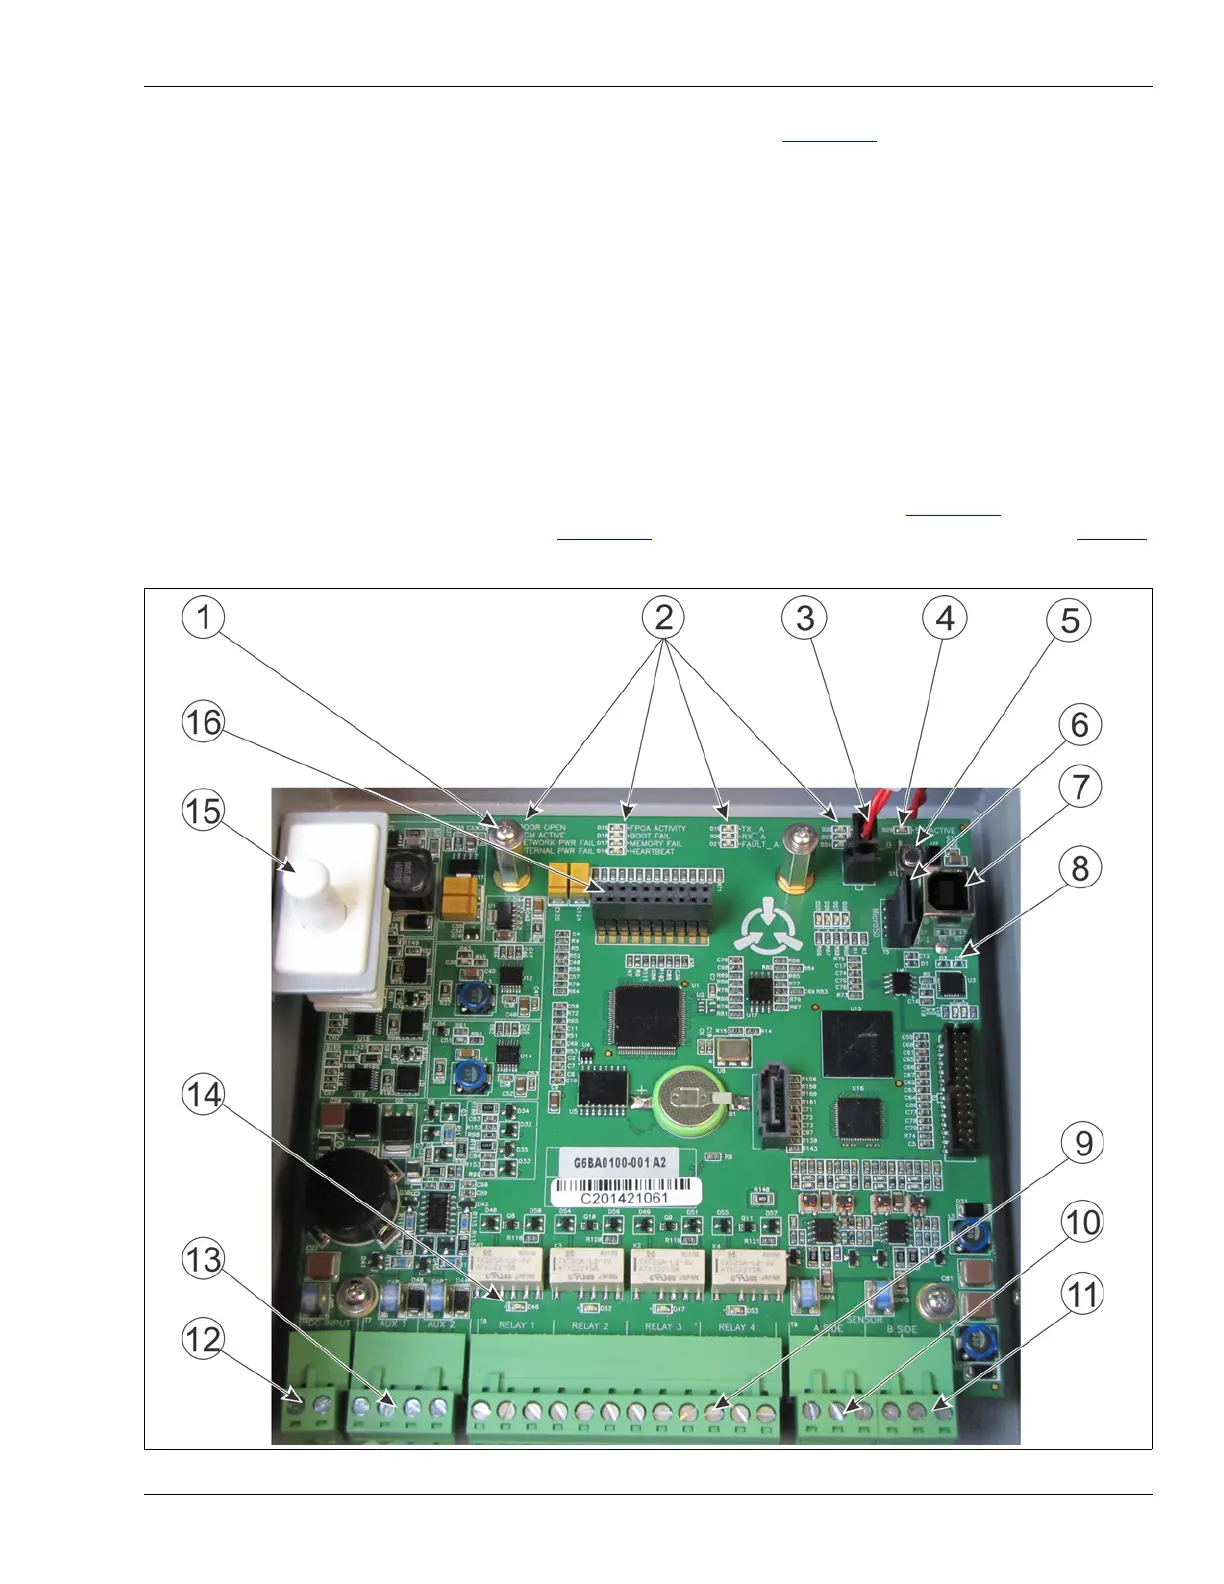
mounted FlexZone processor. Figure 60:
illustrates the FlexZone processor features and Table 1
includes feature descriptions.
Figure 60: FlexZone processor features