Processor calibration
Page 76 FlexZone Product Guide
The Sensitivity Profile procedure is best conducted with two people, one to cause the fence
disturbance and one to operate and monitor the UCM Profile window.
1. Establish a connection between the UCM and the processor.
2. Select the Side A Cfig tab and then select the Profile button.
3. Verify that the All radio button is selected, and then select the Record button to begin
recording the Sensitivity Profile for Side A.
4. At the start point of detecting cable for Side A, begin dragging the screwdriver along the fence
fabric.
5. Maintain consistent pressure and a steady pace and continue dragging the screwdriver along
the fence fabric near the sensor cable until reaching the end of the detecting cable.
6. Repeat this process, dragging the screwdriver from the end point back to the start point.
7. Select the Stop button to stop recording the Sensitivity Profile.
8. Review the Sensitivity Profile to verify that it was successful. Look for a reasonably flat
response that is somewhat lower near the end of the cable than at the beginning (typically a
20 dB drop over a 300 m cable).
9. Once you are satisfied with the profile, select the Update button to load the Sensitivity Profile
data. If the recorded Sensitivity Profile is not acceptable, select the Undo button and repeat
the profile procedure.
10. Close the Profile window and download the Sensitivity Profile data to the processor.
11. Repeat this procedure for the Side B sensor cable.
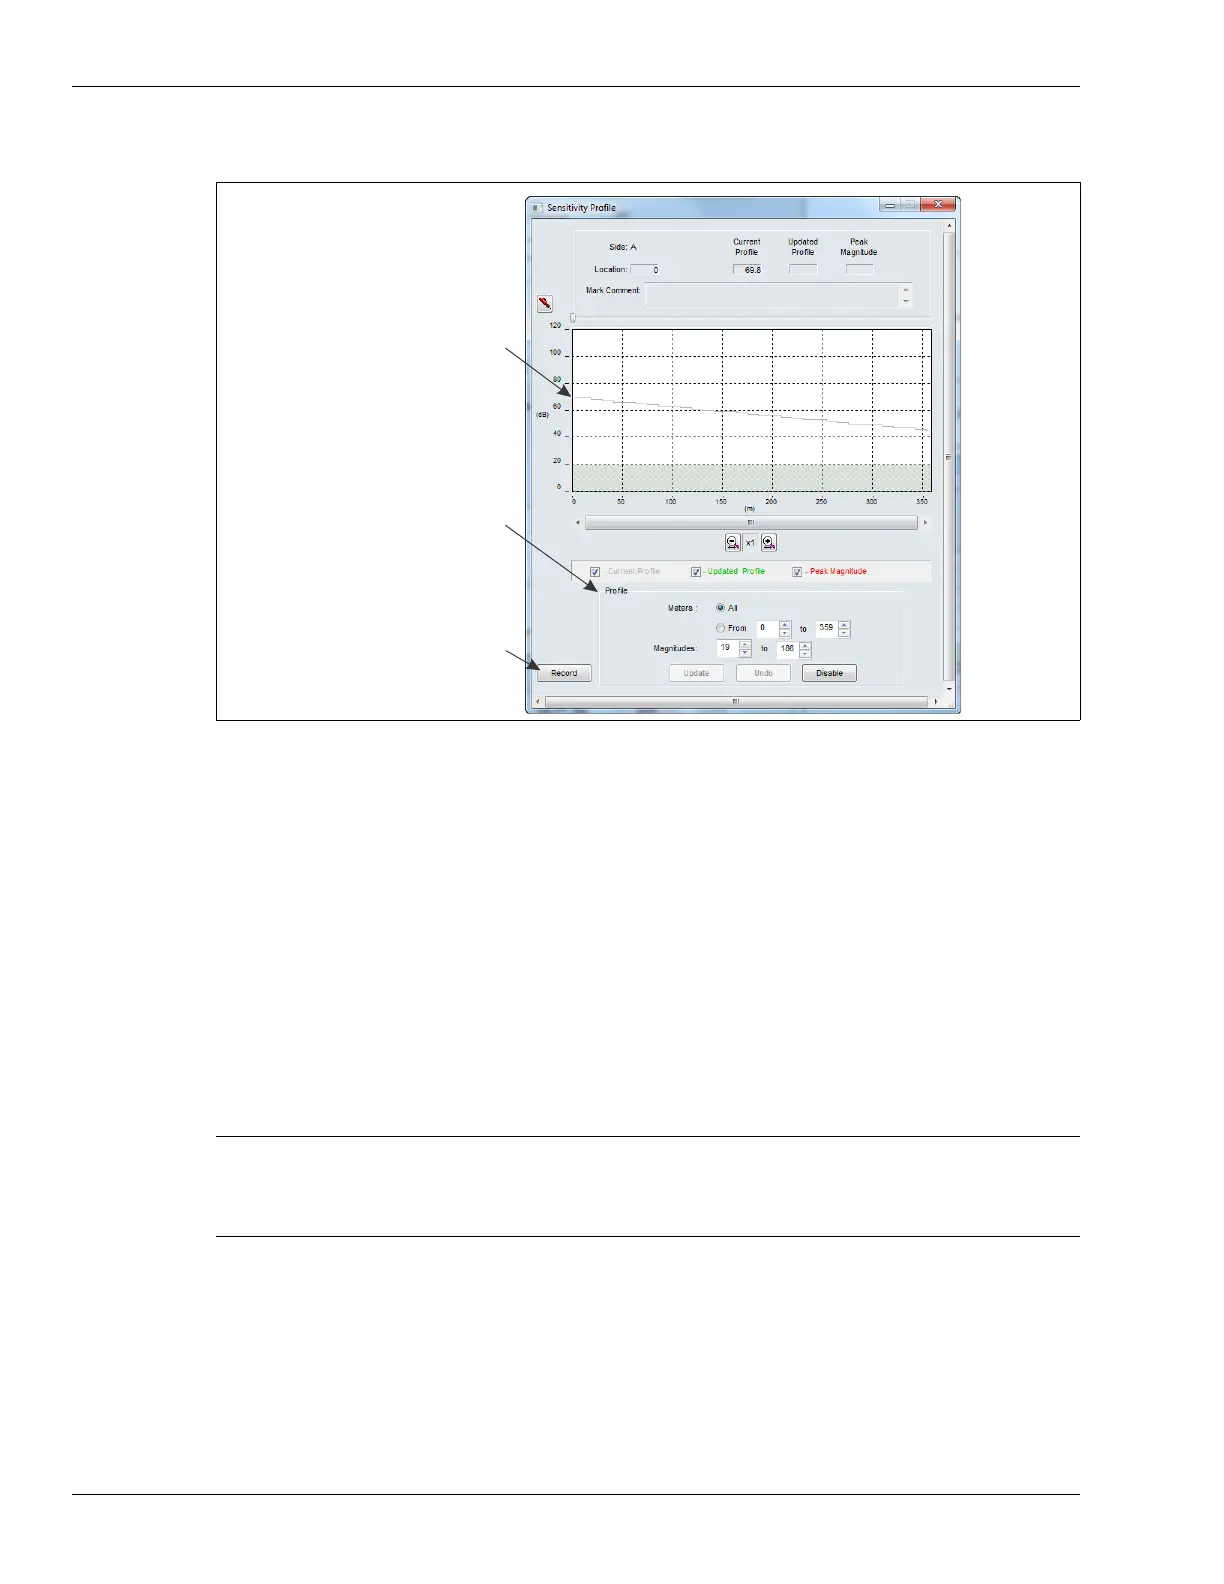
Figure 84: Sensitivity Profile
Note You can use the Disable function on the Profile window to trim out the
areas with low signal responses at the beginning and end of the
Sensitivity Profile by specifying the range of Meters and selecting the
Disable button.
raw sensitivity profile data
(gray line)
use the controls in the Profile field
select the Record button to start
recording the profile
(becomes Stop button while recording)
to setup the profile being recorded