2-71
PRINTING
4
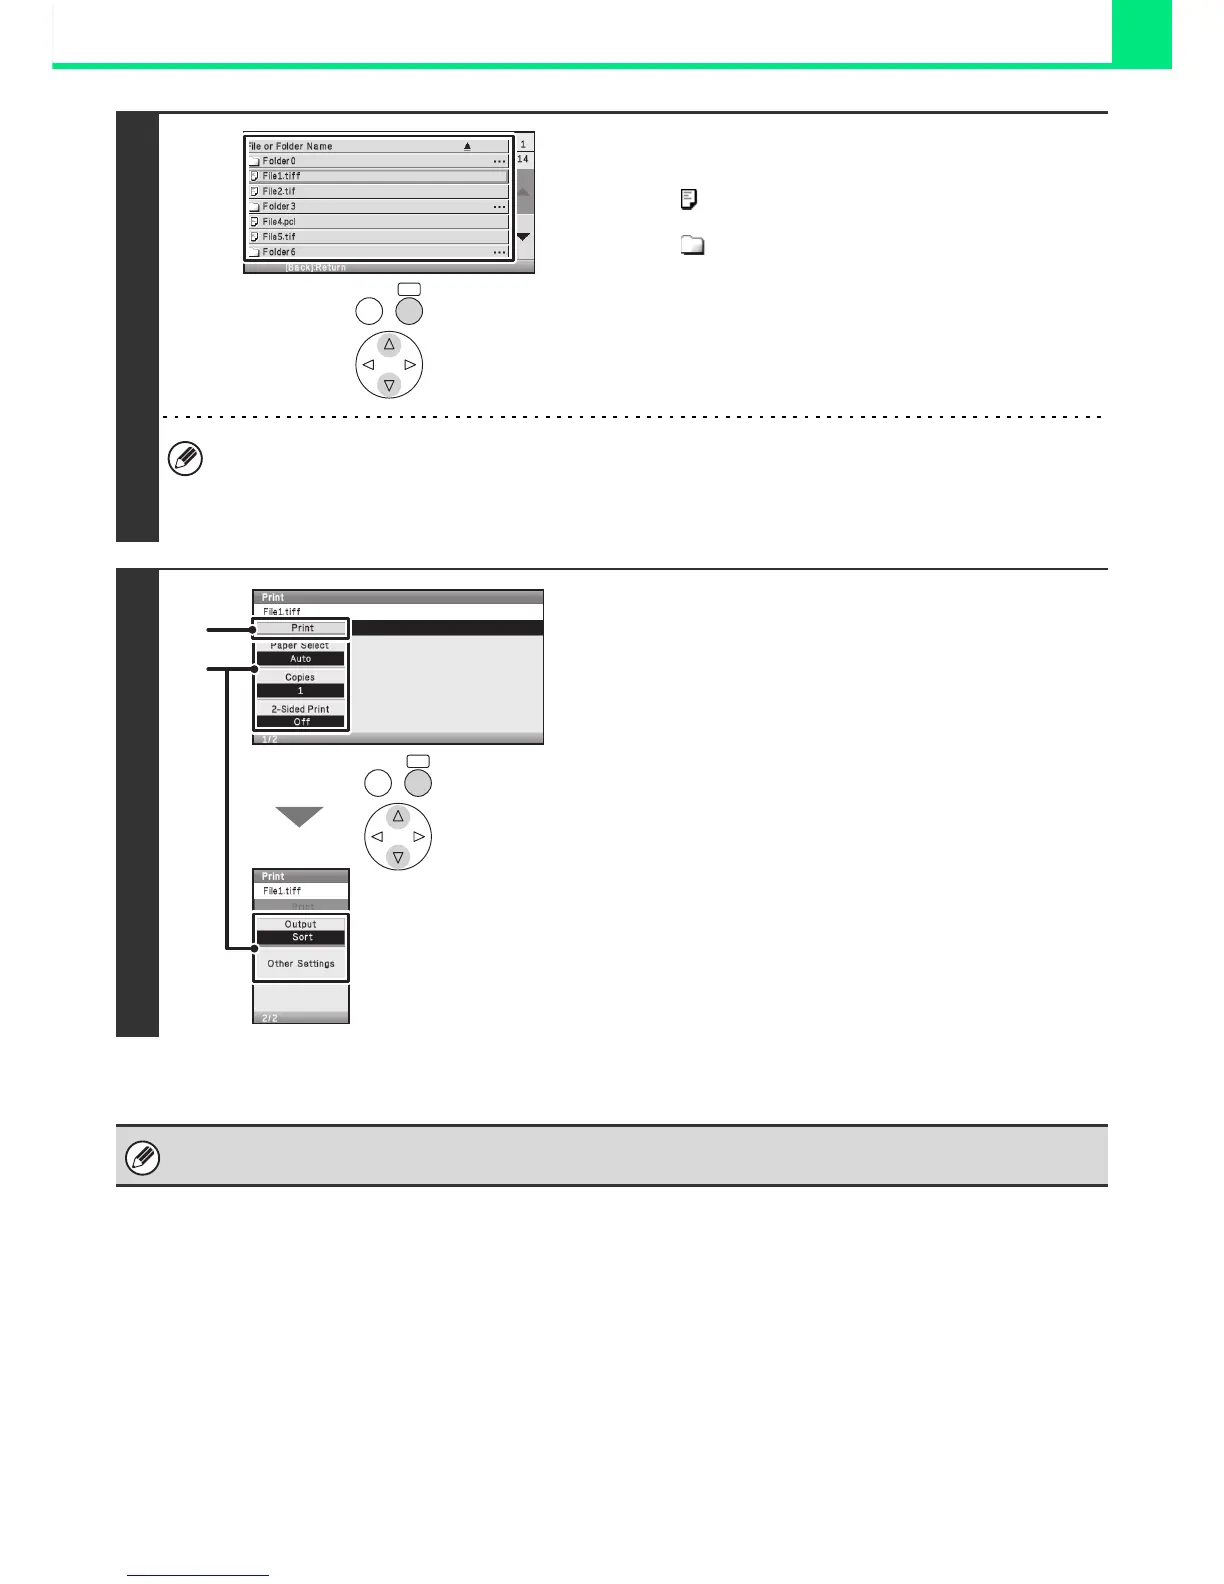
Select the key of the file that you wish to
print.
• The icon appears to the left of keys of files that can be
printed.
• The icon is displayed to the left of keys of folders on the
FTP server. To display the files and folders in a folder, select
the key of the folder.
• A total of 100 keys of files and folders can be displayed.
• Press the [BACK] key to move up one folder level.
• Select the [File or Folder Name] key and press the [OK] key to change the order of the files and folders displayed on
the screen. The order switches between ascending order and descending order each time you press the [OK] key.
5
Print the selected file.
(1) Select print conditions.
If you selected a file (PCL, PS, or XPS) in step 4 that
includes print settings, the settings will be applied.
(2) Select the [Print] key.
Printing begins. When the message appears in the
display, select the [OK] key.
When you select a PDF file that has a password, you must enter the password in the job status screen to begin printing.
☞ PRINTING AN ENCRYPTED PDF FILE (page 2-81)
OKBACK
OKBACK
(2)
(1)