1-61
BEFORE USING THE MACHINE
3
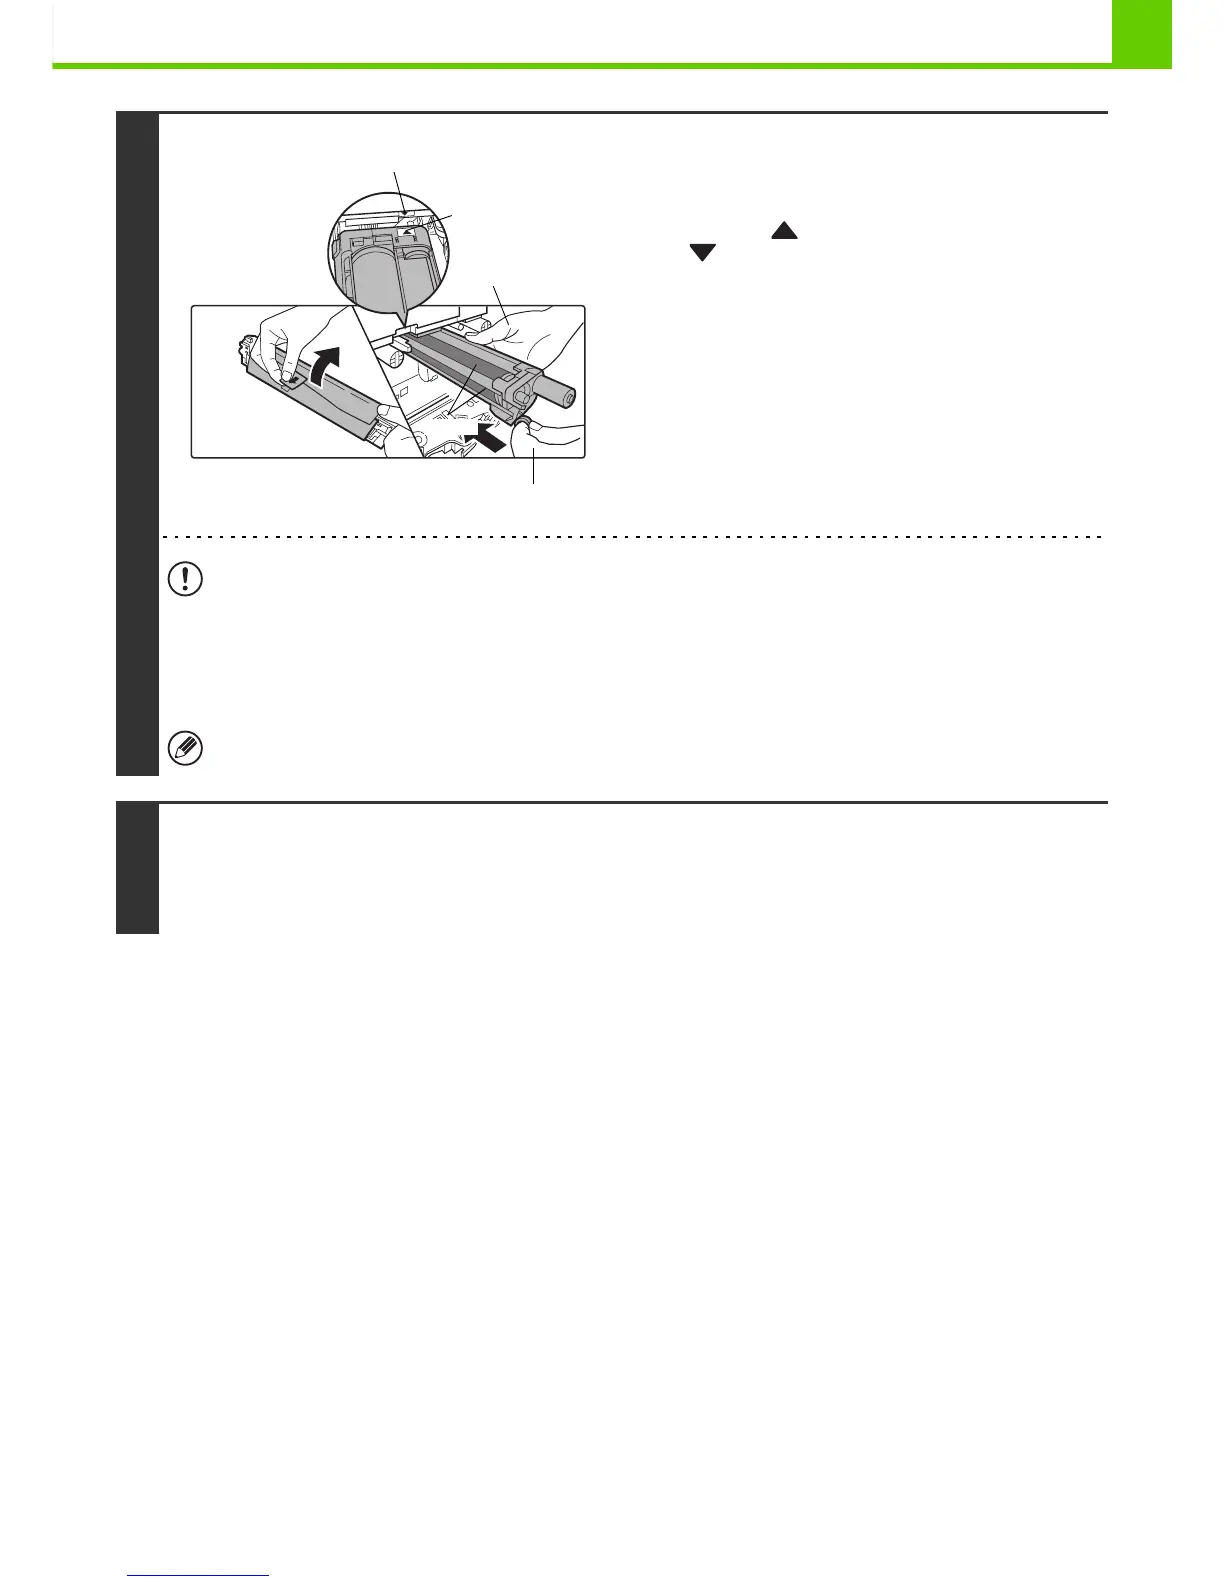
Remove the protective material from the
drum cartridge and slowly insert the
drum cartridge along the guides.
Make sure that the mark on the drum cartridge is aligned
with the mark on the machine as you insert the drum
cartridge.
• To remove the protective material, slowly pull it straight out so that it does not tear.
• When installing the drum cartridge, do not touch or damage the drum. This may cause a failure.
• After removing the protective material, immediately insert the drum cartridge in the machine. Do not allow the drum
cartridge to be directly exposed to sunlight or electric light.
• Do not tilt the drum cartridge or insert it in the wrong direction or orientation. This may damage the drum cartridge or
cause a failure.
Make sure that the colours on the new drum cartridge and the insertion label match.
4
Replace the developer cartridge and toner collection container, close the front
cover of the machine, and turn on the power.
For the procedure for replacing the developer cartridge and toner collection container, see steps 7 to 8 and steps 10 to 11 of
"REPLACING THE DEVELOPER CARTRIDGE" (page 1-55).
Drum
Drum cartridge alignment
mark on machine
Drum cartridge
alignment mark
Right Hand
Left Hand