Appendix C Adjusting Methods
Mobile DaRt Installation Manual
C-viii
C.5 Checking the X-ray exposure
Preparation
1. Confirm the power plug has been disconnected.
2. Set the DIPswitch SW3-8 on the NEXSC board ON. (Adjustment mode)
3. Set the DIPswitch SW2-5 on the NEXSC board ON. (Measurement display
mode)
4. Confirm there are no short-wire between check pins on the XCONT board.
5. Turn the main breaker ON.
Confirmation of ready operation
1. Turn ON the key switch.
2. Confirmthatthecollimatorlampcomesonbyperformingthecollimatorlamp
lightingoperation.
3. PerformingREADYoperation,confirmthattheanodeofX-raytubeisrotating
andtheexposure-readylampcomesonwithinapproximately3seconds.
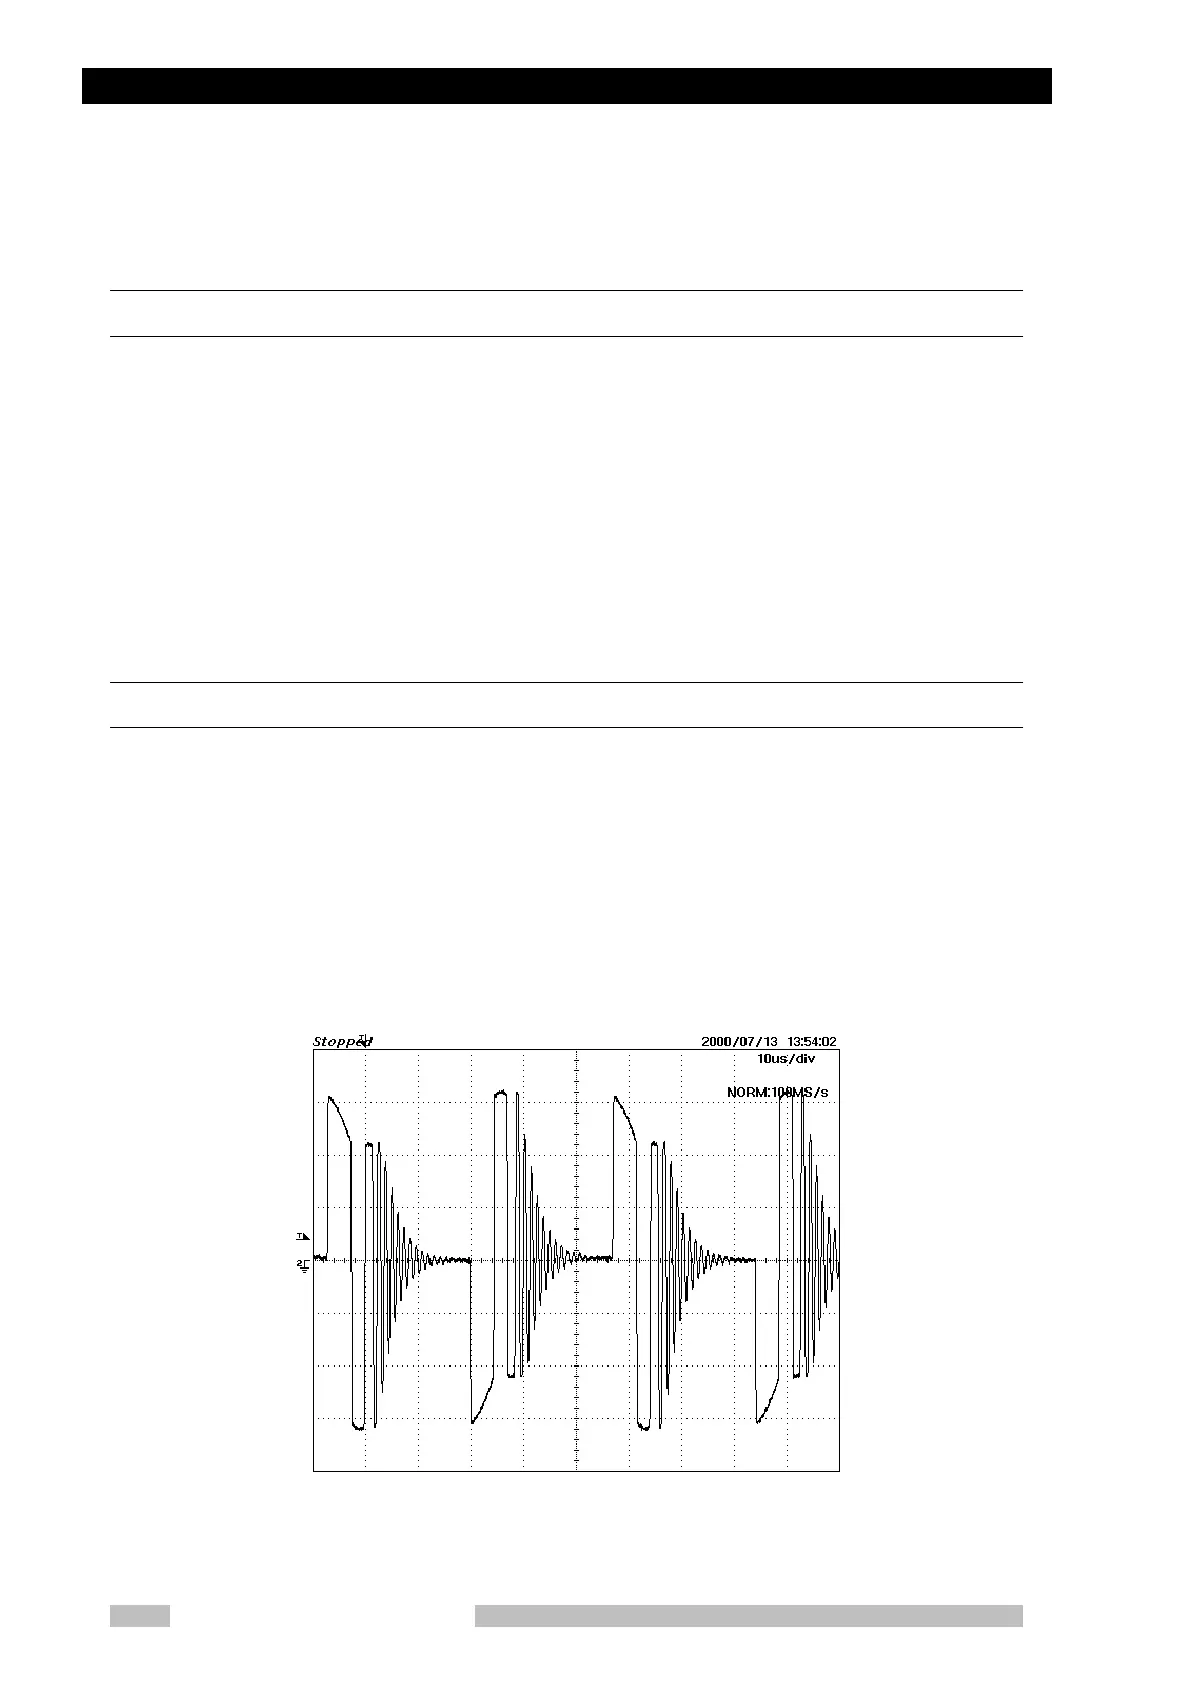
4. DuringREADYoperation,checkthewaveformoffilamentheatingvoltage
betweenCP2[CO]andCP1[CL]onINVERTERUNITboard.
Fig. 4 Waveform between CP1[CL]–CP2[C0]onthe INVERTER UNITboard
100V
div
 Loading...