Shure Incorporated
26/86
1.
2.
3.
•
•
•
1.
Ceiling Tile:
Important: Use large fender washers or a large metal plate on the back side of the ceiling tile to support the weight of the ac
cess point.
Mark and drill pilot holes for the screws and cable entrance using the mounting bracket as a template.
Mount the bracket to the ceiling using #6 (3.5 mm) screws (not included).
Pull the cable through the hole to connect it to the access point, and mount the access point to the bracket.
Tripod:
Use an adapter to bolt the mounting bracket to a microphone stand or tripod.
Networked Charging Station Installation
The screws for attaching the mounting brackets to the charger are provided. Screws for securing the charger to another sur
face are not included.
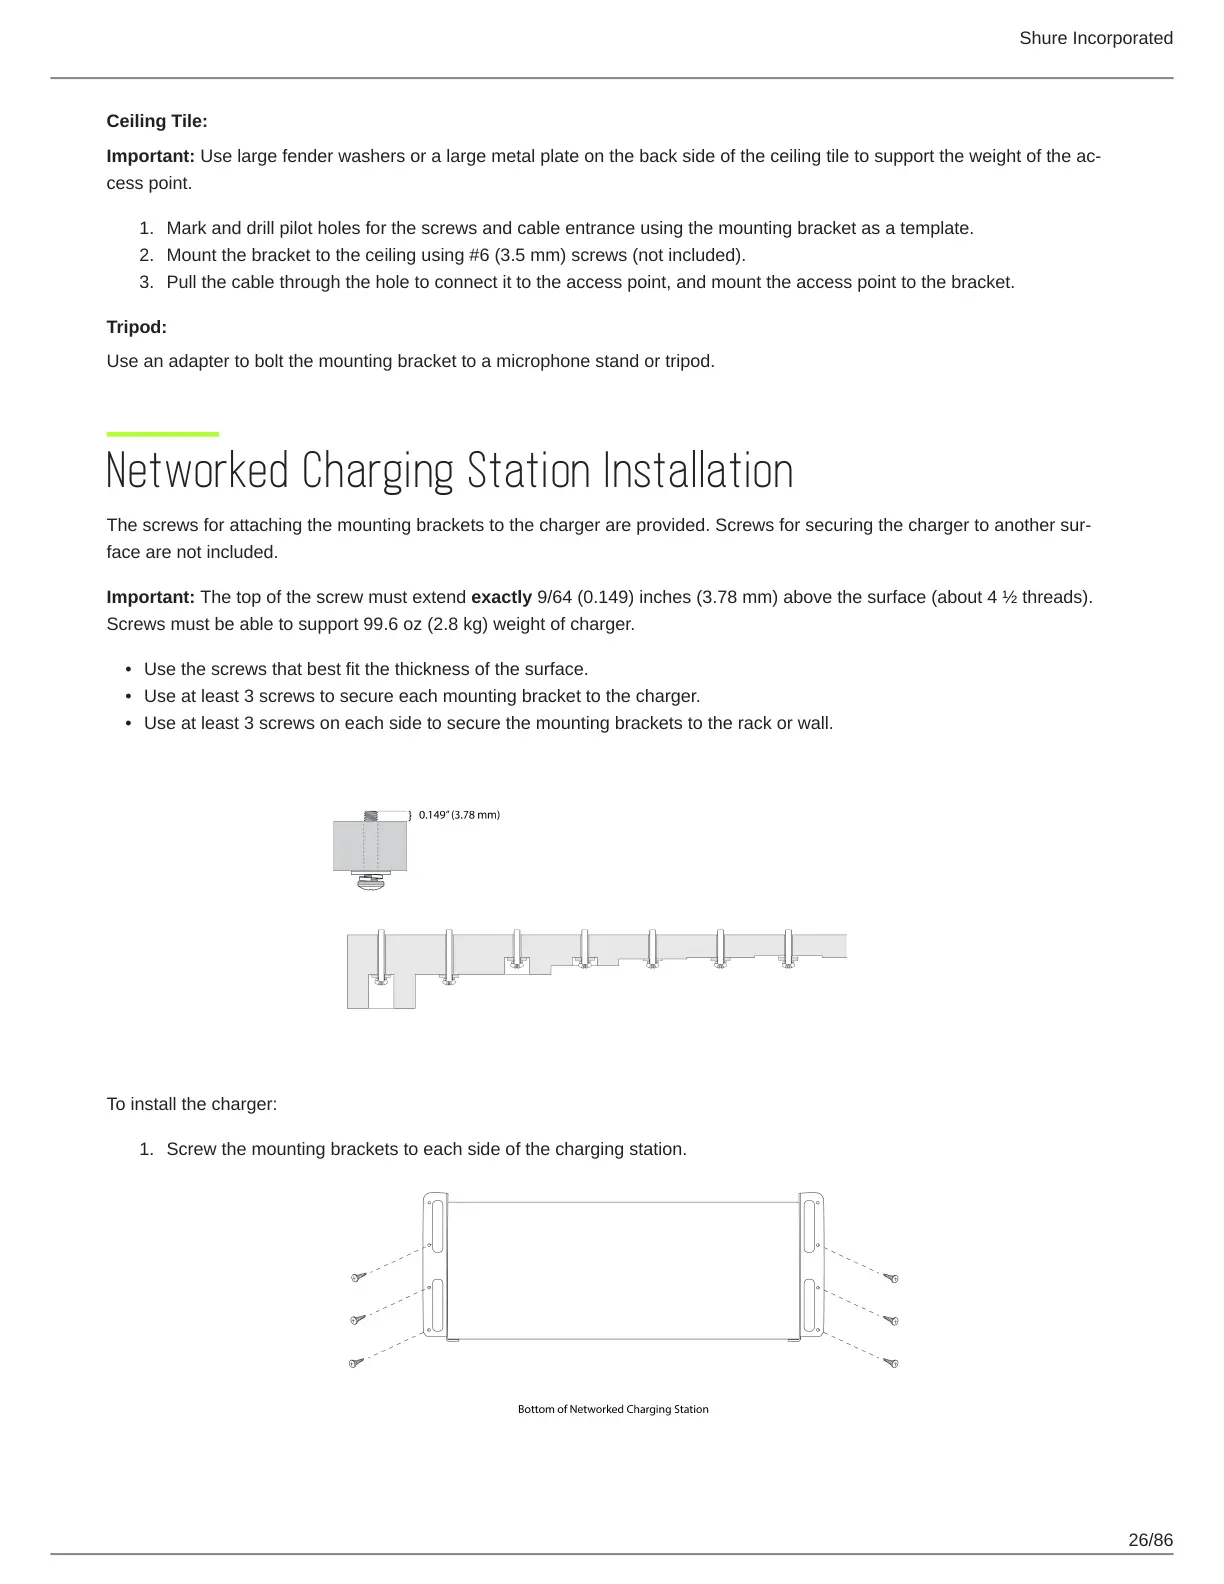
Important: The top of the screw must extend exactly 9/64 (0.149) inches (3.78 mm) above the surface (about 4 ½ threads).
Screws must be able to support 99.6 oz (2.8 kg) weight of charger.
Use the screws that best fit the thickness of the surface.
Use at least 3 screws to secure each mounting bracket to the charger.
Use at least 3 screws on each side to secure the mounting brackets to the rack or wall.
To install the charger:
Screw the mounting brackets to each side of the charging station.