656 234 2010-11-22| Sicam srl società unipersonale
Maintenance | SBM V655 | 45 en
11.3.3 Calibrating the electronic vernier caliper/
gauge arm
i Follow the instructions shown on the monitor.
1. Start calibration in the calibration menu. Press <F4>
and <OK>.
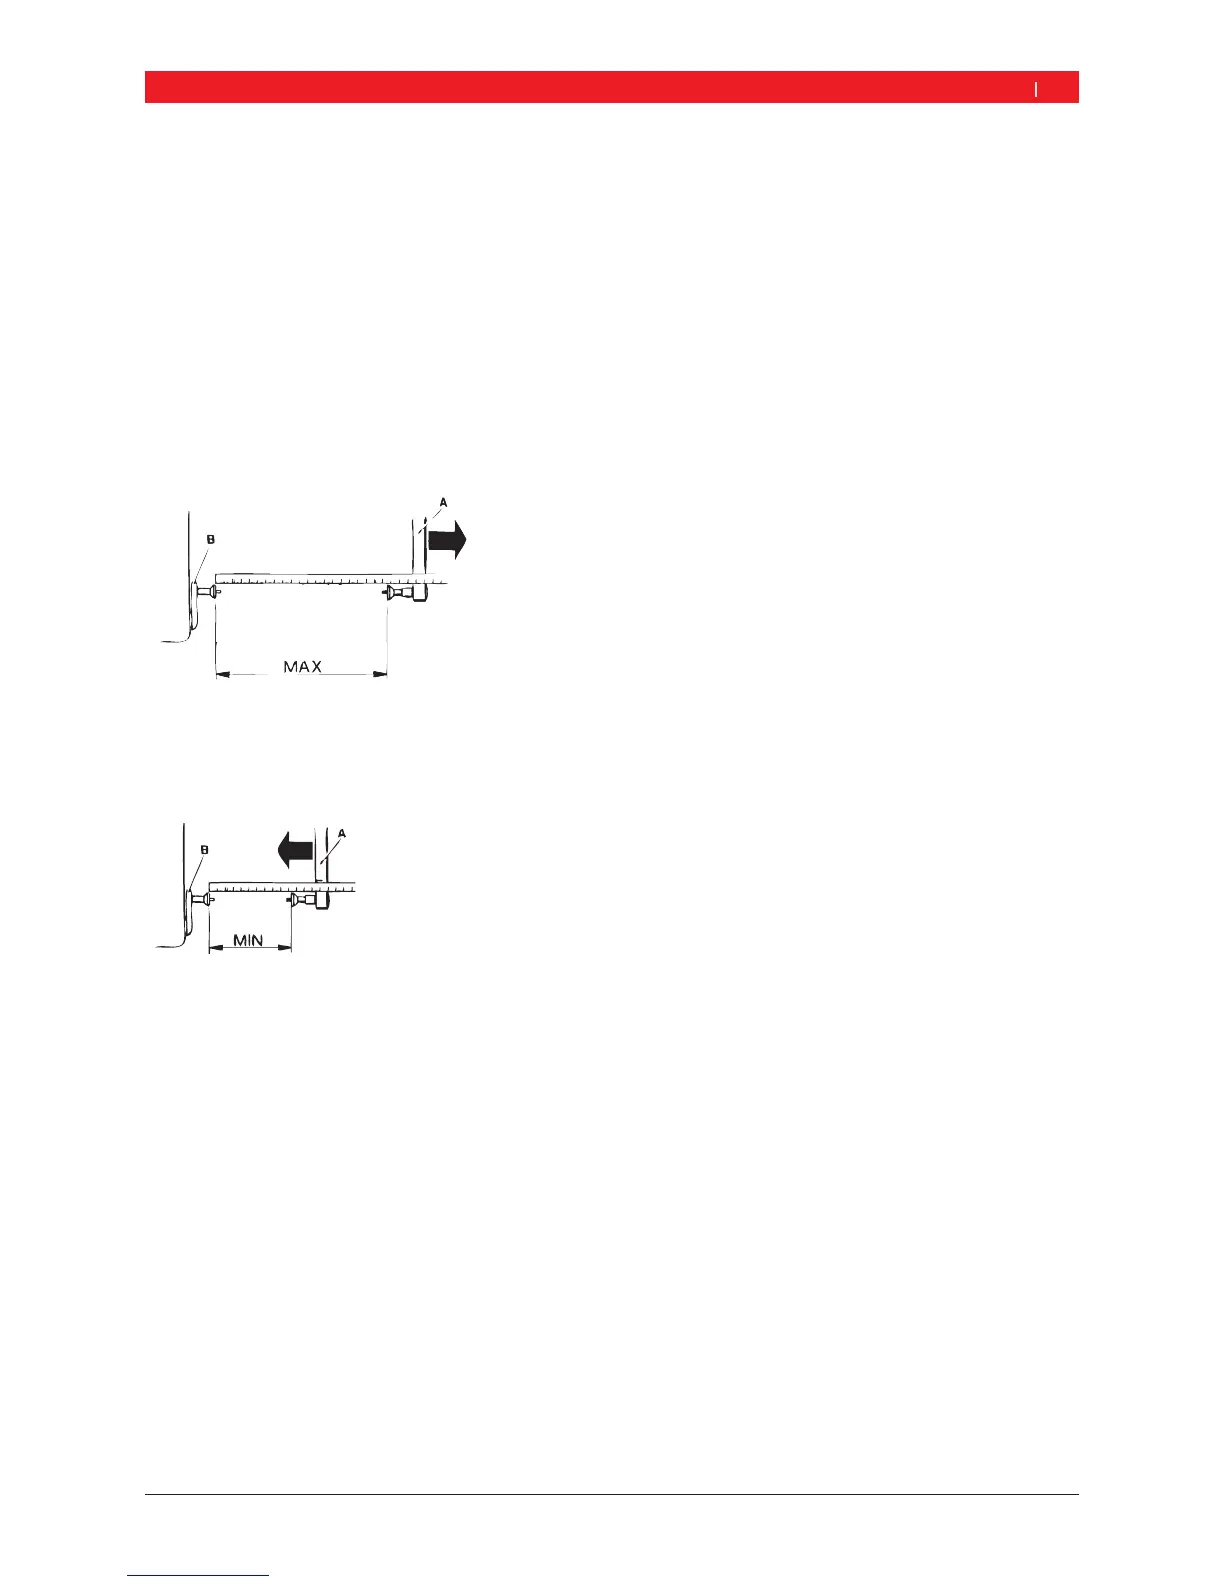
2. Set the vernier caliper (B) to the rest position and
press <OK>.
3. Extend the vernier caliper (B) to 200 mm, enter this
value and press <OK>.
4. Set the gauge arm (A) to the rest position, use a rule
to measure the "MAX" distance, enter the value and
press <OK>.
651001-06 _Rf
5. Set the gauge arm (A) to minimum position with
respect to the vernier caliper (B), use a rule to
measure the "MIN" distance , enter the value and
press <OK>.
651001-08 _Rf
6. Clamp a test wheel in position (ideally 13" or 14").
7. Enter the wheel diameter with <F4> and press <OK>.
8. Apply the vernier caliper (B) to the rim flange and
press <OK>.
"Calibration of vernier caliper and gauge arm completed
11.3.4 Calibrating the SBM V655
i Follow the instructions shown on the monitor.
1. Attach a motor vehicle wheel of medium size
(e. g. width 5.5", diameter 14") and in very good
condition to the flange.
2. Press <F3> and <OK>.
Calibration is started.
3. Enter the wheel data and confirm with <OK>.
4. Press <START>.
Measurement commences.
5. Enter any balance weight between 40 g and 120 g
and confirm with <OK>.
6. Attach a balance weight of the value entered to the
inner side of the wheel.
7. Press <START>.
Measurement commences.
8. Turn the wheel until the balance weight is in the
12 o'clock position.
9. Remove the balance weight from the inner side
of the wheel and attach it to the outer side
(12 o'clock).
10. Press <START>.
Measurement commences.
11. Turn the wheel such that the weight is in the
6 o'clock position.
12. Press <OK>.
"This completes calibration.
i The calibration made is permanently stored
automatically.