NOTE
To enable efficient processing and allow us to determine the cause quickly, please
include the following when making a return:
■
Details of the contact person
■
Description of the application
■
Description of the fault that occurred
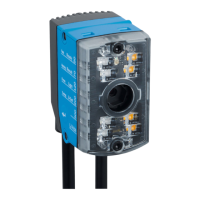
9.6 Replacing the device
Replacing a device with transfer of the current configuration data
The current configuration data of the device to be replaced can be downloaded from
a computer to a replacement device. The configuration data of the device is combined
as a parameter set. The replacement device saves the parameter set to the permanent
parameter memory.
Prerequisites:
•
The replacement device is a device of the same type.
•
The configuration data of the device have been saved on the computer and are
available. This took place on completion of configuration of the device that is now
to be replaced with the SOPAS ET configuration software after confirmation by the
user.
•
The computer is connected to the replacement device when transferring the con‐
figuration data.
NOTE
For further information see "Initial commissioning", page 40.
Removing the device to be replaced:
DANGER
Risk of injury due to hot device surface.
The surface of the device can become hot during operation.
•
Before performing work on the device (e.g. mounting, cleaning, disassembly),
switch off the device and allow it to cool down.
•
Ensure good lost heat transfer from the device.
1. Switch off the supply voltage to the device that is to be replaced.
2. Mark the position and alignment of the device on the bracket or surroundings.
3. Disconnect and remove all connecting cables from the device.
4. Detach the device and remove from the bracket.
Putting the replacement device into operation:
1. Mount and align the replacement device (see "Mounting", page 21). When doing
so, note the previously applied markings on the bracket or surroundings.
2. Reconnect the connecting cables to the replacement device (see "Electrical instal‐
lation", page 28).
3. Switch on the supply voltage for the replacement device.
✓
The device starts with its last permanently saved parameter set. In the case of
devices that have not been used before, this corresponds to the factory default
setting.
TROUBLESHOOTING 9
8026021//2020-12-18 | SICK O P E R A T I N G I N S T R U C T I O N S | GLS611
47
Subject to change without notice