Adjust focus
The purpose of this workflow step is to aim the rigged sensor and optimize the focus
and aperture for the intended working distance. User level Service is required.
NOTICE
Do not try to change focus and aperture settings on a pre-calibrated camera.
1. In the user interface, go to the Installation page.
2. Click Auto adjust exposure in the Advanced section to update the image exposure
settings.
3. Click the Show aiming laser toggle and confirm that the sensor is mounted in an
appropriate position above the target surface.
4. Click the Adjust camera focus toggle to enable the Camera focus curve with a continu‐
ous acquisition of images.
✓
A blue focus region is displayed in the image window.
5. Click and hold to move the focus region. Preferably to a sharp edge with light and
dark pixels on the intended working distance.
✓
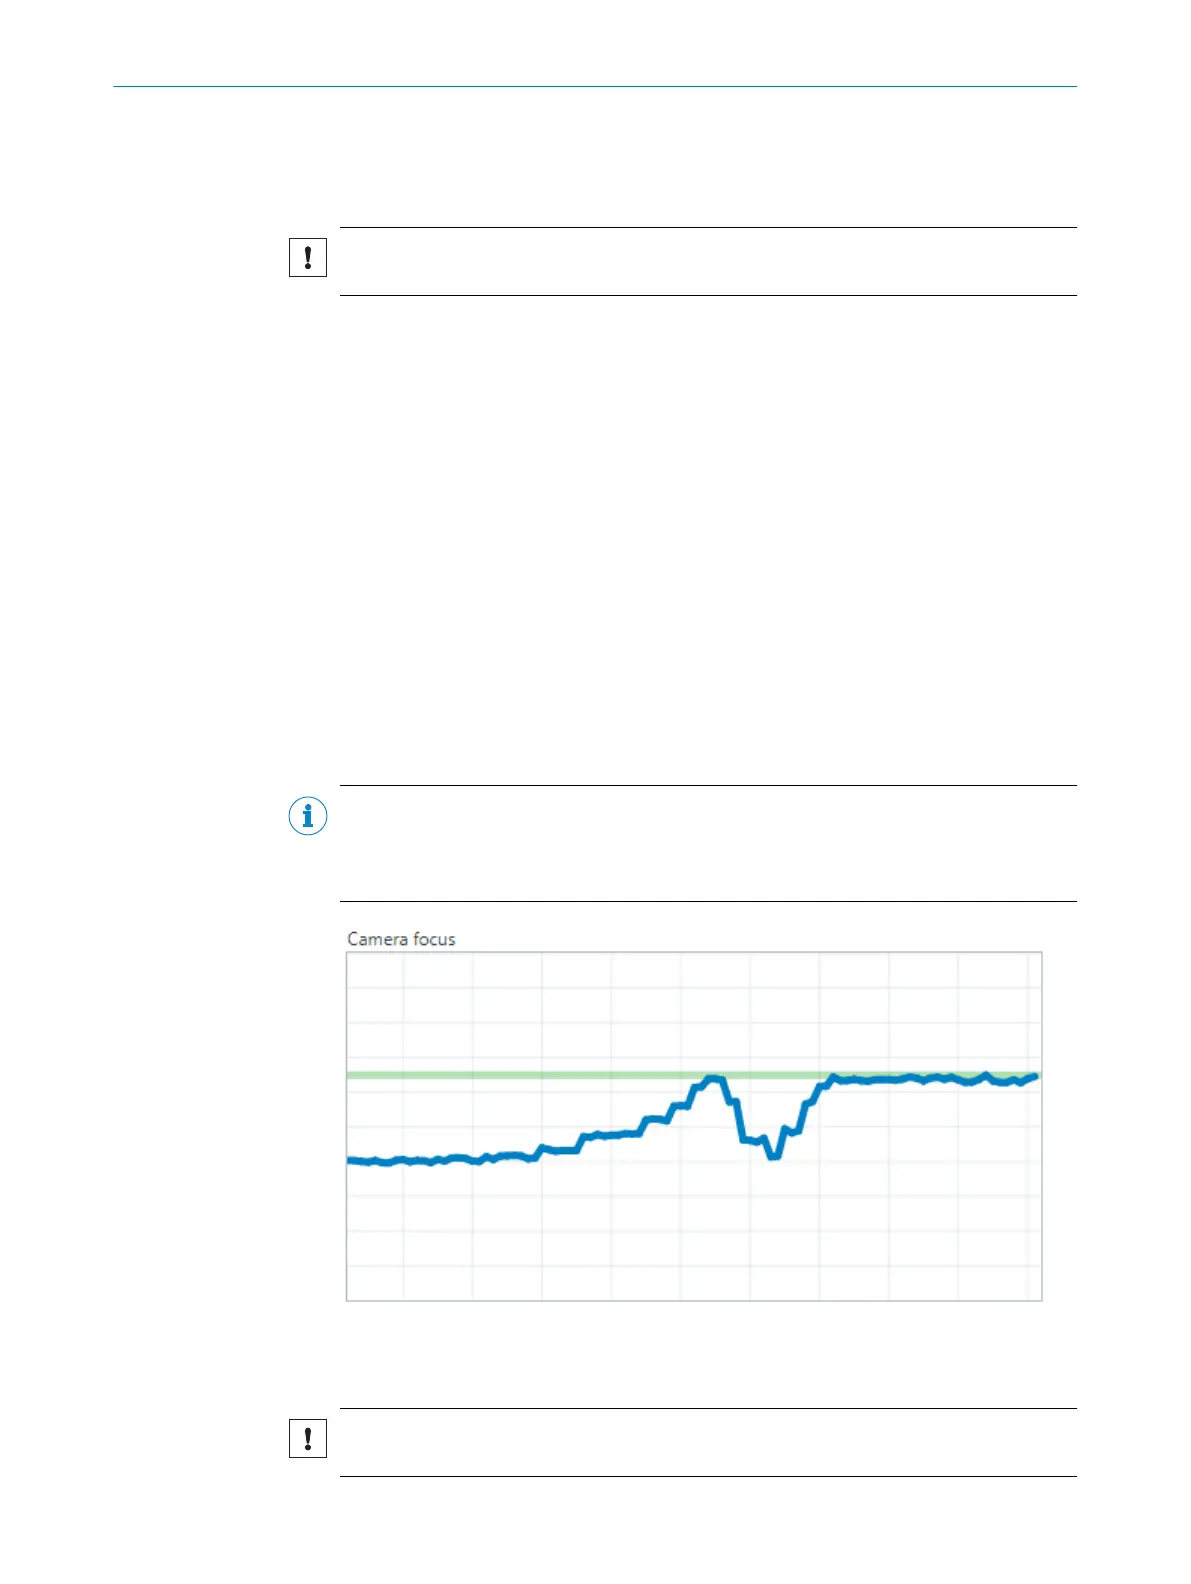
The Camera focus curve (see figure 12) shows the analyzed quality in the focus
region with a blue line.
The green line shows the highest and best value acquired.
6. Adjust the focus until the focus region looks sharp and the Camera focus curve has
reached a plateau as high as possible.
°
Sensor with manual focus: adjust the aperture and focus rings on the sensor
or with the included tool for some sensors.
°
Sensor with electric focus: adjust the focus with the Focus distance slider or
click Auto adjust focus.
NOTE
When adjusting the focus, move the focus ring or slider to one end, and slowly move it
to the other end. The green line has now captured the maximum focus value. Move the
ring/slider back to where the blue line meets the green for finetuning of the focus.
Figure 12: Camera focus curve
7.2.2 Calibration
NOTICE
Calibration must not be performed on pre-calibrated PLOC2D variants.
OPERATION 7
8020736/1K3Z/2023-06 | SICK O P E R A T I N G I N S T R U C T I O N S | PLOC2D 4.1
39
Subject to change without notice