4. Select 'Network' > 'IP settings' to setup IP addresses and enter the DNS
settings for 'wan0'.
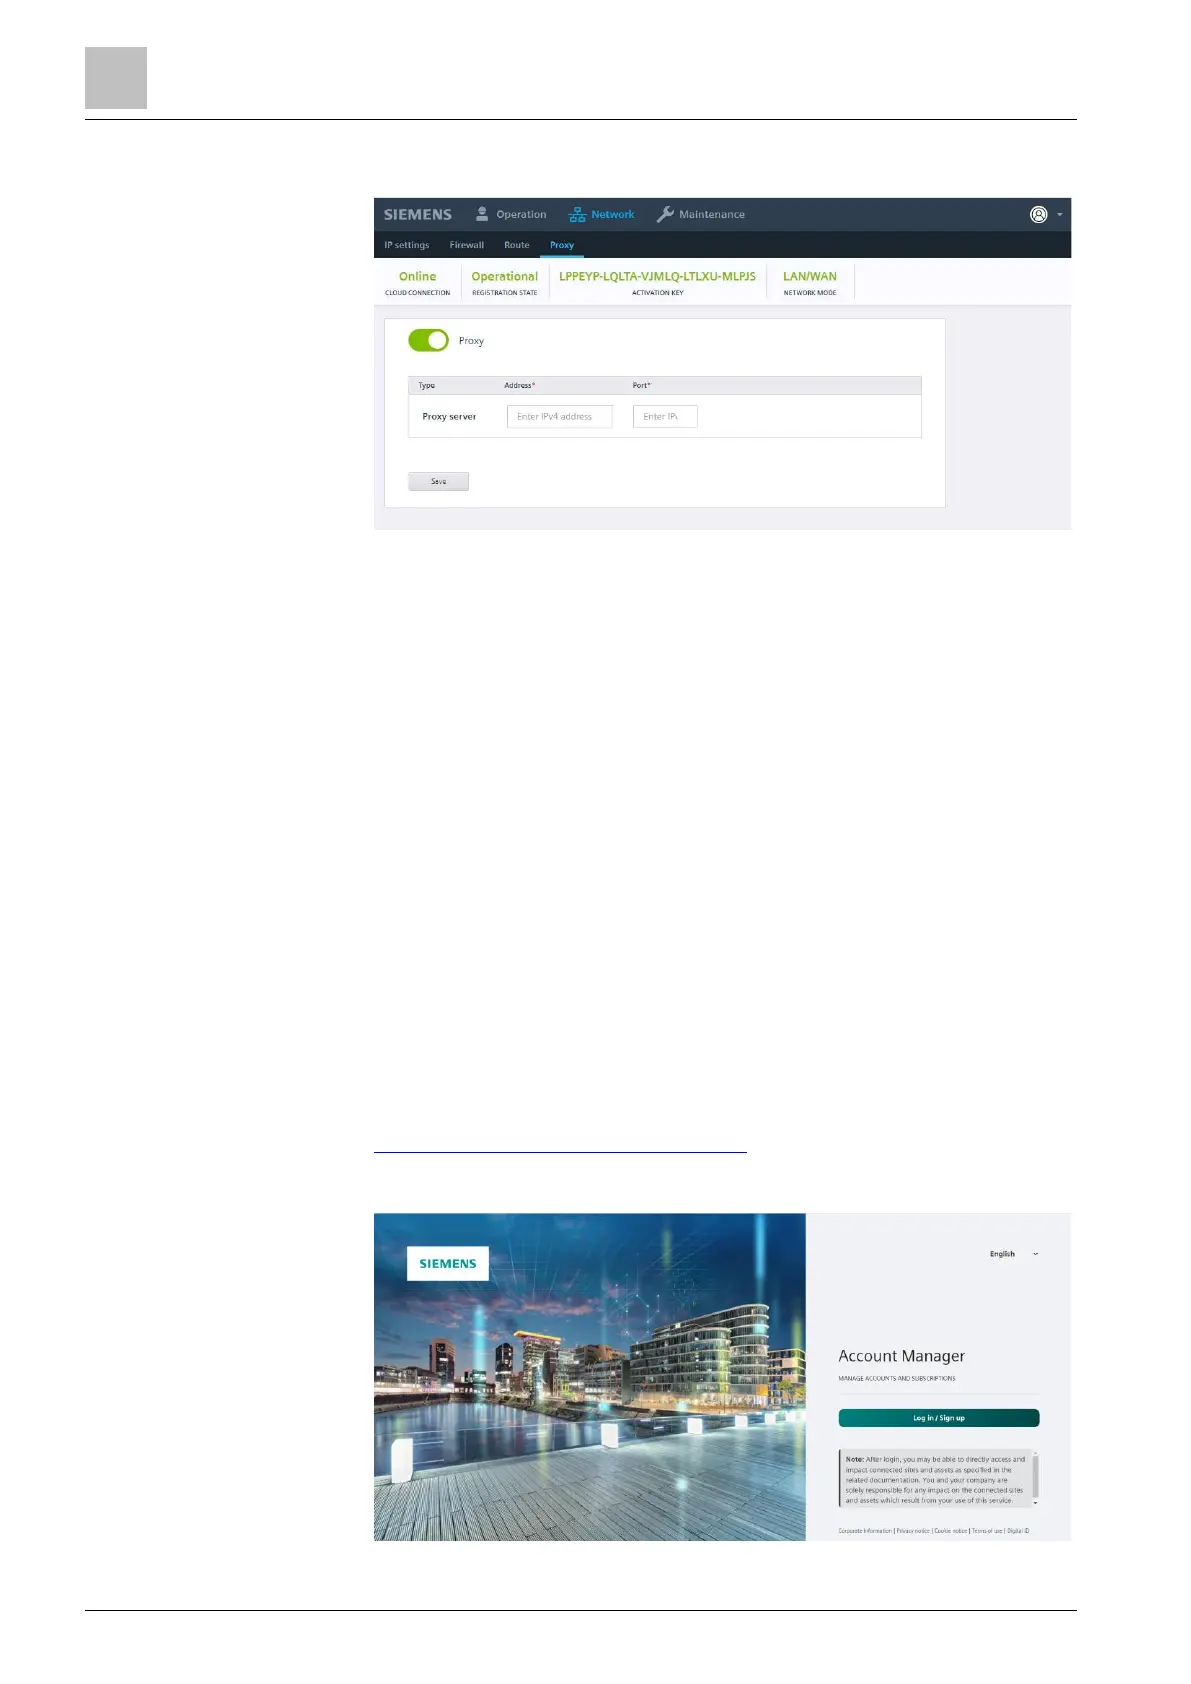
5. Select 'Network' > 'Proxy' to setup proxy addresses and enter the port number
for the proxy server.
6. Disconnect the computer from the Connect X300 Gateway via the Ethernet
connection X1P1.
7.3 Create and activate a new company in the Cloud
The following section describes how to acquire a license using the License
Management System (LMS).
7.3.1 Order product activation from License Management
System (LMS)
This is a short description on how to create a connection to the Cloud. Detailed
information on Account Manager is available in document Account Manager
A6V12050070.
Internet access required.
You ordered a subscription for your project at Siemens Customer Support and
received the registration mail.
You Created a Siemens-ID [➙ 19].
1. Click the Entitlement-ID email link in the registration email. The forward goes to
https://account.bpcloudapps.siemens.com.
The login page opens for the Account Manager.
2. Select the user language from the drop-down list in the upper righthand corner.
3. Read the security text before continuing.
 Loading...