Installation Procedure
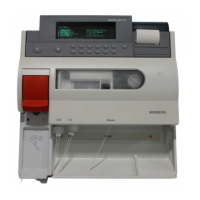
Use the following procedure to install your 248 only if you are located in
a region where Siemens Field Service Representatives do not perform
installation.
For detailed information on the operating system, refer to Section 1,
Understanding the System, and Section 2, Operating the System. Refer
to Section 3, Maintaining the System, for figures.
1. Inspect the packing case and report any damage to the shipper.
Notify your Siemens representative at installation.
2. Unpack the accessories and check against the following list:
Cat Description Qty
473755 Gas Tubing Kit 2
673252 Printer Paper, 5 rolls 2 packs
473496 Buffer Pack 1
473497 Wash/CD Pack 1
476267 pH Sensor 1
476247 pCO
2
Sensor 1
476246 pO
2
Sensor 1
476273 Reference Sensor 1
Power Supply Cord 1
3. The Spares box contains the following items
Description Qty
Clot removal line 1 pack
Fuse, 1A, time delay 2
OR Fuse, 1A, slo-blo 2
‘O’ rings 2
Probe and tubing 1
Screwdriver 1
Grounding block 1
Voltage selector bobbin 1
Probe protectors 3
Pump roller 1
Pump roller drive pin 1
Grease 1 vial
Sample detector cover 1
Sample detector cover screw 1
Bottle tubing connector 2
WARNING The 248 weighs approximately 9 kg (20 lb). Observe safe
lifting procedures.
4. Remove the 248 from the shipper and place on the work surface,
with the rear panel accessible.
5. Select the voltage required for your power supply, and slide the
voltage selector bobbin (from the Spares box) into the voltage
selector so that the selected voltage is visible when the voltage
selector cover is closed.
6. If necessary, connect a suitable plug to the power supply cord.
Follow the plug manufacturer’s instructions.
7.
Insert the power supply cord into the power connector on the rear panel.
CAUTION: Do not connect the power supply cord to the power supply.
Page F-2 248 Operator’s Manual
 Loading...
