Wiring
6.5 Wiring front connectors
S7-300, CPU 31xC and CPU 31x: Installation
Operating Instructions, Edition 08/2004, A5E00105492-05
6-9
Wiring front connectors
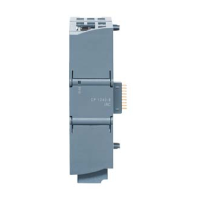
Table 6-6 Wiring front connectors
Step 20-pin front connector 40-pin front connector
1. Place the included cable strain relief into the front
connector.
–
Cable exit at the bottom of the module?
If yes:
Starting at terminal 20, work your way down to
terminal 1.
Start wiring at terminal 40 or 20, and work in alternating
passes from terminals 39, 19, 38, 18 etc. until you have
reached terminals 21 and 1.
2.
If not:
Start wiring at terminal 1, and work your way up to
terminal 20.
Start wiring at terminal 1 or 21, and work in alternating
passes from terminals 2, 22, 3, 23 etc. until you have
reached terminals 20 and 40.
3. Front connectors with screw terminals:
Always screw-tighten the unused terminals.
4. – Place the strain relief around the cable harness and the
front connector.
5. Tighten the strain relief for the cable harness. Push in the strain relief to the left to increase cable space.
–
1
2
1
2
1
4
3
The work step numbers are shown in the figure above
(1) Insert the strain relief.
(2) Wire the terminals.
(1) to (3) Wire the terminals.
(4) Tighten the strain relief clamp.
Reference
For information on wiring the integrated I/O of 31xC CPUs, refer to the
CPU 31xC and CPU
31x, Technical Data
manual.
 Loading...