Maintenance
9.6 Module installation / removal
S7-300, CPU 31xC and CPU 31x: Installation
Operating Instructions, Edition 08/2004, A5E00105492-05
9-9
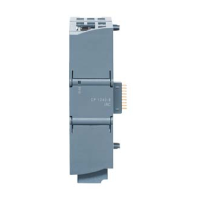
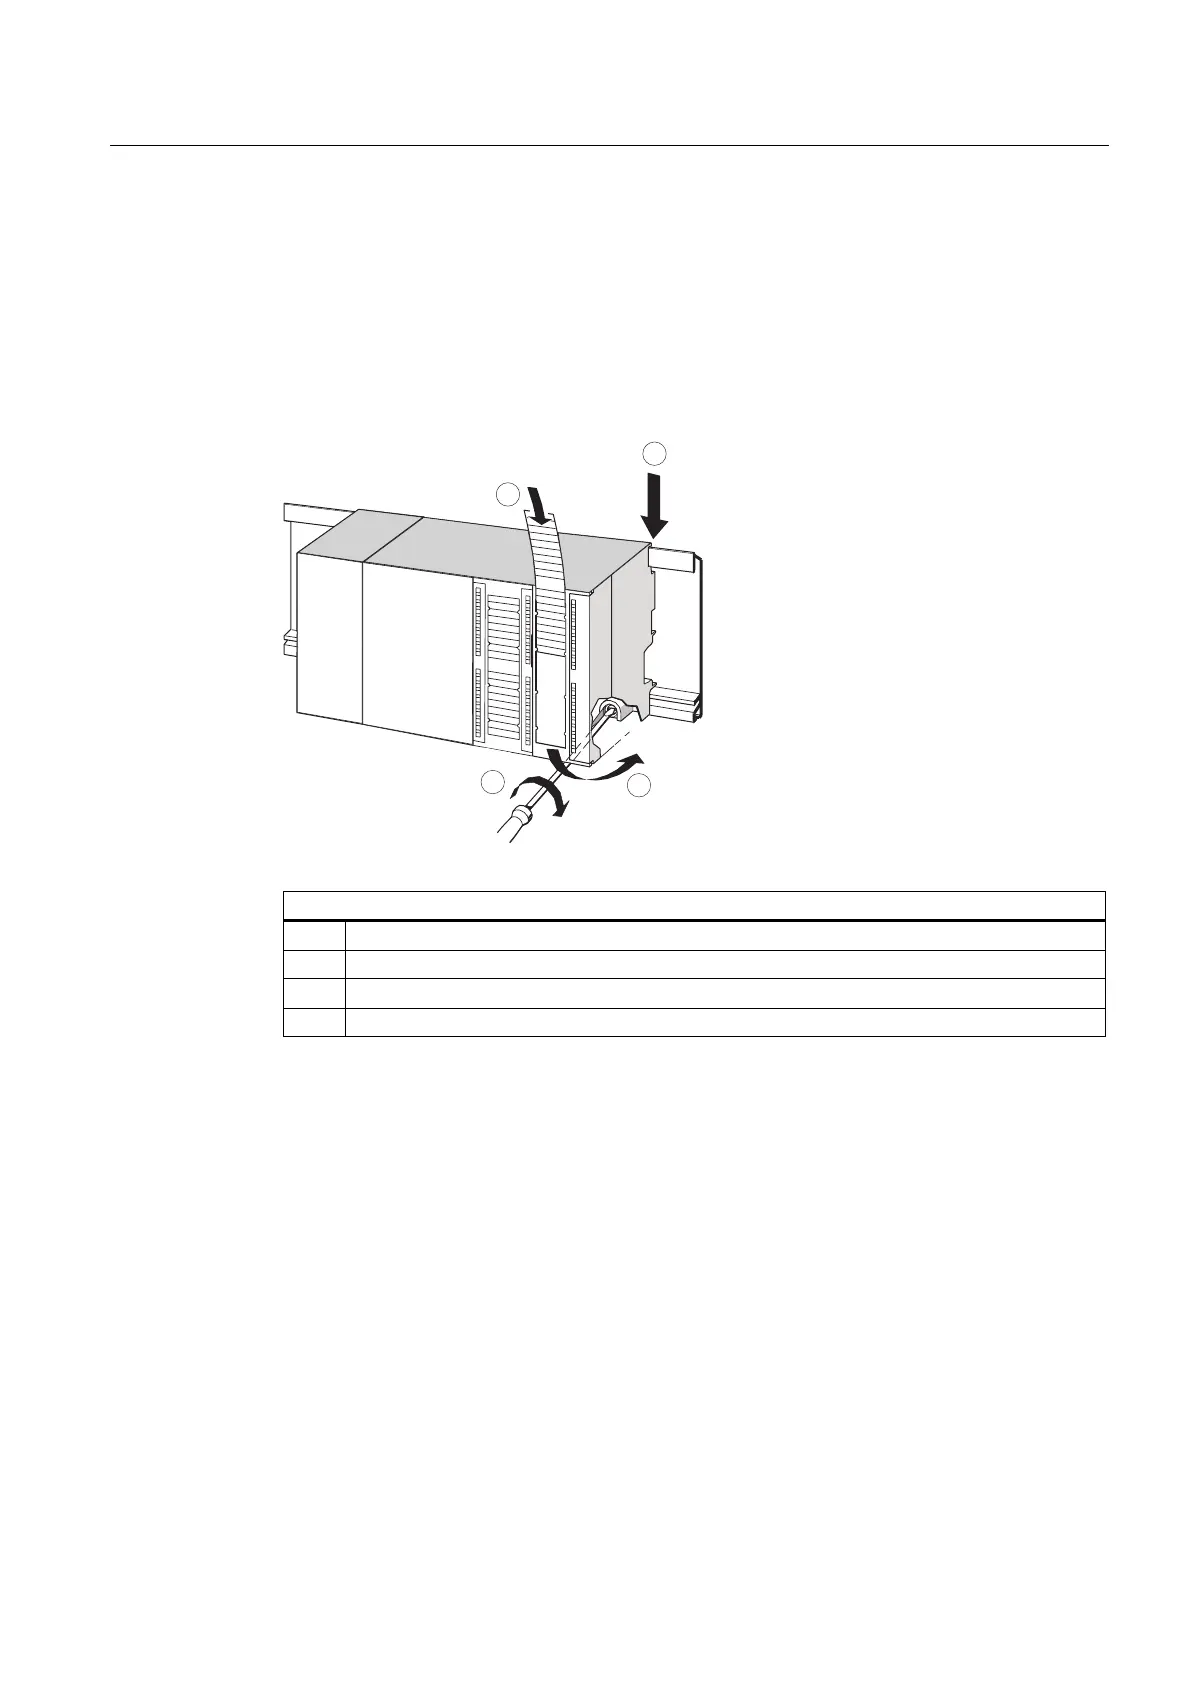
Installing a new module
To install the new module:
1. Hang in a new module of same type.
2. Swivel the module down into place.
3. Screw-tighten the module.
4. Slide the labeling strips into the module.
CPU
PS
1
2
4
3
The figure illustrates the described steps:
(1) Hang module onto rail.
(2) Swivel module downward.
(3) Screw-tighten the module
(4) Insert labeling strips.
Removing the front connector coding from the front connector
You may take a "used" front connector to wire another module by removing its coding
mechanism:
Simply use a screwdriver to push out the front connector coding.
This upper part of the coding key must then be plugged back into the old module.
 Loading...