5-3
Selecting Points with the Entry Keypad
Overview
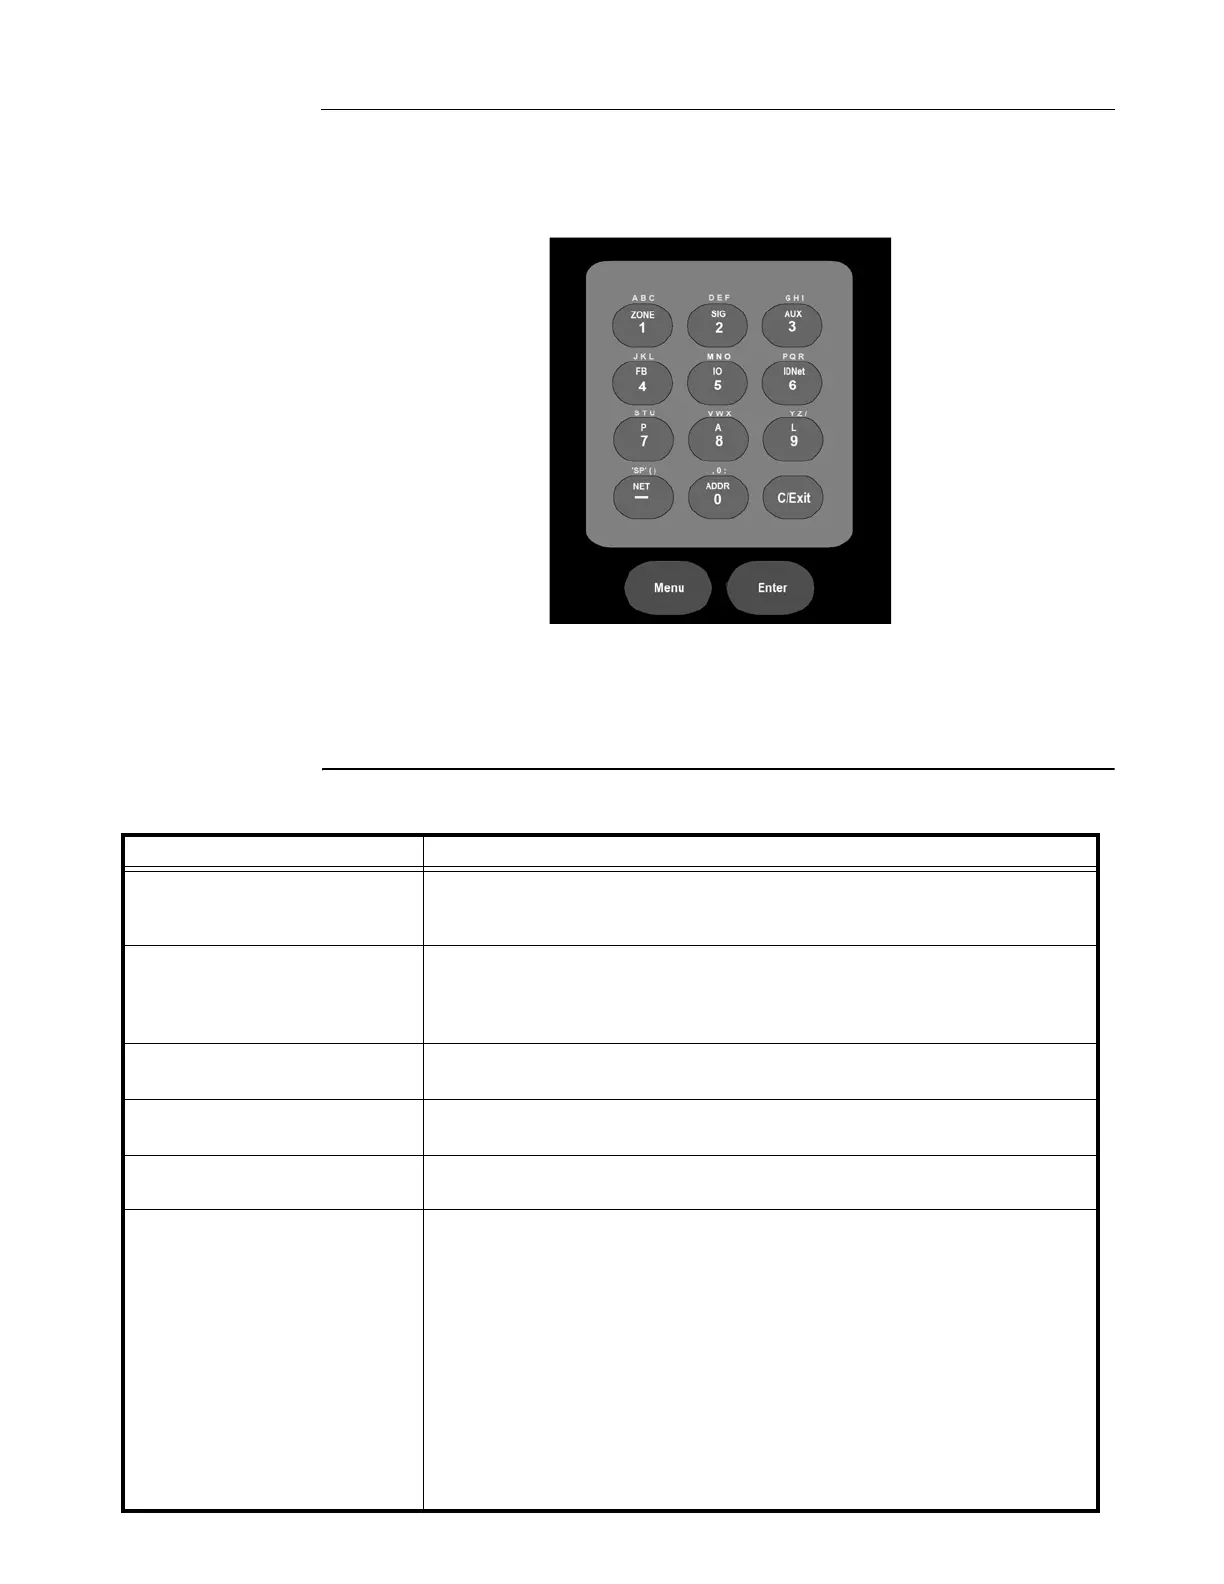
The entry keypad, shown below, allows you to quickly select a category of points. For example,
pressing the ZONE key on the upper left side of the keypad opens the direct point call-up screen
and places the cursor at the first monitor zone point. Press an additional number to move the cursor
closer to the desired point or use the arrow keys to move the cursor manually.
Figure 5-1. Flexible User Interface keypad
You can use the keypad to select either a local point or a network point. A local point is physically
connected to the panel, and a network point is one that is located on a different panel and is
programmed so that it can be selected and controlled from another panel.
Refer to the following table for information on using the keypad to select local points on this panel.
Key
Data to Enter
ZONE - allows you to select a
Monitor Zone point.
ZN, where ZN represents a zone card and is a number from 1 to n. n rep-
resents the number of the last zone in your system. After selecting a
zone, use NEXT and PREV to scroll through the points.
SIG - allows you to select a
NAC.
SIG, where SIG represents a Notification Appliance Circuit (NAC) and is
number from 3 to n. n represents the number of the last signal point in
your system. After selecting a signal point, use NEXT and PREV to scroll
through the signal points.
AUX - allows you to select an
Auxiliary Relay.
AUX, where AUX represents an auxiliary relay and is a number from 3 to
n. n represents the number of the last auxiliary relay in your system.
FB - allows you to select a
feedback point.
FB, where FB represents a feedback point and is a number from 3 to n. n
represents the number of the last feedback point in your system.
IO - allows you to select a point
on a 24 Point I/O card.
IO, where IO represents a point and is a number from 1 to n. n represents
the number of the last I/O point in your system.
IDNet - allows you to select an
IDNet, MAPNET, or VESDA
point.
C-D, where C represents the IDNet, MAPNET, or VESDA channel and D
represents the device number. You must insert the dash between chan-
nel and device. Use the (NET/ - ) key to insert the dash.
Notes:
• IDNet. Specify the channel with a number from 1 through 30. Use the num-
ber 0 to represent channel 10. Device numbers on each IDNet channel run
from 1 to 250.
• MAPNET. Specify the channel then the device. Device numbers on each
MAPNET channel run from 1 to 127.
• VESDA. Specify the channel then the device. Device numbers on each
VESDA channel run from 1 to 127.