10 Transmission Removal & Installation
Peerless (Gear Drive) Models
10 - 14
Transmission Installation - Peerless Models
NOTE: Reinstall the carrier assembly if not already done.
1. Block the front wheels and elevate the rear end. See
ELEVATING REAR END FOR SAFE SERVICE,
Section 6. Support the frame with jackstands.
2. Pivot the torsion bar out of the way.
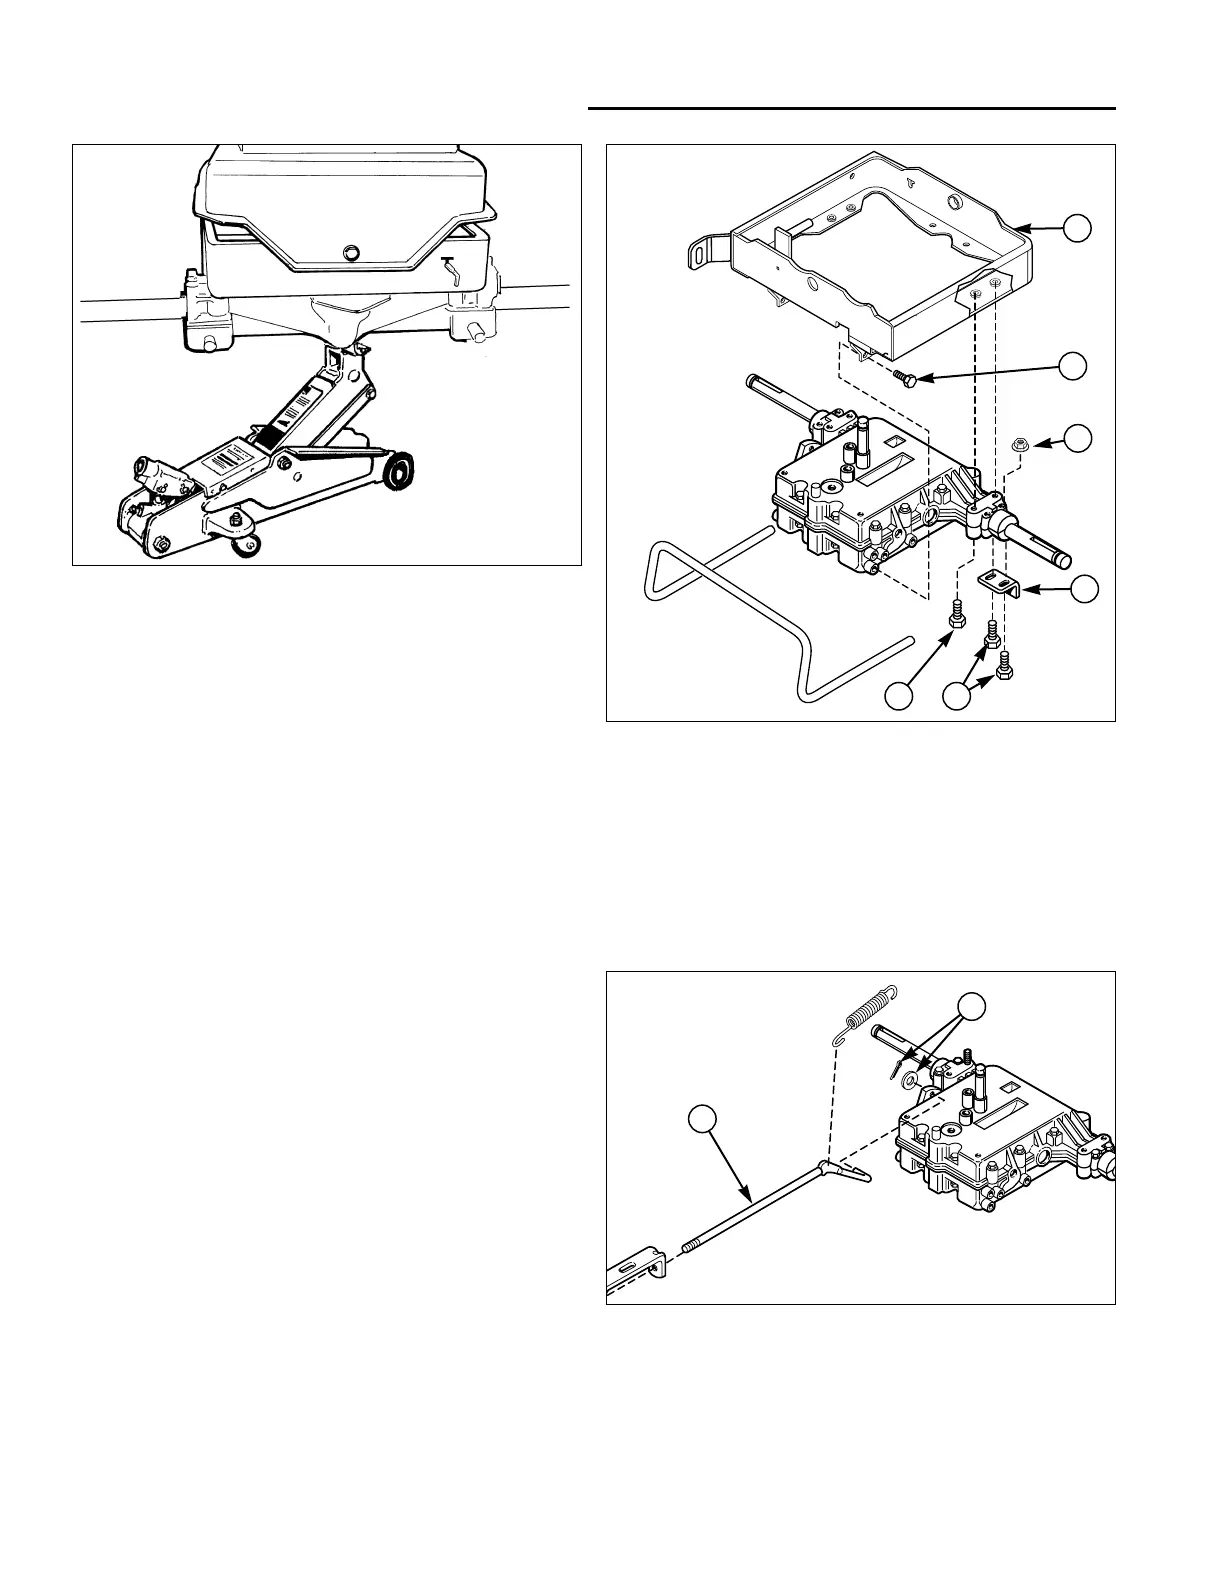
3. Using a hydraulic floor jack, lift the transmission into
the frame (see Figure 24). Be careful not to damage
the input pulley.
4. Install the two rear mounting capscrews (F, Figure
25). Do not tighten at this time.
5. Rotate the torsion bar into place.
6. Install the two front mounting capscrews (B, Figure
25). Do not tighten at this time.
7. Install the four rear mounting capscrews (E, Figure
25) and torsion bar retainers (D). Tighten all mount-
ing bolts at this time.
8. Reconnect the rear brake rod (B, Figure 26) to the
brake control arm. Secure with a washer and cotter
pin (A).
Figure 24. Support the Carrier & Trans. w/ a Floor jack
Figure 25. Peerless Transmission & Carrier
A. Carrier Assembly
B. Front Mounting Capscrew
C. Locknut
D. Torsion Bar Anchor
E. Torsion Bar Anchor Capscrews
F. Rear Mounting Capscrew
A
B
C
D
F E
Figure 26. Disconnect Rear Brake Rod
A. Cotter Pin & Washer B. Rear Brake Rod
B
A
 Loading...