29
SEWING
INSERTING ZIPPERS
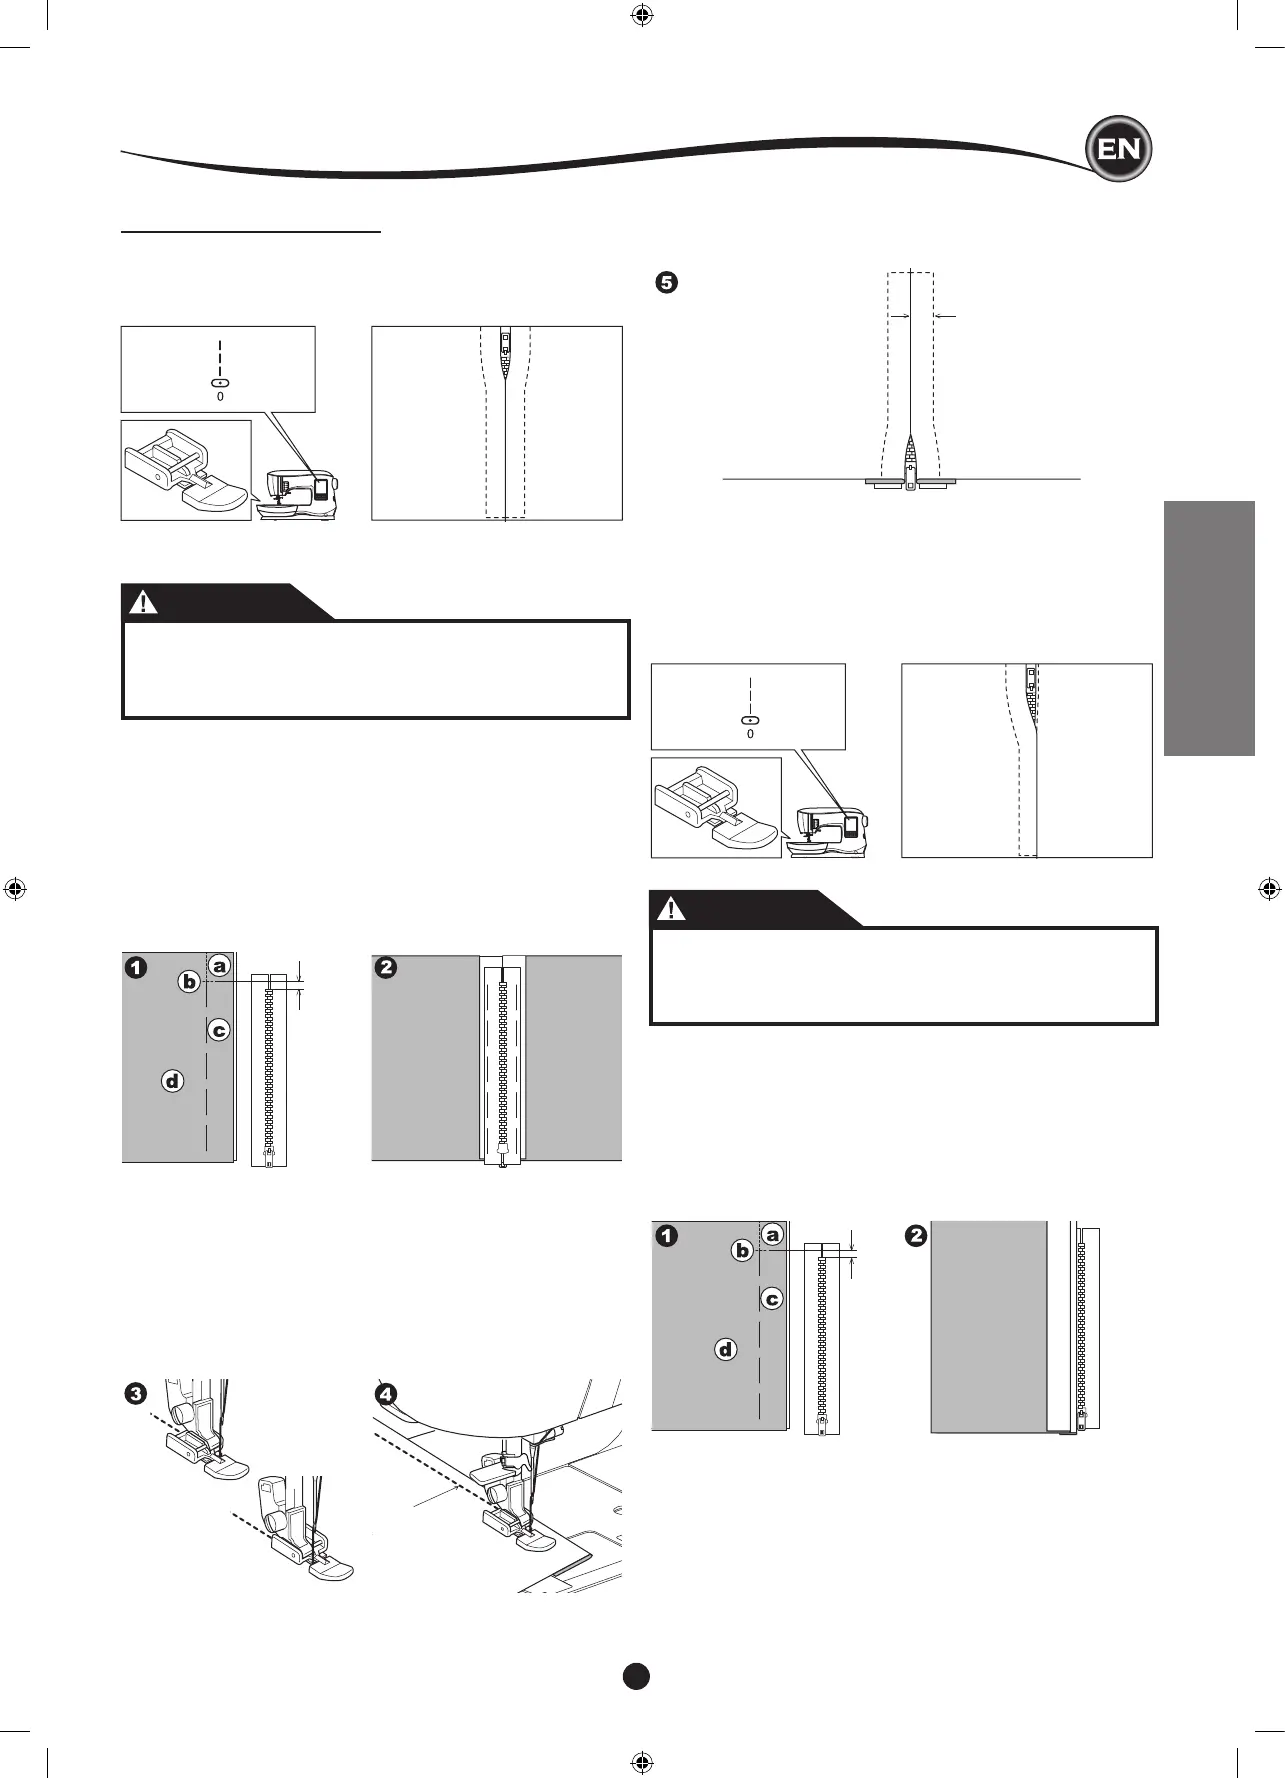
No. 0 Straight Stitch (Center Needle Position)
Zipper Foot (E)
5 mm
7-10 mm
7-10
mm
CAUTION
To prevent accidents, do not change the needle
position. Changing needle position could cause the
needle hit the presser foot, which could break the
needle or damage the machine.
1. Baste the zipper opening to the seam line.
a: Straight stitch
b: End of opening
c: Basting
d: Wrong side of fabric
2. Press open the seam allowance.
Place the open zipper face down on the seam allowance
with the teeth against the seam line.
Baste the zipper tape.
3. Attach the Zipper Foot.
Attach the left side of the presser foot pin to the presser
foot holder when sewing the right side of the zipper, and
right side of the presser foot pin to the holder when sewing
the left side of the zipper.
4. Sewing on the right side of the fabric, stitch the left side of
the zipper from bottom to top.
5. Stitch across the lower end and right side of zipper.
Remove the basting and press.
No. 0 Straight Stitch (Center Needle Position)
Zipper Foot (E)
5 mm
CAUTION
To prevent accidents, do not change the needle
position. Changing needle position could cause the
needle hit the presser foot, which could break the
needle or damage the machine.
1. Baste the zipper opening to the seam line.
a: Straight stitch
b: End of opening
c: Basting
d: Wrong side of fabric
2. Fold back to the left seam allowance.
Turn under the right seam allowance to form 3 mm (1/8”)
fold.