52
When you complete editing the design, press the Stitch Out
tab to start sewing.
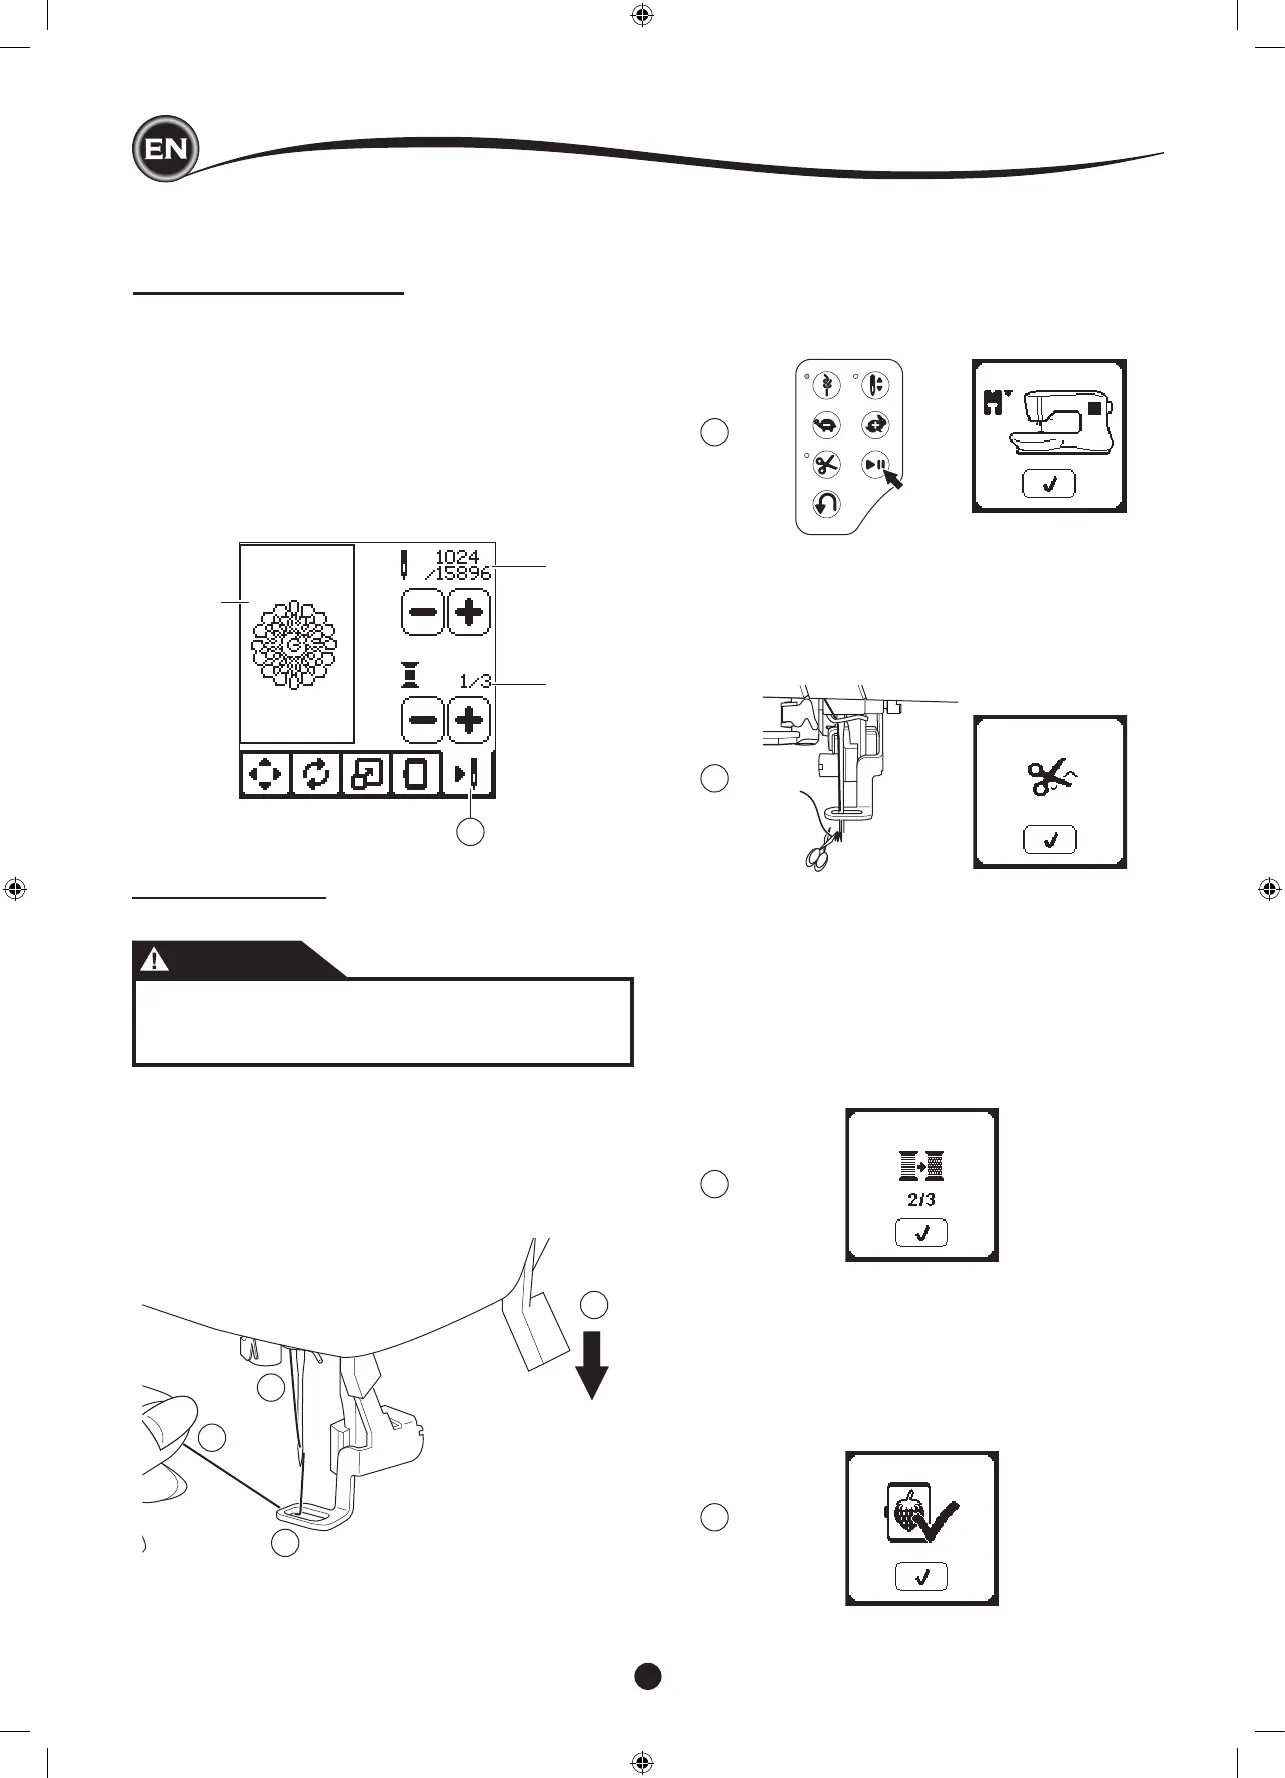
STITCH OUT SCREEN
When you press the Stitch Out tab (A), the Stitch Out Screen
will appear.
a. Embroidery eld and position
b. Stitches left in color block / Total number of stitches left in
design.
By pressing -/+ buttons, stitch will go backward/forward.
Press and hold will increase stepping speed.
c. Current color / Total number of colors
By pressing -/+ buttons, color block will go backward/
forward.
a
b
c
A
2
3
4
1
9
7
6
8
6. Press the Start/Stop button.
The machine will start embroidering the rst color of the
design.
NOTE:
If presser foot lifter is raised at this time, the pop up
message will appear. Lower the foot and press the “
✓
”
button.
START TO SEW
1. Thread the upper thread with the rst color.
CAUTION
To avoid injury:
Special care is needed for the needle when changing
the upper thread.
2. Pass the upper thread through the hole of the embroidery
foot from the top side.
3. Lower the presser foot lifter.
4. Hold the upper thread.
5. Clear sufcient space to accommodate movement of the
carriage and the hoop.
7. When Stop for Cut setting is on, machine stops
automatically after few stitches for cut thread end. A pop up
appears asking you to cut thread end. Cut thread end and
press the “
✓
” button. Continue embroidering by pressing
Start/Stop button.
8. When embroidering a color block is completed, machine
will stop automatically and cut upper thread.
A pop up will appears asking you to change color. Re-
thread with the next color and press “
✓
” button. Continue
embroidering by pressing Start/Stop button.
Each color segment is tied of at the end and the upper and
bobbin threads are cut.
9. When the entire embroidery is completed, your machine
cuts both threads and stops.
A pop-up informs you that your embroidery is nished.
Then press “
✓
button.
Raise the presser foot and remove the hoop.