48
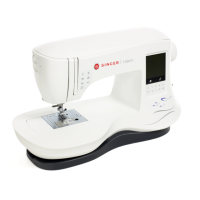
HOME SCREEN
Selecting designs to embroider begins with the Home Screen.
The Home Screen has two main selections.
a. Selecting a design, editing and stitching.
b. Programming letters, editing and stitching.
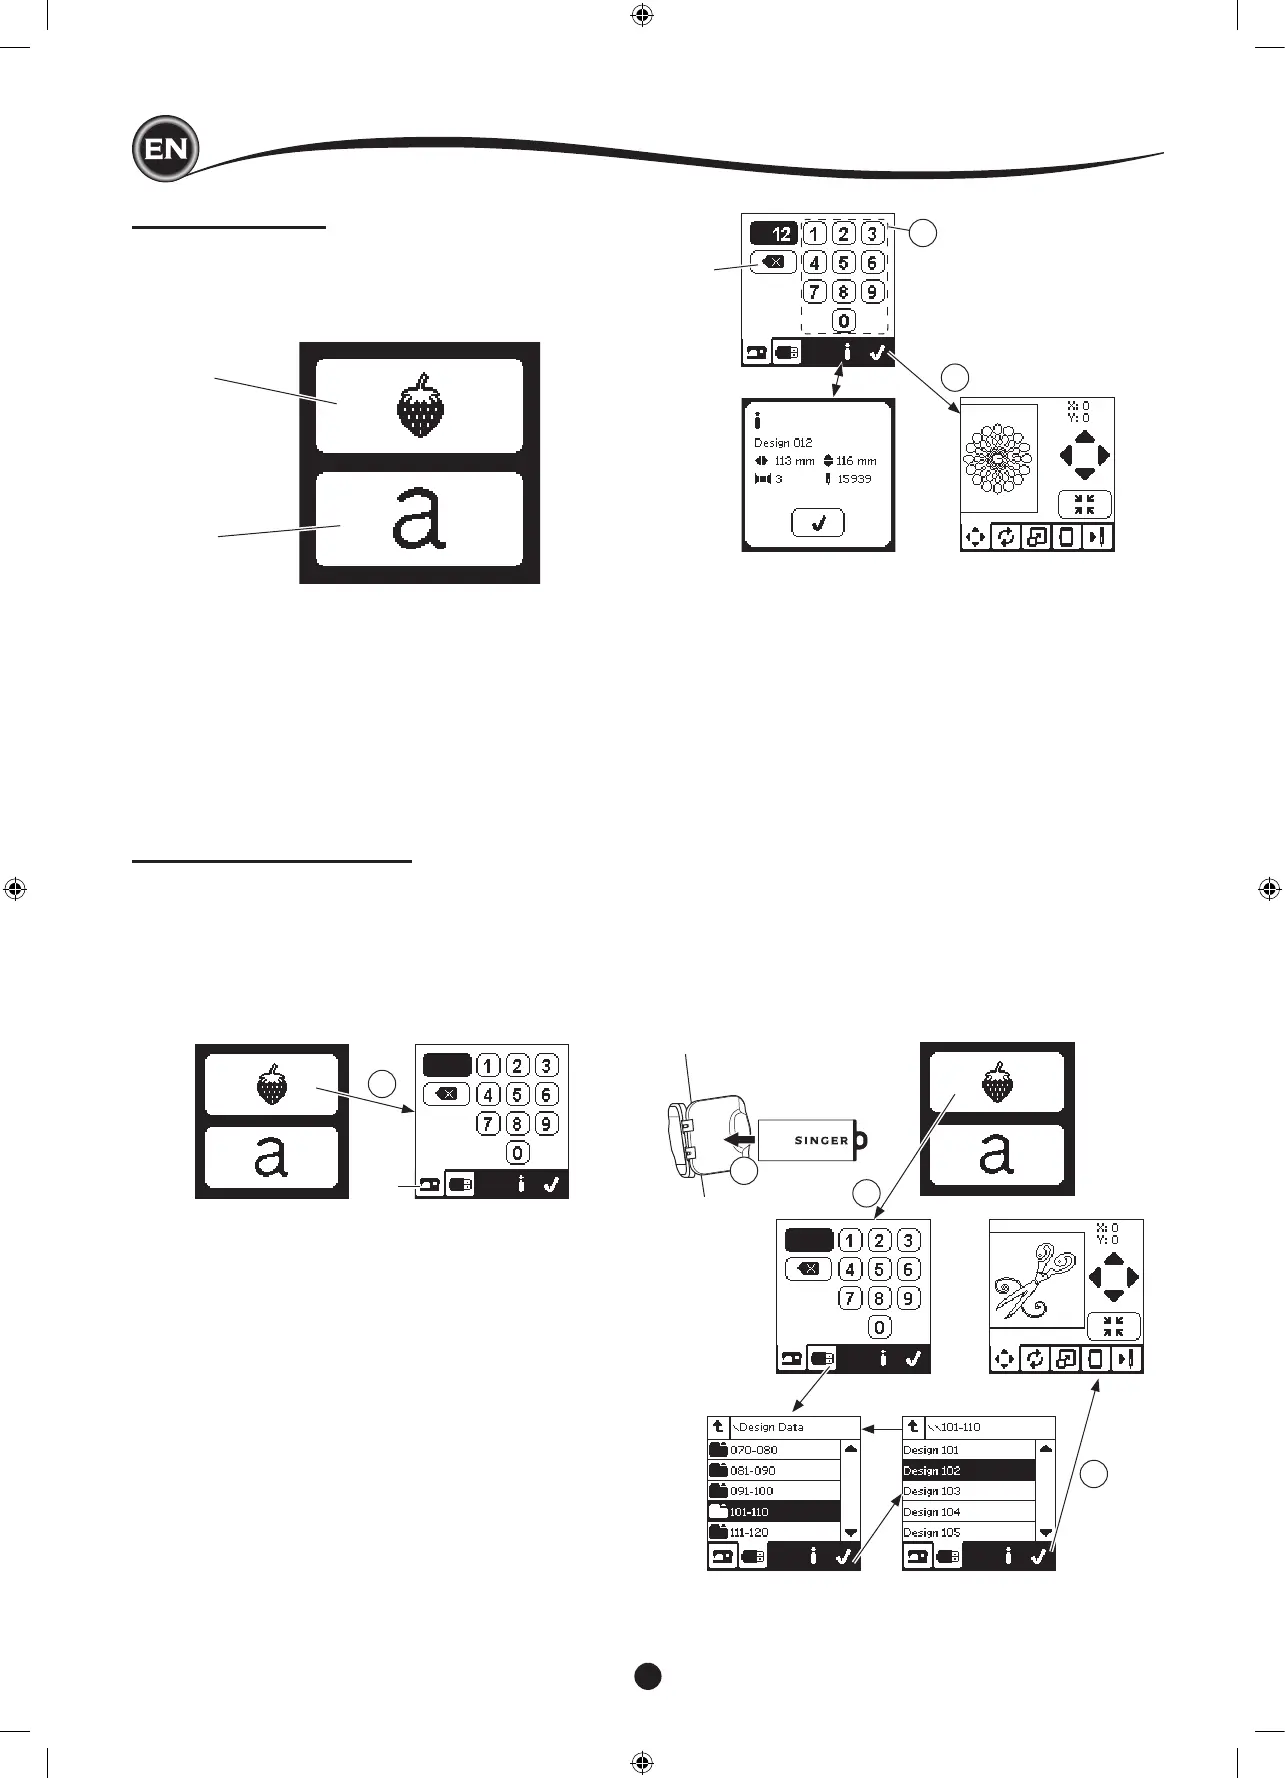
a
b
1
c
2
3
d
e
1
2
3
f
g
h
(PDF le in your USB embroidery stick)
Your machine comes with 200 embroidery designs, as well as
embroidery fonts. You will nd 69 of these designs, plus the
fonts, built-in to the machine. The remainder of the designs
are on the USB stick.
The USB stick also has PDF les with information about the
designs. For more information about this, see page 47.
SELECTING A DESIGN
to Select a buIlt-In deSIgn
Your machine has 69 built-in embroidery designs.
1. Press the Design button on the Home Screen.
A ten-key screen will appear.
NOTE:
Press the machine tab (c) if USB tab is activated.
2. Select the design from the Embroidery Collection and press
the design number on the ten-key screen.
Selected number will appear in the top left of LCD.
To delete a number, press the Delete button (d).
If you want to know about selected design, press the info
button (e). The following information is indicated on the
screen.
i. Design name
ii. Design max width & height
iii. Total number of colors
iv. Total number of stitches
By pressing “
✓
” button, the information will disappear and
ten-key screen will appear again.
3. Press the “
✓
” button at ten-key screen.
The design is selected and Embroidery Placement screen
will appear.
Your machine can read “.xxx” and “.dst” embroidery data
stored in the USB embroidery stick.
1. Insert the USB embroidery stick into the USB socket.
2. Press the design button on the Home Screen and then
press the USB tab (f).
Data list will appear in the screen.
Press the le or folder to select or open and press the “
✓
”
button.
When folder is opened, the list of designs included in that
folder will appear (g).
To go back, press the arrow button on the top line (h).
Press the info button for more information about the
selected design.
NOTE:
If the USB stick or a folder is empty or if readable le is not
included, empty mark will appear.
3. When le is loaded, embroidery placement screen will
appear.