36
APPLIQUE
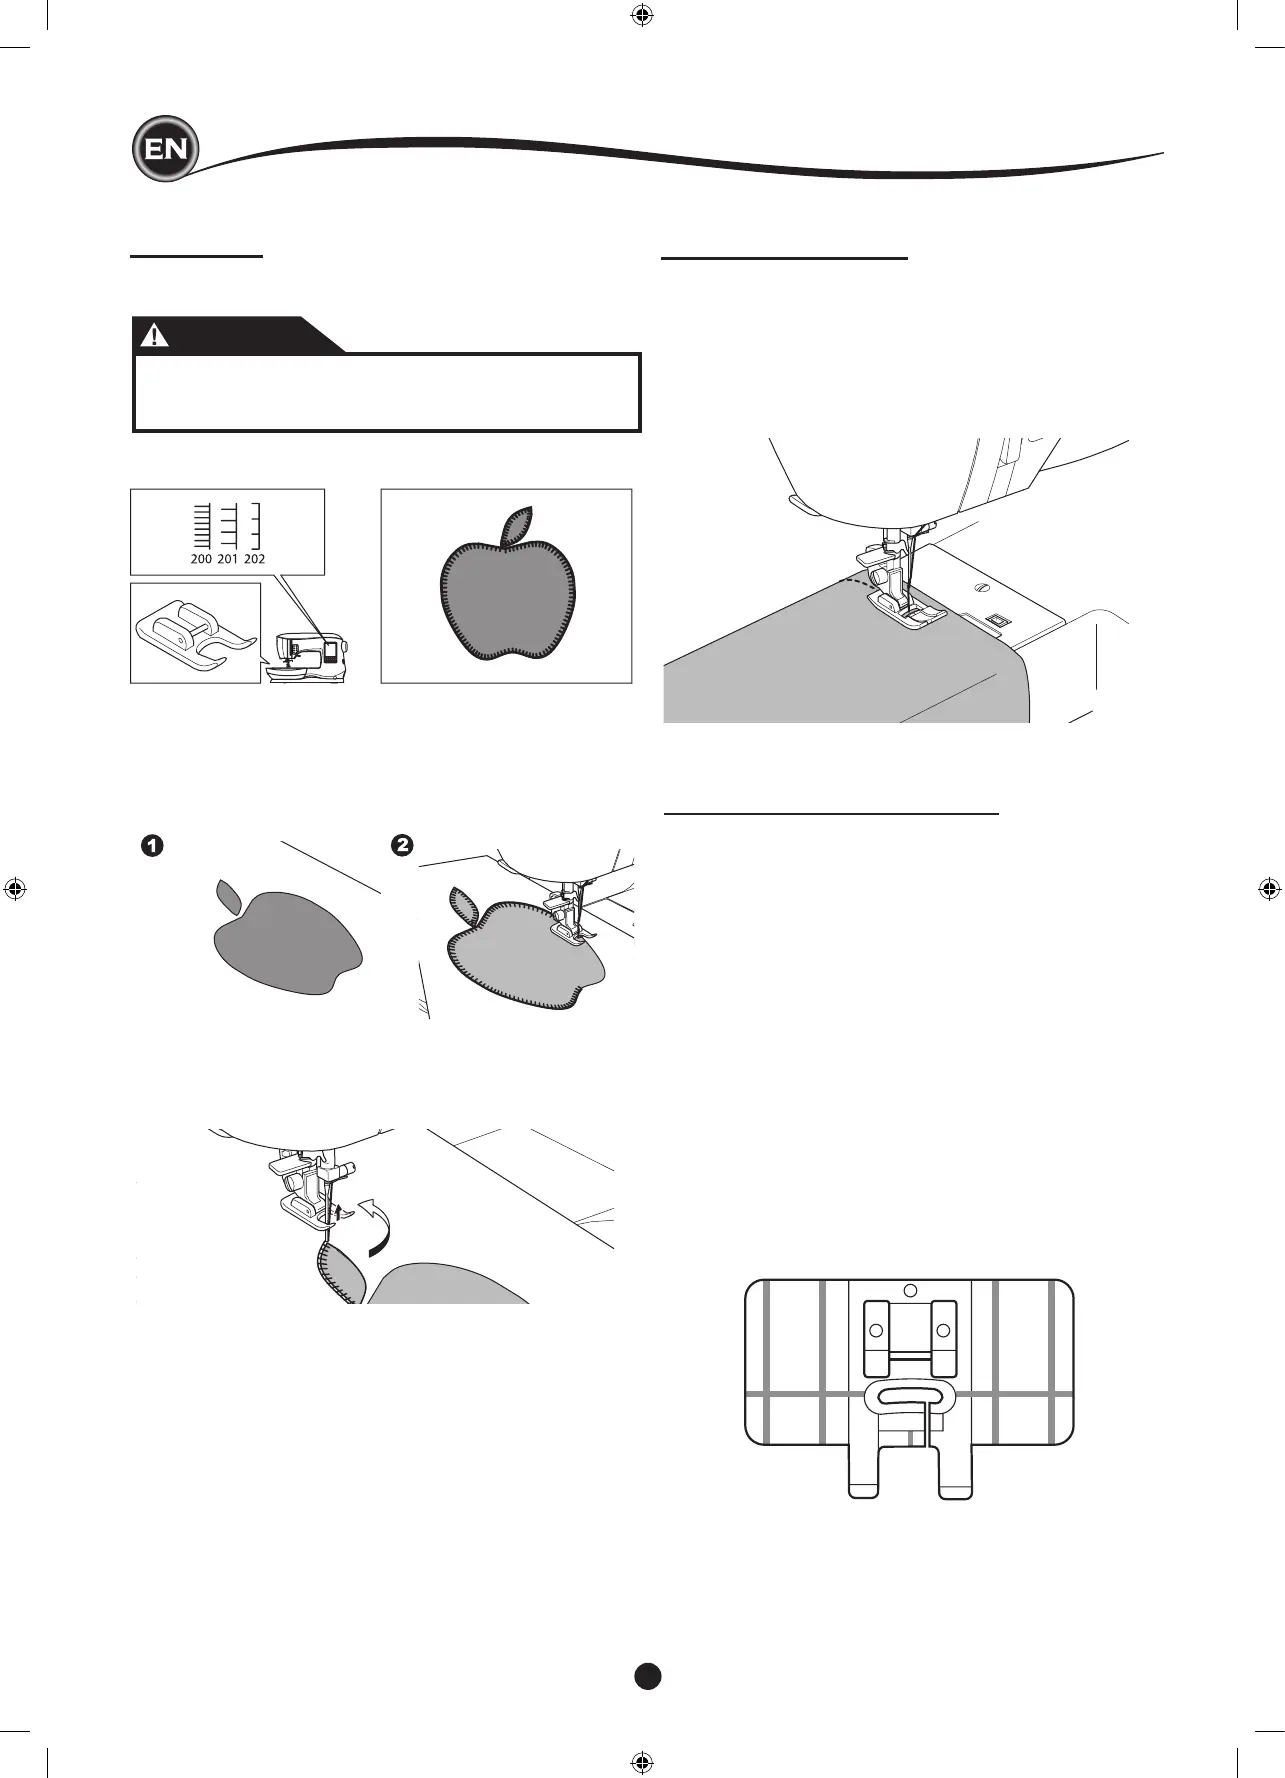
No. 200, 201, 202
Open Toe Foot
CAUTION
To prevent accidents, do not change the stitch width to
wider than 5.0. Otherwise, needle could hit the presser
foot and break.
1. Set the applique in place on the base fabric with temporary
fabric spray adhesive or by using fusible web.
2. Sew with the right side of the stitch following the right edge
of the applique as closely as possible.
FREE ARM SEWING
By simply removing the extension table, you can access the
free arm, making it easier to stitch hard-to-reach areas like
pant hems, sleeve cuffs and children’s clothing.
NOTE:
Refer to page 7 for Removing the Extension Table.
PARALLEL SEWING FOOT
This foot is used for sewing rows of stitching in parallel rows.
1. Snap on the Parallel Sewing Foot.
2. Sew the rst row of stitching.
3. Align the rst row of stitching either between or on the red
guideline markings on the foot, depending on the desired
distance from the rst row of stitching. Sew the next row of
stitching, using the red guidelines as a reference.
4. Align the two rows sewn, following the red guideline
markings on the foot, depending on the desired distance
between rows of stitching. Sew the next row of stitching,
using the red guideline markings as a reference.
5. Continue for as many rows as desired.
NOTE:
The rst vertical guideline, to either the left or right is 1/2”
from the center needle position. The second guideline is
approximately 1/4” from the rst guideline on either side.
There is a marking at the center front of the foot that can
also be used a reference.
When sewing sharp angles or curves, bring the needle to its
lowest position and raise the presser foot.
Use needle as pivot and turn fabric.
NOTE:
Applique can also be done with a satin stitch using the Satin
Foot (page. 24). It may be helpful to place a fabric stabilizer
underneath your work, which may help prevent any fabric
puckering.