HGMS61 Genset Controller User Manual Page 36 of 47
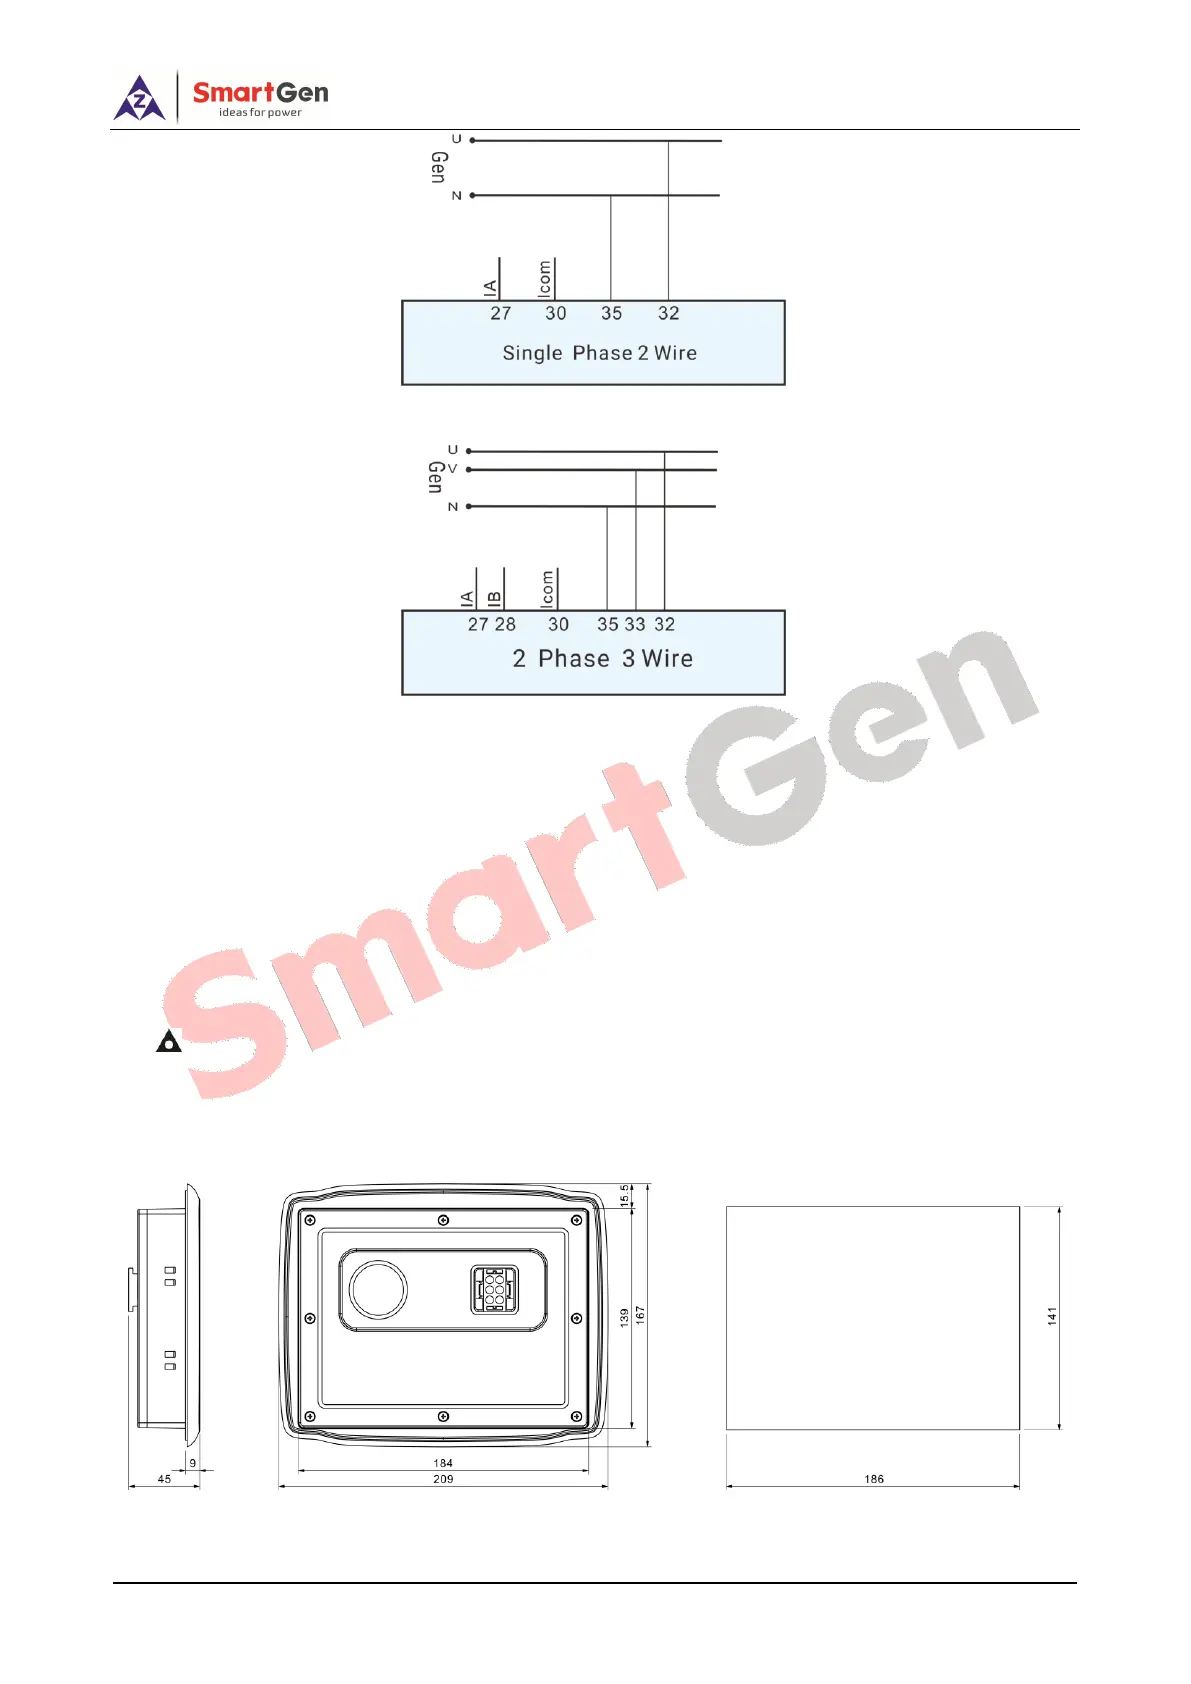
Fig. 7 - Single Phase 2 Wire
Fig. 8 - 2 Phase 3 Wire
12 INSTALLATION
12.1 FIXING CLIPS
— The HGMS61D display module is panel mounting and installed by fixing clips.
— Withdraw the fixing clip screw (turn anticlockwise) until it reaches proper position.
— Pull the fixing clip backwards (towards the back of the module) ensuring four clips are inside their
allotted slots.
— Turn the fixing clip screws clockwise until they make contact with the panel.
Note: 0.27N·m (2.75kgf·cm) torque is recommended to tighten the fixing clips.
12.2 OVERALL DIMENSION AND PANEL CUTOUT
Unit: mm
Fig. 9 – HGMS61D Case and Overall Dimensions