50
EEWB334A
6-7
1
2
6-8
C
B
A
1
2
3
6.3 Storage
When the unit will be stored for a several weeks or
longer prepare the unit correctly:
• Shut down the unit properly
, F 5.2.4.
• Remove the threaded shaft from the balancer.
• Apply a thin layer of non-corrosive oil on all threads
and cones.
• Wrap oiled items in paper to keep the parts dust-
free.
Before putting the unit into use again, clean all oiled
parts.
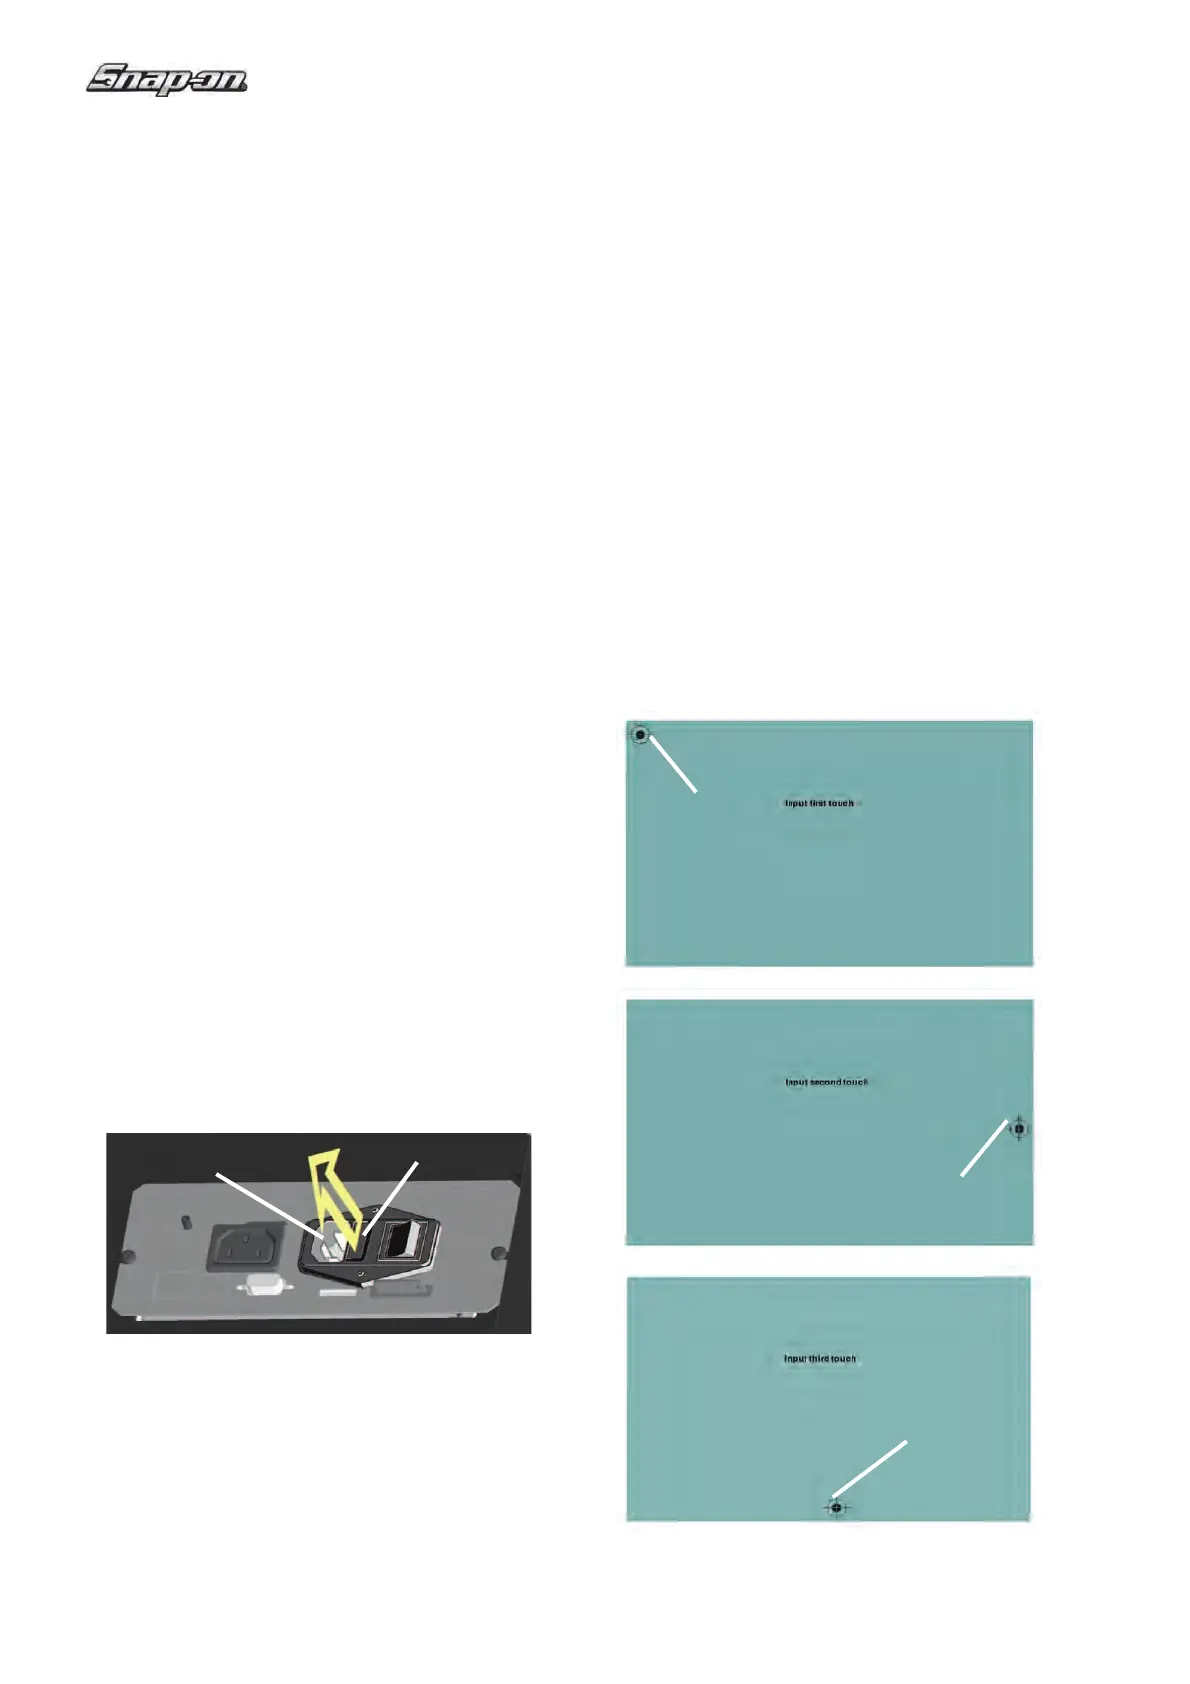
6.4 Changing the Main Fuse
Refer to Figure 6-7.
• Switch of
f the unit.
• Unplug the power cable from the power outlet.
• Remove the power cable from the machine main
socket (1, Fig. 6-7).
• Pull out the fuse holder (2, Fig. 6-7).
• Replace the damaged fuse with another fuse that
has an identical rating.
• Return the unit to its original functioning state, by
following the steps above in reverse.
6.5 Monitor Calibrating
Follow the ! gures 6.8
(1, 2, 3).
Keeping the STOP key pressed for more than 3
seconds in the Introduction screen the calibration
process starts. The process is performed in 3 stages.
The operator must touch in three different times the
white dot with the cross indicator shown on the screen.
First stage;
• Touch the top left dot (A).
Second stage;
• Touch the middle right dot (B).
Third stage;
• Touch the centre bottom dot (C).
At the end of the calibration process, the machine
restarts automatically.
The Touch Screen is now operational.
 Loading...