Lift the Synergy Unit from the sides, or hold it at the top and bottom of the unit
to lift into place.
Align the two indentations in the enclosure with the two triangular mounting
tabs of the bracket, and lower the unit until it rests on the bracket evenly (see
Figure 18
).
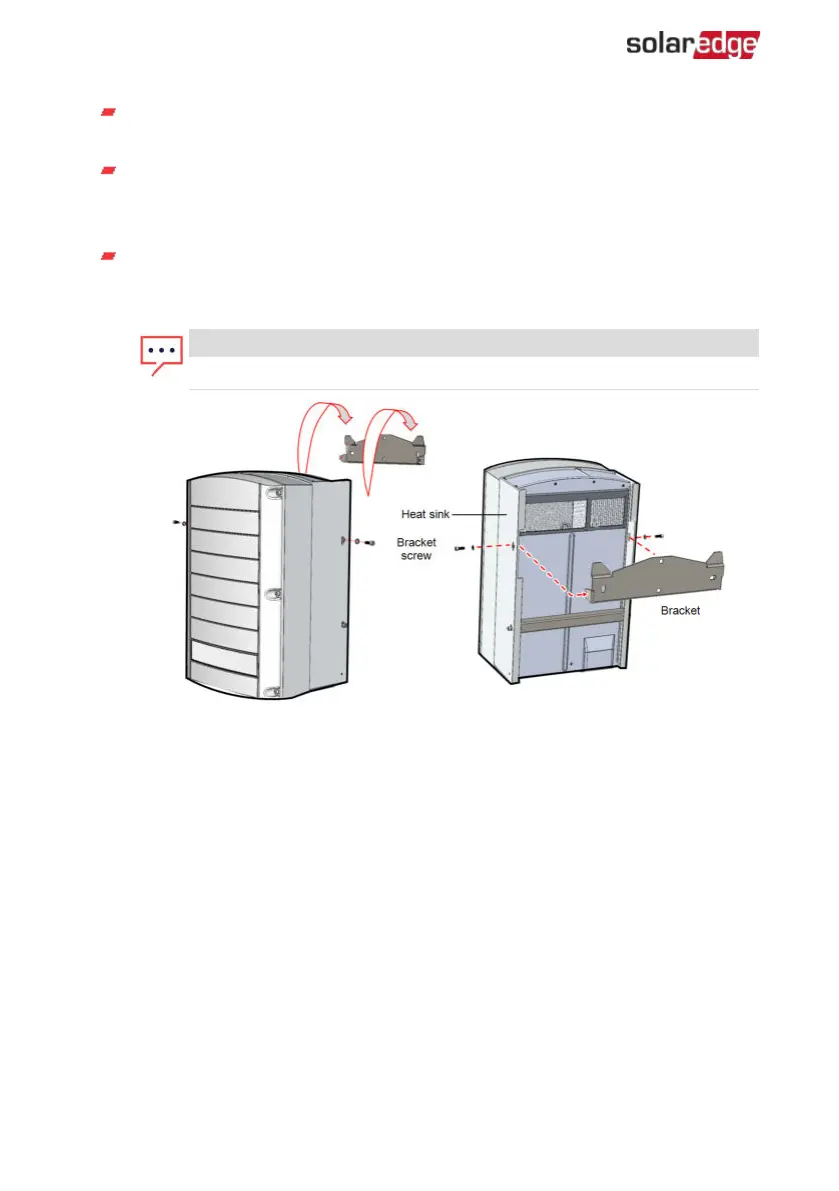
For the right or left Synergy Units, insert only one screw through the outer
(exposed) side of the unit and into the bracket. Tighten the screws to a torque of
2.9 lb.*ft (see
Figure 17
).
NOTE
For the center Synergy Unit, use both side screws.
Figure 17: Hanging the Synergy Unit
8.
Hang the Synergy Manager:
a. Lift the Synergy Manager from its sides.
b. Align the two indentations in the enclosure with the two triangular mounting
tabs of the bracket, and lower the unit until it rests on the bracket evenly (see
Figure 18
).
c. Insert the supplied bracket screw through the right side of the heat sink and into
the bracket.
Three Phase Inverters with Synergy Technology PN: SExxK-xxxxIxxxx
45 Mounting and Connecting the Synergy Manager and Synergy Units
 Loading...